Monday, March 25, 2024

To Everything There Is A Season.....


Hi, all!

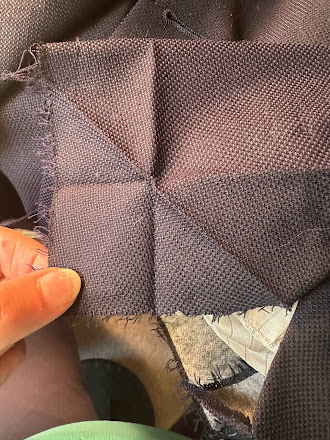
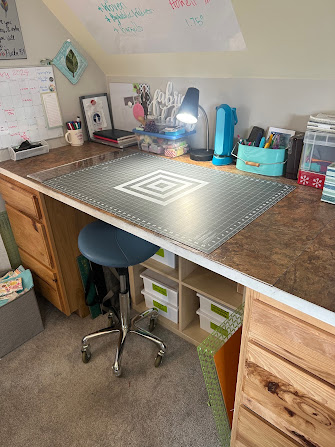
To everything there is a season.  Profound words that are really resonating with me right now.  Changes are coming for us as my husband prepares to retire at the end of May, and life is full right now.  It's full of good things, but the preparation required to make the retirement process run smoothly is taking up much of my time now.  

As I look at the things I "want" to do and the things I "have" to do, I'm finding that blogging is ending up in the category of "things I have to do".  That means that my quilting time is taken up what I need for blog content, and some quilt-y things that I've wanted to do for years are still waiting to be done.  

I've been blogging for about thirteen and a half years now, and this is the first time it's felt like a chore.  And that makes me sad - but it also makes me want to do something different.  To rest from blogging for a while.  To see if I get the urge to blog once again. 

So I'm taking a break.  I don't know if it will be permanent or just for a season, but I do know that if/when I come back, I'll have lots and lots to talk about!  

Thanks to those of you who have checked in to see if I'm ok, and to those of you who may have missed the blog over the past few weeks.  I'm sorry if anyone is disappointed, but I'm also relying on your kindness as quilters to understand.  You'll still be able to find me on Instagram, (I'm @fabricaddictquilts) and I hope to become more consistent about posting there as I work on some fun things that have been gathering dust in my studio.  And you can always email me at salliesue57 (at) gmail (dot) com!  

I'll miss you all!  Thanks for all your support over the years.  Keep making quilts for others - it's good for your heart!

Hugs!

Sarah


Friday, March 8, 2024

Can I Get A Whoop Whoop? An Unusual Week....


Hi, all!

Well, Friday has finally arrived at the end of what seems like a very long week, and we all know what that means - it's time for us to get our whoop whoop on!  Are you ready?  Let's go!

*&*&*&*&*&*&*

Tuesday of this week was primary election day in Tennessee, and I was fortunate enough to get to work the polls for the day!  It's a lot of fun, but really hard work, starting at 5:45 am and running through about 8:30 pm by the time things are all packed up and delivered where necessary.  So Monday is my usual day for housekeeping tasks like paying bills, laundry and grocery shopping, and Tuesday I was at the polling place all day.  

But Wednesday - Wednesday was the day I had to finally bite the bullet and take up a special task.  On the previous Sunday, my husband asked me if I could take up the sleeves on his sports coat.  Of course, I said, "Oh no, let's take it to the alterations shop" because I'm a quilter! But it turns out he wanted it for this coming Sunday, and no alterations shop would do it that quickly.  

Let me say here that while I used to make all my clothes (way back when), and have even made a man's suit (NEVER AGAIN!), altering the sleeves of a sports coat is something I've never done before, and I will admit to being quite intimidated.  I watched YouTube videos and looked at WikiHow pages, then finally bit the bullet and jumped in.


The first order of the day, after taking off the buttons, was removing these fake buttonholes.  Did you know that if you find just the right thread on the back and tug on it, they will pull right out in a chain reaction?  I found that out after I picked out the first one the hard way.


Then I opened up the stitching between the lining and the outside fabric of the jacket.  Ugh!  It looks really complicated in there, but it's too late to stop now!


Am I the only person here that takes lots and lots of pictures when doing something new, so I can remember how to put it back together later?  I have about ten pics and a couple of videos on my phone that helped get me through this.

At one point in the process, my husband, who had been providing me with the YouTube links, said, "This seems to have been much more of a process than I thought it would be!"  At least now he knows why I was so hesitant to do it myself!


But here's the finished product - beautifully shortened sleeves with buttons!  No buttonholes - there's no way you could make me do that! But it still looks good on the outside....


...and on the inside!  And when my husband tried it on, both sleeves were the same length AND the right length, so win/win!!

He actually had the bravery to show me how it looked, then say, "You know, I've got a suit and another sports coat with sleeves that need shortening..." but when he saw the look on my face, he backed up and decided to take that up in a few days!

So - - - can I get a whoop whoop?

*&*&*&*&*&*&*

And now it's your turn!

What's making you whoop it up this week?


What's got you doing a little happy dance?

Share!  We want to dance right along with you,

And it's always more fun to dance with friends!

The party will stay open until Sunday midnight.

Hope to see you there!

Hugs!

Sarah

Sunday, March 3, 2024

Fat Quarter Frenzy Is Woven Today!


Hi, all!

We are back this week with another Fat Quarter Frenzy quilt tutorial!  We've been discovering new ways to utilize fat quarters in quilts, and if you're like me and have way too many, a way to use up some of the stash!  So far, we've used 48 fat quarters (!) - 16 in Meet Me in St. Louis, 14 in Kaleidoscope, and most recently 18 in a new version of Supernova.  But I'm still overflowing with fat quarters, so today we will be exploring a new tutorial, this time for a quilt I call Woven.  Let's go!

*&*&*&*&*&*&*


Woven

A Fat Quarter Friendly Quilt


FABRIC REQUIREMENTS:


Fat Quarters (FQ) in three different contrasting color groups

Color A - 7

Color B - 5

Color C - 4


CUTTING:


From Color A FQs, cut:


26 4.5” x 12.5”

30 4.5” x 4.5”


To achieve this, and assuming your FQ have 17” x 20” of useable fabric, cut your first six FQ in this manner:


This will give you 24 long strips and 24 squares.


Take your remaining FQ and cut in this manner:


This will give you your remaining 2 long strips and 6 squares.


From Color B FQs, cut:


13 4.5” x 12.5”

30 4.5” x 4.5”


To achieve this, cut the first 3 FQ in this manner:


This will give you 12 long strips and 12 squares.


Take another FQ and cut four 4.5” x 17” strips.  From one strip, cut one 4.5” x 12.5” strip and one 4.5” square.  Cut the remaining strips into 9 squares.  This will give you one more long strip and 10 more squares, for a total of 13 long strips and 22 squares.

Take the final FQ and cut three more 4.5” strips, then crosscut into 8 4.5” squares, giving you a total of 13 long strips and 30 squares.


From Color C FQs, cut:


48 4.5” s 4.5”


To achieve this, cut four 4.5” x 17” strips from each of the four FQ, then cross cut them into 12 4.5” squares for a total of 48 4.5” squares.


ASSEMBLY


This quilt is made up of three separate blocks, shown as follows:


Block 1:  Make 13


Block 2:  Make 6


Block 3:  Make 6


LAYOUT:


While it may look complicated to lay out, it’s really quite simple.  First of all, take Block 1 and lay it out in a checkerboard design, with 3 blocks in the 1st, 3rd and 5th rows with the stripes running horizontally, and 2 blocks in the 2nd and 4th rows with the stripes running vertically.


Take Block 2 and place them between the horizontal stripe blocks in rows 1, 3, and 5. 


Now take Block 3 and place them between the vertical stripe blocks in rows 2 and 4.


Assemble and quilt as desired!


*&*&*&*&*&*&*


I hope you enjoy this quilt pattern, and that it helps you use up some random fat quarters in your stash!  See you next Sunday with another Fat Quarter Frenzy quilt!


Hugs!


Sarah

Friday, March 1, 2024

Can I Get A Whoop Whoop?


Hi, all!

What do you know - - - it's Friday again!  And we all know what that means - it's time for us to all get our whoop whoop on.  Are you ready?  Let's go!

*&*&*&*&*&*&*

It's been a busy week around my studio this week, and my quilt math brain has been stretched to its limit - but I have a finished t-shirt quilt top to show off!


It's been a while since I made one of these, and because I made some adjustments to block sizes as I went to fill in empty spots, I ended up needing to do some quilt math at the end to make sure everything fit.  Hopefully the second one this season will go a little easier now that I remember all the little tricks!  Quilting will come sometime next week, as I've got a busy weekend coming up.


Once I finished the top, I decided to take a little break and clean off my cutting table.  It feels so nice to have at least one little corner that is calm and peaceful and neat!


Then I decided to play around with an idea I had at church last week - a jelly roll quilt made with ombre fabric.  I had this piece of ombre, about a yard and a half, sitting in my stash, so I ironed it well and cut it into 1.75" width of fabric strips - the widest I could cut the strips and get 42.  I sewed them together, matching the yellow ends and the blue ends, then proceeded with a typical jelly roll quilt, and here's what I ended up with!  Isn't it pretty?


My friend Piper at church is working on the same thing, with a more traditional light-to-dark-to-light ombre, and I'm interested to see what hers ends up looking like!


And here's my final whoop whoop for the week - my daughter (the one on the left) celebrated her tenth birthday this week!  It's always so much fun when it's a leap year and we get to celebrate her "real"  birthday.  Her party will be on Saturday, because Lilli is away at DECA State Competition this week, but we went out to dinner with them Thursday and had a great time.  Where do the years go?

So - - - can I get a whoop whoop?

*&*&*&*&*&*&*

And now it's your turn!

What's got you whooping it up this week?


What's making you do a little happy dance?

Share! We want to dance right along with you,

And it's always more fun to dance with friends!

The party will stay open until Sunday midnight.  

Hope to see you there!

Hugs!

Sarah

Friday, February 23, 2024

Can I Get A Whoop Whoop? Lots of Finishing Going On....


Hi, all!

Here we are, another week gone and Friday is here!  And we all know what that means - it's time for us to get our whoop whoop on!  Are you ready?  Let's go!

*&*&*&*&*&*&*

It's been a busy week of finishes around my studio this week - I had a customer quilting job, plus a wedding gift quilt to make and a t-shirt quilt to begin working on.  Whew!  A lot on my plate, but I'm happy to say things went well.  First thing was taking care of the customer quilt, and although I don't have pictures of it, it is quilted, binding on, and washed and dried, waiting for my customer to pick it up tomorrow.  She made herself a beautiful winter-themed quilt, and I wanted to get it back to her as quickly as possible so she can enjoy it for a while!

Then I got to work on the wedding quilt.  The shower is next weekend, so I really had to get hopping!  I found a kit that had been in my stash since 2015 (oh the shame!) and whipped out this pretty top....

Didn't that turn out nice?  The fabric is Good Neighbor by Amanda Nyberg of Crazy Mom Quilts.  I bought this quilt on a fabulous sale years ago and then avoided making it because of the flying geese - but the technique it used to make them was so simple and quick, I don't know why I ever feared making them!  

Once the top was finished, I went to my stash to see if I had a piece that would work for the back.  I thought I was going to have to go shopping (oh the horror!) but then I spotted a bolt of fabric my friend Piper picked up for me when she was shopping for fabric for the quilt ministry.  She was worried that the fabric wouldn't be appropriate for the ministry - it has girls in bathing suits on beach blankets on it - but I loved the colors and told her I would take it.  Well, I took one look at it, and another one at the quilt, and knew I had found my back!

Wednesday morning, this quilt went on the frame, and about an hour later, it was ready for binding!  A little trimming, a little sewing. and voila!  It's finished!


See what I mean about that backing fabric?  It is so perfect it could have been printed with he same dyes.  Every color in the fabric on the front is present in the backing fabric!  And the recipient loves the beach, so win/win!!

Thursday saw some real progress on the t-shirt blocks.  I had done a few of the trickier blocks previously....


...but Thursday I got to work on the "easy" blocks - the ones that just have to be carefully measured, backed and trimmed.  I got a bunch of them ready to go, but there's still a lot to do!  You can see my clips on each one in this picture, with it's number so I can lay it out in the proper spot when I get ready to assemble this puzzle style quilt.


So lots of finishes this week, and a good start on the next big project!  But the very biggest whoop whoop came Thursday afternoon, when I opened up my email and found a message from someone who wants to donate her long arm machine to our quilt ministry!  God is good, and we are excited to be able to make even more quilts - but it's going to be exciting times making space for our new girl!

So - - - can I get a whoop whoop?

*&*&*&*&*&*&*

And now it's your turn!

What's got you whooping it up this week?


What's making you do a little happy dance?

Share!  We want to dance right along with you,

And it's always more fun to dance with friends!

The party will stay open until Sunday midnight.

Hope to see you there!

Hugs!

Sarah

Monday, February 19, 2024

Make-A-List Monday - Because I Really Need a List!


Hi, all!

Well, it's been a while since I posted on a Monday, but that doesn't mean I haven't been working, just that I'm a lazy blogger!  But this week I feel the need to organize my mind and commit publicly, so here I am.

I'm pleased to say that I put in some time with a new skill today - I finally tried four-at-a-time flying geese, and I can't believe I've ignored this fabulous technique for all these years!  I finished these pretty blocks....


...and one of my goals for this week is to finish this quilt, which will be a wedding gift and hence has a time deadline!


I'm also working on another t-shirt quilt for a 2024 graduate, and these are a couple of the blocks I've already got up on the design wall.  I usually try to make the "tough" blocks - the ones that take more thought and effort to create - first, so the rest of the quilt is downhill after that.  But I've still got a lot of blocks to create, and this one is next on my list after the wedding gift.

So those are my goals for this week - finish the wedding quilt, and put in some serious time on the first t-shirt quilt of the season.  

And now I really need to know - - - what are YOU working on this week?

Hugs!

Sarah

Sunday, February 18, 2024

Fat Quarter Frenzy Rediscovers Supernova!


Hi, all!

I. Am. Late.  So sorry!  And I will totally blame this on the state of my studio - it's a flipping mess, with about twelve quilt tops waiting to be quilted, a customer quilt just off the frame, a t-shirt quilt in progress, and now a new quilt started for a wedding shower gift.  My brain feels like my studio looks, and I just completely forgot what day it was yesterday when I should have been writing this post.

That being said, welcome back to Fat Quarter Frenzy, where we are exploring simple quilt designs made from fat quarters.  If you're like me, you've got a lot of fat quarters sitting around, and hopefully this will help you find a good quilt-y home for some of them!  So far I've used 30 fat quarters, 16 with Meet Me In St. Louis, and another 14 with Kaleidoscope.  

Today we're going to re-visit one of the most popular tutorials on my blog, Supernova.  I first posted this in 2017, as part of the Stunning Stars series, and it's been requested as a PDF hundreds (thousands?) of times since then.  But I'm always up for a new interpretation of this quilt, so here it is in mixed prints!

*&*&*&*&*&*&*


Land, Sea and Sky

A Fat Quarter Friendly Quilt


This is a very simple one-block quilt; its secret lies in the layout.

Finished size:  approximately 60” x 60”


Materials:


18 Fat Quarters - 9 each in two different color groups

For the purposes of this tutorial, choose one that you will 

        designate as the “background” fabric.  Dark fabrics tend 

        to pop, so you may find that the lighter of your two 

        fabrics works best as background.


CUTTING DIRECTIONS:


From each fat quarter, cut six 7” squares.  Once finished, you should have 54 each in two different color groups.  


Choose four foreground squares in the same print that will become your focal star.


MAKING THE BLOCKS:


Take the squares you have designated as background squares and draw a line from one corner diagonally across the square on the back of the fabric. This can be done with pencil, chalk, or my personal favorite, Hera marker, which just leaves a visible crease on the fabric.


Pair one background square with one foreground square, right sides together.


Stitch a scant 1/4” from each side of the diagonal line you drew on the background square.  Cut on the diagonal line.  Press seam to one side (it doesn’t matter which side, just be consistent.)   You will have 54 sets of two matching half square triangles (HSTs).  Trim your HSTs to 6.5” square.  Don’t skip this step - it will make your quilt go together faster and look better!


 I love using a Bloc-Loc ruler for this step - it makes everything go fast and easy.  However, if you don’t have one, a regular square ruler with a diagonal line will work!  And just look at how pretty all those trimmings are!


Locate your eight focal star HSTs to start your layout.


LAYOUT:


Use this diagram to lay out your blocks.  Start with the focal point star in the lower left quadrant, (the shadowed area) and work out from the star.  (The shadowed area and the dark lines are to help you see how the blocks lay.)  Step back often and check to see that your diamonds are going the right direction!  Fill in the gaps at the upper right and lower left edges with half diamonds, splitting up some of your pairs for the purpose.  


TIP:  If you have a design wall, or use a “design floor”, take a photo of your layout (before assembly) and look at it on your phone.  The distance this provides you visually makes it easier to see errors and places where you may wish to switch some blocks.  It usually takes four or five photos before I’m happy with the layout.  


Assemble the quilt top.  Quilt as desired!

*&*&*&*&*&*&* 

And that's it for today's tutorial!  I'm another 18 fat quarters down in my stash after making this quilt, and it's barely made a dent!  But I'm having fun and finding all kinds of inspiration for making more quilts and diminishing that stash.  See you next week!

Hugs!

Sarah

Sunday, February 11, 2024

Fat Quarter Frenzy Is Back, With Kaleidoscope!


Hi, all!

Time snuck up on me this week, and I almost forgot to write this week's Fat Quarter Frenzy post, but here I am!  If this is your first time stopping by, we've just started a series of tutorials for simple, quick quilts that can be made with fat quarters.  Last week we made a St. Louis 16-patch that used up sixteen fat quarters from my rather voluminous stash of them.  This week, we're moving from square to triangles as we create a beautiful top that reminds me of a kaleidoscope image.  Let's go!

*&*&*&*&*&*&*&*

Kaleidoscope

A Fat Quarter Frenzy Quilt


Materials:


14 Fat Quarters (FQ) measuring a minimum of 17” x 20” after squaring up.  

There should be a wide range of colors in your FQs to achieve a good effect.


Cutting:


From each squared up FQ, cut 7 strips 3” wide x 17”.  When finished, you should have 98 strips.


Assembly:


Sort the strips into 32 sets of three contrasting strips.  (You will have two left over)


Sew the strip sets together, always starting your seams from the same end of the set.


Once all your strip sets are sewn together, press the seams.  (I chose to press mine open so that they would be easier to match)


More Cutting:


Now you will crosscut your strip sets into two blocks.  Measure your strip sets and see how wide they are.  Mine were 8.25” wide, so I cut my blocks 8.25” square.  After cutting your strip sets, you will have 64 strip blocks.


Now pair up the blocks that will be in each large block.  You will need two sets of two identical strip blocks for each  block. (16 sets total) 


Choose one of the sets you just prepared, and take the first identical set of strip blocks and lay them on your cutting mat with the stripes going horizontally.  (BE SURE the blocks are laid with the same color at the top!)  Cut these two on the diagonal from upper left to lower right.


Take the second identical set of strip blocks and lay them on your cutting mat with the stripes going horizontally.  (BE SURE the blocks are laid with the same color at the top!) Cut these two on the diagonal from upper right to lower left.  Keep all of these triangle sets (2 sets of four triangles) together to be assembled into one large block.


Repeat for all 16 block sets.


Back to Sewing:


I chose to use two different block designs in my quilt, because I liked the secondary patterns it created.  If you prefer, you can assemble all of your blocks using just one or the other of the designs.


 For each of the two blocks, you will assemble the same basic component block.  Do this by taking one triangle of each color set and sewing them together along the long diagonal, matching the seams.  Take care not to stretch this seam as you sew - it is cut on the bias.  Press the seam open.


Repeat until all 64 component blocks are assembled.  You should have two sets of two identical component blocks for each large block.


 Square up those blocks so that they are all the same size, using a ruler that allows you to place a diagonal line along the diagonal seam of the block.  You may not trim off much, but believe me, but will make your quilt look much nicer in the end!


Now on to assembly of the blocks.


 Block #1:


Block #1 reminds me of the old TV test patterns!  It’s easy to assemble.  Take two sets of two identical blocks and place two identical blocks in the upper right and lower left corners, with the small triangles in the center.  Take the other two and place them in the upper left and lower right corners, with the small triangles in the center.  Assemble, pressing the seams open.  


If you are making the quilt as shown, make 8 of these blocks.  If you are using only this block, make 16.


Block #2:       


To assemble this block, lay your component blocks in a pinwheel formation, with the same color strips on the outside of the block.  Having all the same colored sides in the center is what creates the hooked pinwheel.  This block is a good one for the guideline “Look Twice, Sew Once”.  Be sure it is properly laid out before you sew it, and you will save yourself a good bit of time with our little friend Jack (the Ripper)!


If you are making the quilt as shown, make 8 of these blocks.  If you are using only this block, make 16.


 Once you have completed all sixteen blocks, arrange them in your preferred layout.  I laid mine out in a checkerboard pattern alternating Block #1 and Block #2 to achieve the secondary pattern shown.


Assemble your quilt top, and quilt as desired!


*&*&*&*&*&*&*

Now, I know some of you are looking at this design and thinking that it's a lot of seam matching - but while I agree there are a lot of seams to match, I didn't have any trouble achieving neat intersections.  I don't know if that's because I pressed my seams open, but being able to pin through the seams (over the threads) seemed to help make them match neatly.  And don't skip the squaring-up step - it's the most important part of making a half-square triangle quilt, and I guarantee you will be happier with your finished quilt if you do!

See you next week with another simple quilt!

Hugs!

Sarah