Showing posts with label binding scraps. Show all posts

Friday, September 23, 2022

Can I Get a Whoop Whoop? I'm Back!!


Hi, all!

It's Friday, and we all know what that means - it's time for us to get our whoop whoop on!!  After a much longer than anticipated hiatus, I am back - and I am whooping about it!  I've also got a few things I've been working on during the hiatus to share.  I hope you've got something wonderful to whoop about this week, too, so let's get started!!

*&*&*&*&*&*&*

First of all, thanks to all of you who have checked in on me over the past months, or who have sent good thoughts and prayers my way.  It's all been much appreciated, even if it was unacknowledged at the time. Life seems to be returning to normal, for which I am VERY grateful!!

Here's a project I started way back in January that is finally coming close to being completed...


This top started out as a bunch of leftover binding strips!  I sewed them together jelly roll race style, then cut the resulting top into long strips made up of short pieces.  Then I re-sewed those strips together to end up with what is shown above.


Isn't that pretty?  It's still not quite large enough, so I went to church this week and dug through the stash for a good border...


... and I think this will do!  Hopefully I will get this border on this week and then this quilt will be ready for quilting and gifting to someone in need!

I also worked on a hand project over the past few months.  


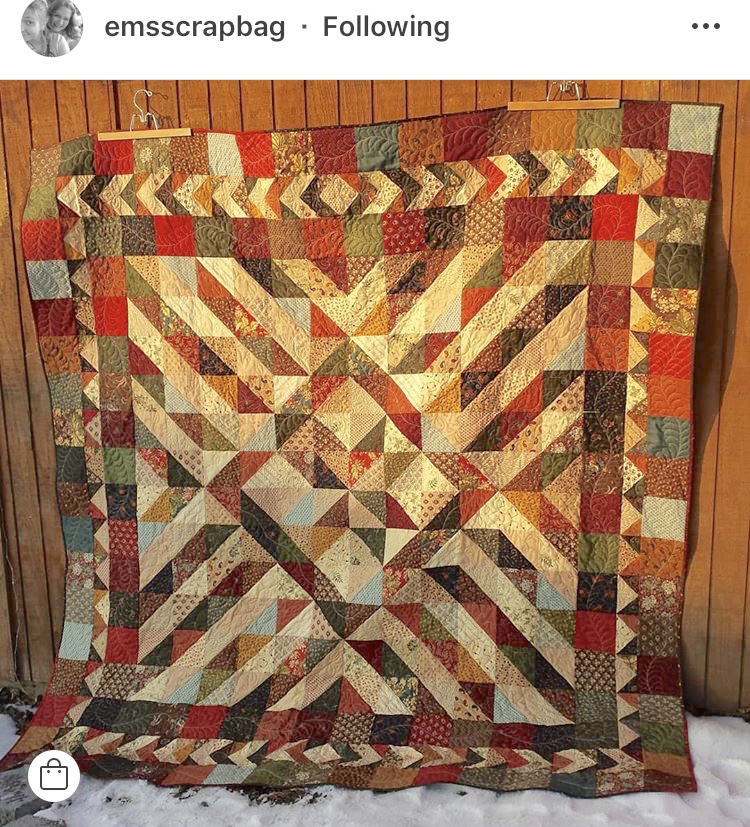
Made completely by hand, from 2.5" squares cut from my scrap stash, I despaired of this ever reaching quilt size.  But as I kept working on it, I realized I was having fun (and getting pretty good at it!) and now it looks like this!


I'm still working on filling in the top angle (that was an "oops" because what I thought would fill in and make a straight, 90 degree corner actually made a way out of whack angle) and I will then finish off the two bottom corners to give me a nice rectangular quilt.  We will be driving on vacation this next week, so I'll have lots of car time to work on that stitching - maybe (just maybe) it will be finished in a couple of weeks!

And last but certainly not least, let me show you a picture of my constant companion of the past few months.  Bree has grown up from a tiny puppy to a lovely, not quite mature one year old. She realizes that I feel better now, and so she has reverted to some of her puppy ways.  One of those "ways" is stealing fabric scraps in my studio!


I guess it's appropriate for a fabric addict's dog to also be addicted to fabric!  So I share with her and hope she doesn't steal anything too precious...

So - - - can I get a whoop whoop?

*&*&*&*&*&*&*

And now it's your turn!

What's making you whoop it up this week?


What's making you do a little happy dance?

Share!  We want to dance right along with you,

And it's always more fun to dance with friends!

The party will stay open until Sunday midnight.

Hope to see you there!

Hugs!

Sarah


Wednesday, April 3, 2019

I May Have A Scrap Problem... Goodbye March, Hello April!

Hi, all!

Wow!  How fast is this year flying by, right?  It's hard to believe, but it's already April.  It's been a good year so far, and I do believe that I've come to love scrap sewing!  

At the end of February, I decided that for my March scrappy goals I wanted to quilt my Long Time Gone quilt and finish the top of my Gypsy Wife quilt.  And I'm happy to say that I met both of those goals!  Here's my Long Time Gone...


...as it hung on the line drying!  It has a wool batt, my first experience with that but definitely not my last - but that means it can't go in the dryer.  You can see lots more detailed photos that show the quilting and gorgeous texture in this post.

And not only did I get my Gypsy Wife quilt top finished, I got it quilted too!


I'll be posting LOTS more pictures of this one on Friday!  But it's done and I love it...

And as if that wasn't enough, I did some other scrappy sewing in March, too!


I made a kid-sized version of the On-Line quilt, using all solids.  It came out so cute!  This one will be going to Jack's Basket.


I made a second version of the On-Line quilt early in the month when I needed a "brainless" sewing project, and pulled it out of the to-be-quilted pile and put it on the frame!


This quilt also jumped out of the to-be-quilted pile - it's been there a while!  It's made with solid binding scraps, with some black and white bindings thrown into the mix.  I separated them all with a cute rainbow print just to spice it up.   The original intention was to "slice and dice" it and re-assemble it, but I decided finished was better than good intentions!  This quilt will be going to another of the Hands2Help charities.


And just because scrappy sewing is more fun with friends, I got my quilt ministry buddies in on the mindless sewing!  This was one morning's accomplishment, and I think we now have enough for four or five twin size quilts!  

So I think it's safe to say March was a very good and productive month! I still have tons of scraps, but at least now I have something to show for it.  

Then I dug out the Scrap Attack box and pulled out a goal for April...


Now, those templates aren't new any more - I got them over a year ago - but they ARE still unused.  And it's been so long, I couldn't find the original inspiration shot that made me get them, but this is similar...


The arcs aren't pieced, they are one piece.  I love this look!  So I'm going to give it a whirl this month.  We'll see how it goes!

Now I'd love to know what wonderful scrappiness you did in March, and what you plan for April!  Link up below and let's cheer each other on!

Hugs!

Sarah

Wednesday, December 5, 2018

I May Have A Scrap Problem.... A Scrappy Finish - Finally!!

Hi, all!

Can you believe it - - -I finally have a scrappy finish!!!  I woke up this morning, realized I'd need to write a scrappy post for Wednesday, and decided to throw the bunkbed quilt top on the frame.


And voila!  It's finished!  I made this quilt using a mad conglomeration of 10" squares that I cut from my scraps earlier this year.  I also used up a small bit of leftover white Kona cotton for the triangle corners.


I also cleared out more scraps by making a scrappy binding!  I always feel so virtuous when I sew all those little leftover bits together to make new binding...


Take a look at this great backing!  I found this flannel flat twin sheet in my stash and realized it was "just right" for this quilt!

And if a scrappy finish isn't enough for this week, here's some beautiful inspiration I spotted out and about...


Anja really inspired me with this piece she made using bonus HSTs.  Isn't it pretty?  Her advice - don't sweat the layout too much!


 And Emily knocked it out of the park again this week with TWO beautiful scrap quilts!  I want to be her when I grow up....


Isn't that a beautiful layout for HSTs?  I don't think I've seen one quite like that before - the star in the center is subtle but so pretty!!

I hope you've had some time to play with your scraps - I know it's hard to make time for yourself at this time of the year, but remember, your scraps are always willing to come out and play!

Hugs!

Sarah

Wednesday, October 31, 2018

I May Have a Scrap Problem - Good Results!

Hi, all!

Wow, October just flew by in a flash, didn't it?  I love fall - cooler weather, my birthday, and the upcoming holidays - but it does seem like the fall months go by so much faster than summer!  It was a good month, though - I got a lot accomplished and I hope you did too.  

First up was Nathanael's annual quilt.  He loves green, so I dug in my green scraps and found lots of 2.5" squares, which turned into 16-patch blocks.


Then I made a bunch of X-blocks...


Pairing up the two sets of blocks, it grew on the design wall...


...and then the center of the quilt was finished!  But it still needed a white border to hold the finishing points...


And then it was done!  It's big - a twin size - so it's hard to get a good picture of it, especially when it's windy (which it has been here, a lot!) so I probably won't have anything better until it's quilted.  But isn't it pretty and green?


And, as an added bonus, I have this pretty jar full of green and white bonus HSTs to make something out of later!


And then, I started on a quilt for the bunk bed in the guest room.  Original plan was to do an hourglass quilt, but then this happened...


My binding box was running over - so it was time to pull out some of the strips...


...and sew them together into a jelly-roll race style quilt!


This still isn't big enough for the bunk bed, but I think I'm going to cut it into rectangular chunks and sash it with a black and white sketchy print I have on hand to bring it up to size.  Stay tuned for more of that next month!

So all in all, I had a pretty productive scrappy October!  In November I will work on finishing the quilt for the bunk bed, and deal with all the scraps that I created in September and October - because they are piling up on my sewing table and driving me NUTS!!!


What have you been working on in October, and what do you plan for November?  November is such a great month to make little scrappy gifts, decorations and ornaments for the holidays - and if you're making anything like that, I want to know about them!  Share in the linky party below to give us all some great ideas!

Hugs!

Sarah

Wednesday, May 23, 2018

I May Have a Scrap Problem... Leftover Binding!

Hi, all!

I definitely have a scrap problem this week - my scrap bucket is starting to overflow, but no time to deal with it as I work hard on the end of Hands2Help!  But I did do a little clean-up today putting away binding scraps, so I thought I'd share my process with you!


I started with some leftover binding, and added my tools - something to measure with, post-it notes, a pencil, and some short straight pins!


Step one:  measure that binding scrap!  (Duh!)  This isn't rocket science, you just want a general length.  I usually round down from any partial inches.


Take your pencil and write the measurement on your post-it note.  If you use different widths of binding, this would be a good place to note the width, too.


Then I wrap the binding around my fingers to get it all neat and tidy.  If it's a really long piece, I'll use three fingers instead of four so all the little bundles are about the same size.  


Pin that post-it note to your nice neat bundle and you're all set!


Here's a picture of the tub I use to store my binding scraps in.  You can see the print bindings toward the bottom of the picture, and the solid bindings toward the top.  My pins and post-it notes live in here, too!


In the center is a zip loc bag that holds all of my bias binding scraps.  I don't do bias binding very often - usually only when I have an oddly shaped piece to bind (curves, hexies, etc.) and I always end up making too much - so I save it for later projects.


And at one end of the box I keep the instructions for making continuous bias binding - because I got tired of trying to track it down every time I needed it!  

So that's how I save my binding scraps - and here's why!  First of all, binding scraps are PERFECT for binding scrappy quilts.  (Duh!) And with the pieces already measured, it's easy to pull out enough for your whole quilt and not come up short.

Second, when your binding scrap box starts overflowing, you can turn them into fabulous quilts...


....limited only by your imagination!  So don't waste those binding scraps - use them!

And don't think that I haven't been working on my scrap projects at all - I did manage to get the arcs attached to the denim quilt, and trimmed the edges so it's ready for quilting!


So what have you been doing with your scraps this week?

Hugs!

Sarah

Sunday, January 28, 2018

Scrumptious Scraps Quilt-Along - Making The Most of Binding Scraps!

Hi, all!

Is there anything with more potential than a big pile of fabric scraps?  Most of us have them - some of us have way too many - and all those scraps are like free fabric.  They are left over from other projects and crying out to be used - and this year's quilt-along will give you six great ways to use them!  


As you may know from past years, I've been hosting a "quilt-along" in the six weeks before the Hands2Help Charity Quilt Challenge.  Now I call it a quilt-along, but it's not really that - for six weeks, I'll share six quilts that follow a theme.  In 2015, it was Sweet Sixteen (all sixteen-patch quilts), in 2016 it was Nifty Nines (all nine-patch quilts), in 2017 it was Stunning Stars (all star quilts).  Each of those posts had a tutorial so you could make the quilt if you wanted to.  All the quilts are designed to be simple enough to be made quickly and used for charity quilts - perfect if you want to participate in the Hands2Help Charity Quilt Challenge that follows.  

This year, the theme is Scrumptious Scraps - six great quilts designed to use up those fabulous scraps we all have sitting around!    So let's get started with our first Scrumptious Scraps quilt - designed to use up your overflowing binding scraps!


A long time ago, I decided that if I was going to use my binding scraps, I should stop just throwing them in a tub all higgledy-piggledy and get them organized.  The picture above shows what my binding box looks like today.  All the pieces are measured, then wound up and pinned with a post-it note stating the length of the piece.


This way, when I want to make a scrappy binding, it's easy to pull out just enough pieces to make the length I need!  But even using those binding scraps, sometimes my tub starts to get over-stuffed and I know it's time to make a quilt.  Since I always use the same size binding (2.25" is my favorite size), I can sew those strips together to make a jelly roll quilt.  Here's one I made recently using all my solid binding pieces, and I added a red cornerstone between each binding scrap for a little extra punch.  


This quilt was made using a variation of the super-easy and ever-popular Jelly Roll Race pattern.  You can find a video tutorial showing the original Jelly Roll Race pattern here.  Once you've mastered the basics, it's easy to find ways to vary the pattern, and that's what I've done with today's Scrumptious Scraps quilt!


This quilt started with a basic Jelly Roll Race quilt top, made using my binding scraps.  I pulled out a bunch of print pieces from my tub, cutting anything longer than 40 inches in half or thirds (or more if it was really long) and pressing them flat.  Then I threw them in a big basket and mixed them all up.


Randomly drawing out pieces (just making sure I didn't repeat colors too close together) I put these together and created a jelly roll top using the basic method.  


Using this picture as my inspiration, I cross-cut my finished jelly roll quilt top into four 5.5" strips, two 10.5" strips, and one 15.5" strip.  Then I found a piece of fabric (mine was about a yard) to use as the horizontal sashing to separate the strips.  You can use a solid, but I found a near-solid Cotton + Steel print in my stash that I really liked.  I cut my strips 2.5" wide for the horizontal sashing, and also cut two pieces of the sashing fabric to put into each row of the jelly roll fabric.  


Now comes the fun part!  You can mix up the prints in your jelly roll strips so that they aren't right over each other by opening the seams to add in your sashing strips.  Feel free to flip the jelly roll pieces, or move them from their original positions (end to end) to vary to positions of the fabrics.  Stagger the vertical sashing strips in each row.  They serve to move the eye across the quilt and provide visual interest.

Assemble the quilt with two 5.5" jelly roll strips at the top, then a 10.5" strip, the 15.5" strip, then the second 10.5" strip and the two remaining 5.5" strips.  If you have enough of your sashing fabric left, it looks really good as the binding (as you can see in the inspiration piece) but as you can see in mine, I didn't have quite enough, so I had to find a coordinating fabric.


The "pickle" color of the sashing strips was hard to match, but I found just enough of it in this stripe to echo both the sashing strips and the jelly roll fabric!  Sometimes it pays to have a big stash!

Are you looking at your binding scraps a little differently now?  Or maybe you don't have a stash of binding scraps - there are still ways to make this quilt.  You can always use that jelly roll you've had stashed away forever - - - or you can pull out your stash and cut a 2.5" strip off each piece.  We've been doing that at church lately to create jelly roll kits and it's amazing how great those quilts look!  Scrappy always looks best when you don't think too much about how the fabrics work together - don't ask me why!


And now, how about a little fun?  I have WAY too many scraps in my stash, and I'm looking to share.  So - I'm going to give away a box of scraps!  If you're feeling a little scrap poor, or you want to supplement yours with some new scraps, leave a comment below and let me know.  I'll draw a name next Saturday and announce the winner in next Sunday's Scrumptious Scraps post!  Please be sure to leave your email address in your comment if we don't regularly correspond - I'd hate to be unable to send it to the winner because I couldn't contact you!  And if you want to comment but don't want any more scraps, just let me know in your comment and I'll exclude you from the drawing.

Hugs!

Sarah

PS - if you are interested in checking out the previous years' tutorials, you can find the links on the Tutorials page under my blog's header photo!