Hi, all!
You have got to go over and see Clare Bower's new stuffed crocodiles on her blog, Clare's Craftroom!! They are just too cute!! And if you leave a comment on her blog, she's giving away a copy of her new pattern to one lucky commenter....
I'm still plugging away on those quilts for my daughter's silent auction - four of them are finished and ready to go, and the last one is now a quilt sandwich, ready for quilting! Keep your fingers crossed that my sewing machine doesn't decide to take a vacation!! Check back for pictures of all the quilts on Friday.....
Later!
Sarah

Monday, May 31, 2010

Friday, May 28, 2010
Sew and Tell Friday - 2 Real Finishes, A Top, and a Tutorial!
Hi, all!!


Remember the Sunbonnet Sue blocks my friend gave me? Here's the top that I completed this week using them. Notice the cornerstones in the two borders? Well, I usually avoid cornerstones like the plague because I always have trouble making the blocks match up perfectly in the corner. But this quilt really needed those cornerstones. Then I flashed on a technique I saw in a recent quilting magazine of using partial seams....... So I did my cornerstones like this:
1. I cut the side border pieces at least 2 inches longer than I needed each piece to be, and cut four cornerstones.

2. I sewed one cornerstone to each border piece, ending up with four pieces, two in each size, consisting of a border and a cornerstone. Press the seams toward the cornerstone.

3. Choosing the proper size border piece for the side I wanted to start on (it really doesn't matter where you start with this technique), I matched the end of the border piece at the cornerstone to the corner of the quilt. Holding it in place, I pinned my first pin a couple of inches in, then pinned down the rest of the edge. You should have some leftover fabric at the end of your pinning. Starting at your first pin, sew the seam. This will leave the cornerstone "waving in the breeze", but you'll get back to it later.


4. Square off the edge of the quilt with the excess border. Press the seam toward the quilt.


5. Beginning where you just trimmed, pin the next strip, matching the cornerstone to the border you just sewed on and the quilt seam. Sew the seam all the way to the end. You should have some excess fabric at the end of this seam.

6. Repeat steps 4 and 5 until you have sewn on all four border strips. Square off the last strip, being very careful not to cut your quilt top or the first strip you sewed on.

7. Now, take the cornerstone that is "waving in the breeze" and attach it to the last strip you sewed on. Voila! You now should have four perfect cornerstones, and you didn't have to do any of that pesky exact measuring!!

NOTE: If you sew on two borders, both with cornerstones, you will have to adjust the direction you press your seams to accommodate matching the corners.
Here's the proof that the corners come out perfectly:


(This little "quilt" I made for the tutorial took twenty minutes, start to finish, including picking out the fabric to make it with and taking the pictures. See how easy? I think I'll finish it off now for my granddaughter's doll bed!)
Now, I know some of you more experienced quilters out there may have been doing your cornerstones like this for years - but when I googled cornerstones, I didn't find any similar instructions, so hopefully this will help someone else!!
Be sure to check out Amy's Sew and Tell Friday - I'm so grateful to have real finishes this week, and I should have two more next week! I can't wait to see what everyone else has been up to!!
Later!
Sarah
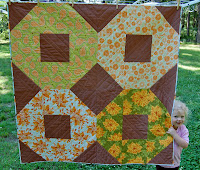
It has been a productive week at my house - finally!! The two Super-Size Shoo Fly quilts are completely finished - quilted, bound, and photographed!!


I really love the way these came out - but now I need your help! Both of these quilts are just crying out for names - but I'm terrible at naming things! Well, except for the snake in our backyard - his name is Severus Snake (for all you Harry Potter fans out there!)


But most of the time, the perfect name for something occurs to me long after I need it..... So I welcome your suggestions for each of these two quilts! Update: Thanks to everyone for their wonderful suggestions! The brown quilt is now called "Chocolate On My Mind" and the light quilt is "Summer Wreaths". Thanks so much and I'll have two more next Friday for naming!!


Remember the Sunbonnet Sue blocks my friend gave me? Here's the top that I completed this week using them. Notice the cornerstones in the two borders? Well, I usually avoid cornerstones like the plague because I always have trouble making the blocks match up perfectly in the corner. But this quilt really needed those cornerstones. Then I flashed on a technique I saw in a recent quilting magazine of using partial seams....... So I did my cornerstones like this:
1. I cut the side border pieces at least 2 inches longer than I needed each piece to be, and cut four cornerstones.

2. I sewed one cornerstone to each border piece, ending up with four pieces, two in each size, consisting of a border and a cornerstone. Press the seams toward the cornerstone.

3. Choosing the proper size border piece for the side I wanted to start on (it really doesn't matter where you start with this technique), I matched the end of the border piece at the cornerstone to the corner of the quilt. Holding it in place, I pinned my first pin a couple of inches in, then pinned down the rest of the edge. You should have some leftover fabric at the end of your pinning. Starting at your first pin, sew the seam. This will leave the cornerstone "waving in the breeze", but you'll get back to it later.


4. Square off the edge of the quilt with the excess border. Press the seam toward the quilt.


5. Beginning where you just trimmed, pin the next strip, matching the cornerstone to the border you just sewed on and the quilt seam. Sew the seam all the way to the end. You should have some excess fabric at the end of this seam.

6. Repeat steps 4 and 5 until you have sewn on all four border strips. Square off the last strip, being very careful not to cut your quilt top or the first strip you sewed on.

7. Now, take the cornerstone that is "waving in the breeze" and attach it to the last strip you sewed on. Voila! You now should have four perfect cornerstones, and you didn't have to do any of that pesky exact measuring!!

NOTE: If you sew on two borders, both with cornerstones, you will have to adjust the direction you press your seams to accommodate matching the corners.
Here's the proof that the corners come out perfectly:


(This little "quilt" I made for the tutorial took twenty minutes, start to finish, including picking out the fabric to make it with and taking the pictures. See how easy? I think I'll finish it off now for my granddaughter's doll bed!)
Now, I know some of you more experienced quilters out there may have been doing your cornerstones like this for years - but when I googled cornerstones, I didn't find any similar instructions, so hopefully this will help someone else!!
Be sure to check out Amy's Sew and Tell Friday - I'm so grateful to have real finishes this week, and I should have two more next week! I can't wait to see what everyone else has been up to!!
Later!
Sarah
Friday, May 21, 2010
My First Blogger's Quilt Festival Entry!!


As you can see in the picture of the backing, I outlined both butterflies with stitching then quilted up to the outline, creating a "ghost butterfly" on each side. I love the bright colors in this quilt, and sure wish I had remembered to take a picture of the bound quilt before I gave it to my daughter for safe-keeping! I used the bright blue print of the four-patch squares for the binding and it really makes the border look complete.

Subscribe to:
Posts (Atom)