Friday, April 17, 2015

Can I Get a Whoop Whoop? The Pennant Quilt is Finished!


Hi, all!

It's Friday again, and you know what that means - it's time to get our whoop whoop on!  I know for some of you, this pretty spring weather has kept you outdoors so you may not have a finish - but remember, we whoop whoop for progress, too!  So show us what you've been working on no matter what stage it's at!

This has been an odd week at my house, as we prepared for our daughter and son-in-law to head to China to finalize the adoption of Nathanael, our adorable 3-year old grandson!  I've spent a good bit of time getting ready to host our granddaughters four days a week (the other grandparents have them over the weekend) and, since Wednesday, playing chauffeur for school and all of their other activities.  Wednesday was a dry run/test, but Thursday was accomplished without my daughter as near as her phone to help me remember which way to turn!  (As of 6:30 Thursday morning, they were en-route to Beijing, China!)  So - before the week started, I managed to finish the new quilt for Emmy's bed!  And here it is...


What?  You can't tell what it looks like from that?  OK, try this...


Spring in middle Tennessee means one of two things most of the time - wind, or rain.  Very seldom do we have a perfect-for-picture-taking day of sunshine and no wind - so we take what we can get!


Here's a pretty shot of the flimsy with the light shining through it!  

This pattern was originally a smaller block, designed to be paper-pieced.  Well, me and paper-piecing do not get along well - for some reason I just cannot wrap my mind around it!  And I wanted larger blocks for a quilt this size, so I redrafted the block, increasing the size.  Then I cut templates for all four pieces from an old cutting mat I had hanging around. That worked great!  Piecing was done in the traditional style, very carefully so as not to stretch all the bias edges in this block.  But it all worked out well - the blocks went together easily!


Here's a close-up of the finished front!  The fabrics are all from the Etched line by Hawthorne Threads - they print their own label fabrics in house and they are just beautiful!  I've got lots of leftovers so expect to see them turning up in other quilts in the near future.


And here's the back - the multicolored print is a very pretty Cloud 9  organic cotton print that is available at JoAnn's, and the print on the left is something I found to coordinate with it, as there wasn't enough fabric on the bolt to make the whole back from the multicolored print.  They go nicely together and this shot shows off the organic wavy straight line quilting I used for this quilt - to evoke the thought of wind blowing the pennants strung across the front of the quilt!


And here's how the two quilts look together in Emmy and Nathanael's bedroom.  (Because they are both 3 and are both deaf as posts with their cochlear implant processors off, it makes sense for them to room together for a while.  If one wakes up in the night, it won't necessarily wake the other one up, and only one room has to be fitted out to deal with their needs.)  I love the way the two quilts look together - not the same, but using the same colors - Nathanael's in the stronger saturated tones, Emmy's mixed with a lot of white which makes them more feminine looking - and the same basic shape, the triangle.  The background fabric on both quilts is Kona Snow.


Here's Emmy's little corner of the world...


And here's Nathanael's!  All ready for when he comes to his forever home at the beginning of May!!

Can I get a whoop whoop??

*&*&*&*&*&*&*

I've had a lot of great feedback on the pattern for Emmy's quilt, so I'll probably try to draft a tutorial for it in the next few days (while I still remember how I did it!)  If you think this is something you'd be interested in, let me know in a comment below!

*&*&*&*&*&*&*

And now it's your turn! 

What's got you whooping this week?


What's making you dance the happy dance?

Tell us - we want to dance right along with you - 
because it's always more fun to dance with friends!

It doesn't have to be a finish - just whatever's 
making you happy this week.

The party stays open until Sunday midnight - 

Hope to see you there!

Hugs!

Sarah

PS - be sure to check out the new Fabrics N Quilts website - and also Shannon's blog, as there is a blog hop to celebrate the new site and multiple chances to win some great prizes over the next three weeks!  And if you go to the quilt show at Paducah next week, be sure to stop by Shannon's booth (#4503, under the Big Bubble, April 22-25).  She's got a special little freebie for you if you tell her I sent you!  Take a selfie with her for an extra entry in my own portion of the blog hop, too! (Coming May 1st...)


Monday, April 13, 2015

Make-A-List Monday - The IGDFMYFAGR Version!

Hi, all!

Well, I'm calling this week's post the IGDFMLFAGR version - that means the "I Got Distracted From My List For A Good Reason" version!  You'll see why in a minute...

So here's how last week's list went...

1.  Finish piecing Emmy's quilt top.
Done!  And not only did I finish piecing it, I quilted and finished it!  I'll be posting about it on Friday, but here's a teaser picture...


2.  Put up two new light fixtures - 
Bill's office and my sewing room.
Done!  Why in the world did I wait so long to do this?  I wanted to leave the vintage light fixtures up, but the one in my studio gave off very little light - this one is so much brighter I can even work in there at night without going blind!


3.  Start repairs on the crazy quilt.
I didn't get to this one...

4.  Learn the grandgirls' new schedule
 (Emmy is now in preschool!)  
because I'll have to cart them around while their
parents are in China!
Done!

5.  Choose pattern and fabric for a gift quilt.
More about this below, but yes, I did this!

6.  Quilt a child's quilt for the ministry.
I didn't get to this...


7.  Keep up with all quilt ministry needs that arise.
Done!  It's a long list this week...

This quilt went to a woman with terminal cancer who was put on hospice care this week...


This quilt went to a new baby boy, the grandson of our longtime church secretary...


This quilt went to an elderly woman in the hospital...


This quilt, pieced by Deb using AmandaJean's Long Division quilt pattern, went to a farmer diagnosed with kidney cancer...


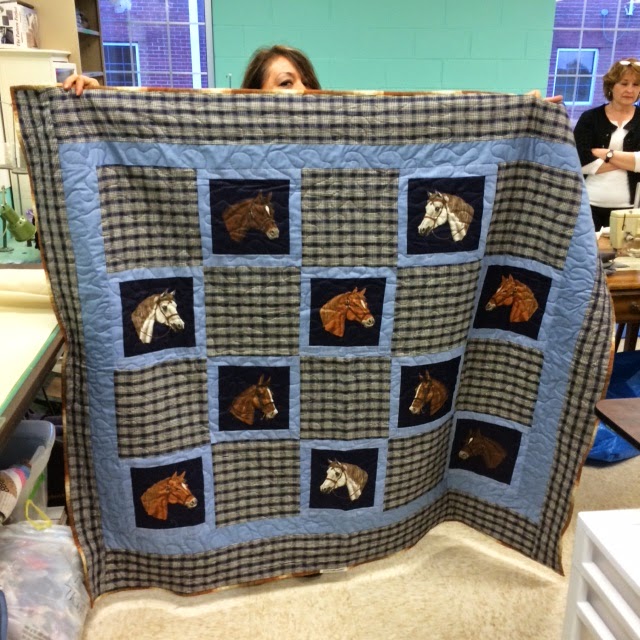
This quilt, pieced by Olga (you can see her peeking out over the top of the quilt!) is going to her father, who has just been diagnosed with prostate cancer...


...and this quilt, Deb and Eddie's version of my Interlocking Stars pattern, went to a woman who, while serving as caregiver to a woman who had a lung transplant, was herself diagnosed with breast cancer.


We also decided to send five quilts to Quilts of Compassion, who put out a call for quilts for the victims of the Illinois tornados this week.  We had extra quilts on hand, so we voted to send some to them!


And here's the reason I didn't get to everything on my list this week!  


I was asked to test drive a new pattern written by Christina Cameli of A Few Scraps - and this is the lovely result!  You all are going to love this pattern - I'll feature the quilt and do a post on it when she releases the pattern - and maybe even do a giveaway of a copy!  But in the meantime, I'm finishing this one up to give as a gift.  

So that's how the week went. The pattern testing was an unexpected task, but always a pleasure, and since she needed the feedback before releasing the pattern, I moved it up to the top of the list.

And here's what's on the table for this week...

1.  Finish the gift quilt.

2.  Check with a local fabric shop to see if I can hang out in their space while Emmy is in preschool for the next two weeks (more about this below!)

3.  Prepare projects I can take with me to work on while Emmy is in preschool.

4.  Keep up with any quilt ministry needs that arise.

It's a very short list this week, because my daughter and her husband leave Thursday morning (yes, THIS Thursday!) to go to China and pick up Nathanael, and that means I take on full-time Nana duties until May 1st!  It will be a lot of fun, but it will also seriously cut into my sewing time.  Lilli has to be at school at 7:15 AM, then Emmy has to be at school at 11:30 - and her school is 40 minutes from my house.  They both get out of school at 2:30, so it doesn't make much sense to come home and then go back.  I'm hoping one of the quilt shops near her school will let me hang out there and do some work - keep your fingers crossed for me!  Maybe I can get that antique crazy quilt repaired in the next two weeks.....

So now the question is - - - what are YOU working on this week?

Hugs!

Sarah

Sunday, April 12, 2015

Hands2Help - Introducing Our First Guest Blogger, Joanne!


Hi, all!  

Well, Hands2Help is really in full swing now!  We've shared tips, tutorials and tasty things; we've met our sponsors (although we've had more folks step up, so in the weeks to come I'll add to our list!) and today, we start off our guest blogger series!  I'm very happy to introduce you to Joanne from Everyone Deserves a Quilt.  Her blog is full of wonderful quilts and tips - well worth your time to check out!  This is her first time as a guest blogger here, and she's done a fabulous job. You're going to love her tutorial!!  

*&*&*&*&*&*&*

 Hi! I'm Joanne from Everyone Deserves A Quilt  and I really do believe that everyone deserves a quilt! 

Many thanks to Sarah
our wonderful Hands2Help organizer. She has graciously allowed me to share this tutorial with you. 

I enjoy making charity/donation quilts, and although I usually have some on hand ready to be given away, there are times when I just don't have what I need. In those situations, All Boxed In comes to the rescue. It's one of my favorite "go to" quilts, and I can usually have the top pieced in one afternoon or evening. It's easy to construct and only requires two fabrics, which makes it great for beginning quilters!   

Here's what you'll need to make a 46" x 64" quilt...

Fabric Requirements                                              
1 3/4 yards               Fabrics 1 - (blue)     
1 3/4 yards               Fabrics 2 - (star)
3 yards                     Backing (based on 40” wide fabric)
1/2 yards                  Binding                                                                                
Let's get started!

Cutting

Fabric 1 (blue)
1. Cut 15 strips 3 ½” x WOF (width of fabric). (Set 6 of these aside to be used in the strip sets.)
           
All Boxed In, Rotary Cutting

2. Clean up the ends and cut off the selvage of the remaining 9 strips.

3. Sub-cut strips into 9 ½” x 3 ½” rectangles. (You should yield 4 rectangles per strip.) 
Cut 36 - 9 ½” x 3 ½” rectangles
All Boxed In, Rotary Cutting

Fabric 2 (stars)
1. Cut 15 strips 3 ½” x WOF.   (Set 6 of these aside to be used to make strip sets.)

All Boxed In, Rotary Cutting

2. Clean up the ends and cut off the selvage of the remaining 9 strips.

3. Sub-cut strips into 9 ½” x 3 ½” rectangles. (You should yield 4 rectangles per strip.) 
Cut 34 – 9 ½” x 3 ½” rectangles
All Boxed In, Rotary Cutting

Making the Strip Sets

1. With rights sides together (RST), align the raw edges of the long side of one Fabric 1 (blue) strip and one Fabric 2 (stars) strip. Using a ¼” seam allowance, sew along one long edge. Pin if necessary. Make 4 of these strip sets. Press to the blue.
 
All Boxed In

All Boxed In

2. Using two of the units from step 1 and with right sides together, align a Fabric 1 (blue) strip to the Fabric 2 (stars) strip. Using a ¼” seam allowance, sew along the long edge. Pin if necessary. Make 2 of these strip sets. 


All Boxed In

Press to the blue. 
All Boxed In

3. Sub-cut these strip sets into 3 ½” segmentsCut 18 segments. (One strip should yield 11 of these units.) These units should measure 3 ½” x 9 ½”. 

These are Unit A - Cut 18
All Boxed In


4. Using two of the units from step 1 and with right sides together, align a Fabric 2 (stars) strip to the Fabric 1 (blue) strip. Using a ¼” seam allowance, sew along the long edge. Pin if necessary. Make 2 of these strip sets. 
 
All Boxed In

Press to the blue.
All Boxed In

5. Sub-cut these strip sets into 3 ½” units. Cut 17 segments. (One strip should yield 11 of these units.) These units should measure 3 ½” x 9 ½”. 

These are Unit B -Make 17
All Boxed In


Piecing the Blocks

1. Sew the 3 ½” x 9 ½” Fabric 1 (blue) rectangles  to both sides of Unit AMake 18 of these blocks. These are Block A and should measure 9 ½” x 9 ½”.  
     
All Boxed In

All Boxed In


All Boxed In


Block A - Make 18
All Boxed In


2. Sew the 3 ½” x 9 ½” Fabric 2 (stars) rectangles to the sides of Unit BMake 17 of these blocks. These are Block B, and they should measure 9 ½” x 9 ½”.    
                                          

All Boxed In

All Boxed In
                                                                                                                                                                                                                                                 Block B - Make 17
All Boxed In
                                                                                                                                                                        
Quilt Layout

Following the picture below, lay out your blocks. For easier piecing of the quilt top, alternate the long seams of the blocks. The long seams of Block A  will be vertical, while the long seams of Block B  will be horizontal. Press all seams towards Block A The quilt should measure approximately 45 ½” x 63 ½”.     


 All Boxed In

Pay careful attention to lining up the blocks properly so the corners match up easily. Sew blocks together into rows and then sew the rows together.

Especially while sewing rows together, I pin both horizontally and vertically. 

All Boxed In

By pinning the bottom edge of the quilt (vertically), I am stabilizing the pieces so they don't shift as I sew down the long edge.


Once all the rows are sewn together, layer and quilt as desired. Bind using one of the two fabrics in the quilt, or add a third fabric to frame the quilt.

Ta-Da!

I like this! It reminds me that we are always surrounded by stars, even in the daytime. :-) I quilted this with stars and swirls and used a brown to match the stars for the binding. 


All Boxed In

Here's another sample, but I used brown (the same brown as the binding in the first quilt) instead of blue for Block A. The alternating block, Block B (stars) is the same for both quilts. For the binding in the quilt below, I used the same blue that I used in the first quilt. Wouldn't it be fun to make this for a set of twins? 

All Boxed In

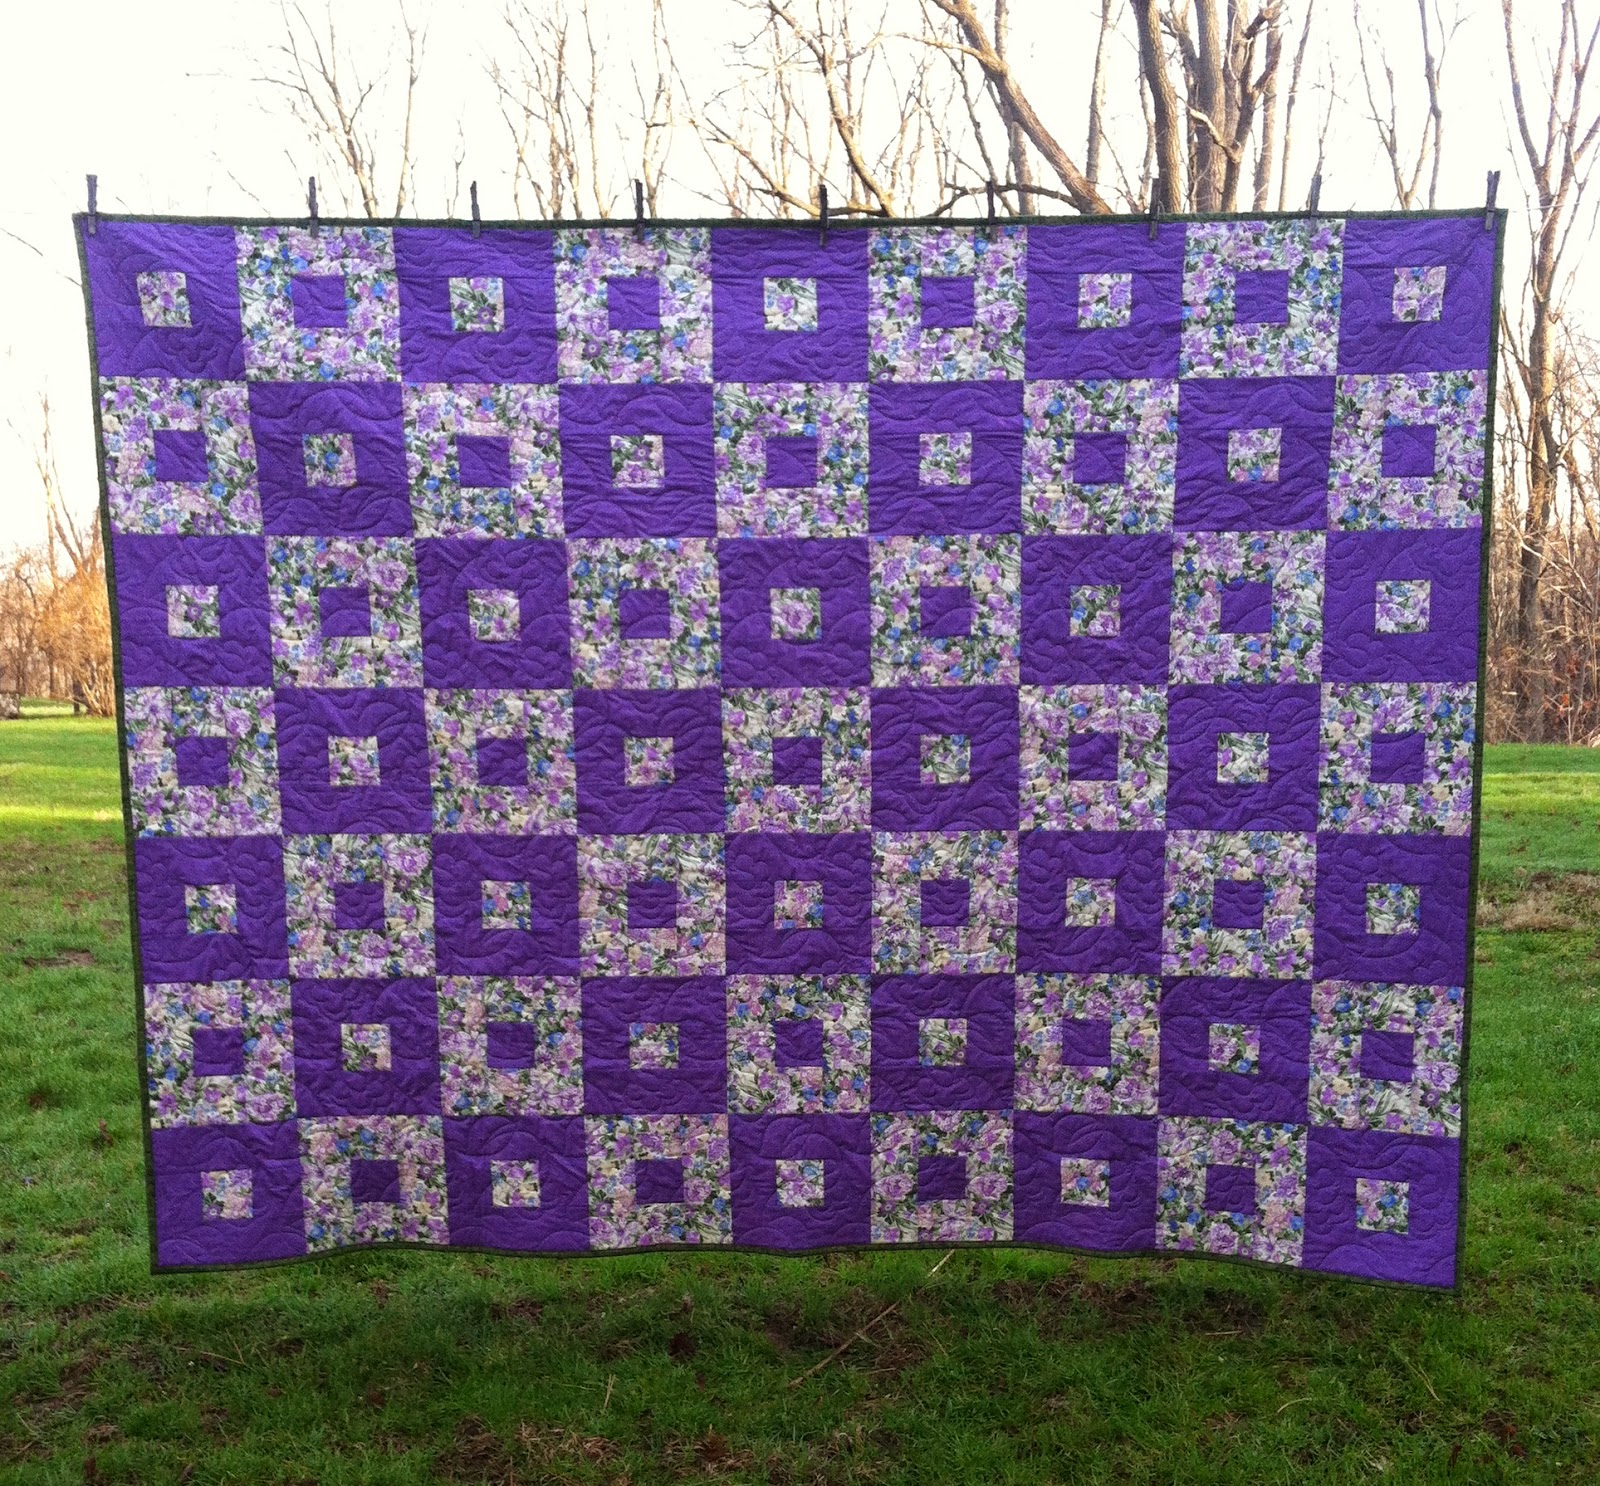
And then I made a larger quilt (layout is 7 x 9 and measures 64" x 82"). I used a beautiful floral fabric (it's difficult to see in this picture - try clicking on the picture to enlarge it) and coordinated it with purple. The binding is a green that coordinates with the green in the floral fabric. This is really pretty and the picture does not do it justice! 

All Boxed In

FYI - for the larger quilt above, you'll need 32 Block A (purple) and 31 Block B (floral). You'll need a total of 2 3/4 yards of each of the two fabrics and 2/3 yards for binding. For a pieced backing, you'll need 5 yards.

Speaking of backing, you can really see the quilting on the back of this quilt. Isn't that beautiful? It is Spring Vine, by Hermione Agee of Lorien Quilting

All Boxed In

Changing the size of this quilt is simple! Simply add or subtract the number of blocks you make to reach your desired size like I did for my purple and floral quilt. But, in order to keep the layout symmetrical, I always use an odd number layout (5 x 7, 7 x 9, etc.). By doing that, each row begins and ends with the same block (block A - blue), and I just think it looks better.

It's also easy to change the overall quilt size by changing the size of strips with which you work. Do you already have a bunch of 2 1/2" strips cut? Simply use that size instead of 3" and your blocks will finish 6" (6 1/2" unfinished). 

Of course you could also increase the size of this quilt by adding borders. When I'm in a hurry for a quilt though, borders tend to slow me down. hehehehe

And, you don't have to limit yourself to two fabrics! You could make this semi- scrappy and use lots of colors. (I'm working on one of these, so check back soon to see how it looks!)

All Boxed In

Or add some pop to the above quilt by adding a different center to half of the blocks. Oh wait, what about fussing cutting some of the center blocks? You'd have to piece the center strip of the block separately, but it may just well be worth it.

All Boxed In

Ok, my mind is swirling with ideas, but I'll stop now. :-)  Seriously though, I'm thinking that the possibilities are endless and that is great for those of us that don't like to make the same quilt twice. Even though they are technically the same quilt, they can look so very different.

I hope you've enjoyed this tutorial and I'd love to see your version of this quilt.

Thanks for all YOU do;
and remember,
Everyone Deserves a Quilt!

*&*&*&*&*&*&*

Thanks again, Joanne!  I can see that this quilt may become a "frequent flyer" in my charity quilt arsenal!  

Be sure to come back next Sunday when we meet our next guest blogger!  There will also be a linky party so you can share your progress - we'd love to see what you've been working on!!  It's a great time to cheer each other on.  

See you next Sunday!

Hugs!

Sarah