Showing posts with label Latitude. Show all posts

Sunday, March 7, 2021

String Therapy Draws To A Close With Unity.....


Hi, all!

It's finally arrived - our last session of String Therapy.  I thought a good topic for today might be unity - how we can all get along even if we don't think or act exactly the same way.  Seems like we've lost a lot of that in the world today, but it doesn't mean we can't strive to get it back.  Wouldn't everyone be a lot happier if we were united?

I guess you're wondering how that can pertain to a quilt design?  Well, in today's quilt I've united warm colors and cool colors, darks and lights, wide and narrow strips, for a quilt that feels like a personification of Unity.

Above you can see the quilt that was my inspiration.  I believe this picture came from Bonnie Hunter's blog, as she was sharing some quilts from a museum exhibit of string quilts.  This one has quite a primitive feel to it, a little Gees Bend-y, and is very scrappy.  Looking at it, it took me a while to analyze the thing that I thought made it work, but finally I saw it - all of the corners on each round are made of the same fabric.  In other words, the quilter never changed fabrics at the corner, she continued around.  It gives the eye a  place to rest and enjoy the surrounding fabrics, I think.  And that was the starting point for my own version.

Since I still had quite a bit of the beautiful Kate Spain Latitude batiks on hand, and much of it trimmed to 2.5" wide already, I started with those and added some 1.5" wide strips from the remainder of my Latitude scraps.

I chose a center piece, in this case a 2.5" wide strip of pink that was about 4.5" long.  Next I picked two of the teal pieces and seamed them together, sewing them to the pink block along the long side.  

I trimmed the ends even with the center piece and set those pieces to one side so I could use them to complete my corners.  This beginning is so small it will only take two fabrics to go all the way around.

Here you can see the block after I sewed the strips all the way around, but before the final trimming.  

Once you have sewn your first round, square up the block so that all the corners are square and the opposing sides are equal in length.

And yes, there's a reason for this.  As we go forward, you will be measuring the length for your strips rather than just applying them and trimming the ends.  Have you ever worked with a quilt that had "waving borders"?  There's a reason for that.  We all have a tendency to make our seams just a little bit narrower as we get to the end of the seam, which means that the end of your piece is a little wider than the top of it.  Over the course of a quilt, that little bit can make a big difference!  

So when you are adding borders, you should measure across the center of your quilt and make your borders that length, rather than measuring the edge you are applying the border to.  It might not make a huge difference if you are just adding one border, but in a quilt like this, which is essentially all border, it will help you keep it square and flat.  

So now start building your quilt, border by border.  

Alternate using wide strips and using narrow ones.  

Throw in a block of the opposite color family (or two) as you go for interest.  

Just remember to go around the corner with the same print to give your eye a place to rest.

The length of your strips can vary from 1" to 10" or more - whatever makes you happy and works with the strips you have!


I know it's hard to believe, but I actually ran out of strips in the right colors and widths before my quilt was as large as I wanted it to be...


...so I started auditioning borders.  Neither of these was right.  And as impossible as it seems, I didn't have any yardage stashed away that worked.  Time to regroup!  I dug through my remaining Latitude scraps and saw that I had quite a few that were 2.25", 2" or 1.25" wide - not quite large enough for the 2.5" or 1.5" I was using for the quilt, but I could use them for a piano key border.  


I sewed a few together, and really liked the look.  But what to do with the corners?  I really don't like to miter corners - I'm not a big one for fiddly sewing, but I wanted it to have a nice polished finish on those corners.  So I made some fan-like string blocks for each corner to allow the eye to travel around the outer border.


I played a lot of piano keys to make this one...


...but in the end, I had a top I really like!  And look at how nice and flat it lies!  Measuring for each of those borders pays off in the end.


And here's the finished quilt!  "Quilt as desired" in this case meant a quick loopy meander because I ran out of time for anything fancier...


...but I like the way it looks, and it will make a nice soft cuddly quilt!


And just look at those pretty corners!


Those very different colors came together nicely in Unity, I think!


*&*&*&*&*&*&*

And now that we've completed our String Therapy, let's share a little love, shall we?  Come back next Sunday for the beginning of this year's Hands2Help Comfort Quilt Challenge, where I'm sure you'll find the perfect place to donate an expression of quilt-y comfort for someone in need.  I can't wait, can you?  See you there!

Hugs!

Sarah

Wednesday, November 29, 2017

I May Have A Scrap Problem... Drumroll Please!!!

Hi, all!

Today's blogpost is slightly late because.......

........ (drumroll please)...............


I finished all my Gypsy Wife blocks!!!

Here they are in all their glory...


I can't wait to start putting the sections together...

...but that's going to have to wait!

Christmas parties start this week (at my house!!)

and the decorations must go up NOW!

See you next week with some more scrappy goodness!

Hugs!

Sarah

Wednesday, November 22, 2017

I May Have A Scrap Problem... Success!

Hi, all!

This being the time of year when we are made more aware of things to be thankful for, I can honestly say this year that I am grateful for scraps!  I never thought I would be able to say that, and there are times (particularly at church) when my scrap experience can become a little bit overwhelming, but I am learning to embrace the scrap!  


That being said, I'm happy to say that I took some time today and made all thirty-six Square In A Square blocks for my Gypsy Wife quilt!!


This was the first batch - I cut these out Monday night and sewed them up Tuesday morning.  It went so fast, I decided to cut out the remaining 23 (all one size) and get to work on them!


And I managed to get these done too!  I am getting so close to finishing up all the blocks for this quilt - it's tempting to just drop everything else and work on it, but I've got some other projects that have to come first....


And look!  Lots more bonus HSTs for my "future projects" jar!

I need to keep this short and sweet - lots to do this week because twenty folks are headed my way for Thanksgiving dinner.  Today is pie-making day - I have at least five to make, with a couple of those going to neighbors who helped us clean up after the storm - and the granddaughters are coming over to help us cook in the afternoon.  Should be a rollicking good time!

So have a happy Thanksgiving, and come back on Friday to do a little whoop-whooping!

Hugs!

Sarah

Wednesday, October 18, 2017

I May Have A Scrap Problem... Pillow Cover Tutorial!

Hi, all!

Well, better late than never - I didn't get my tutorial written in time to post this earlier (I actually had to make another pillow cover to take some pictures!) but it's done now!  First, though, let me share with you this week's blocks for the Gypsy Wife quilt...


This block is called Old Maid's Puzzle, and it's the last of the "named" blocks in the book.  As before, these blocks are made out of Kate Spain's Latitude batiks, and I love the colors!  The rest of the blocks are designated as "filler" blocks, so this is definitely a milestone!  I'll need to figure out how to divide up the rest of the blocks in the book over the next few weeks.  

*&*&*&*&*&*&*

And now for the tutorial.  I had so much fun making a wide variety of pillow covers over the past few weeks, and they are a great way to use up scraps and orphan blocks!  I'm sure there are many ways to make them, but I'm going to share how I do it.  Try it my way or experiment until you find what works for you!


First of all, create your pieced top.  Standard pillow form sizes are 14", 16" and 18", and I usually make my pieced top about 1/4" larger than the pillow form size.  I like my pillows well-stuffed, and making it slightly smaller than the pillow form size will give you a well-rounded pillow that isn't loose in the covering.

Sandwich your pieced top with a piece of batting, and a backing if desired.  I like to use Warm & Natural batting, which is dense enough that it doesn't stretch or pull, unlike some other battings.  Because of that, there's no need to use an additional backing inside the pillow.  If you do need a backing, a simple piece of muslin is sufficient.  It doesn't need to be fancy!  I like basting spray for these, but pins work as well.  


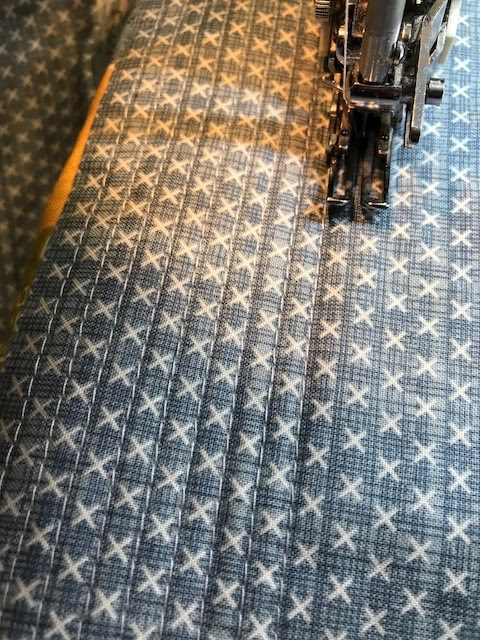
Next, quilt as desired!  I chose to quilt this in straight lines because the pattern made that easy without extra marking.  You might choose to do cross-hatch or grid quilting, or even free motion quilting.  It's all up to you!  


Trim any excess backing and batting off your quilted piece, squaring it up as needed.


Here you can see what the back of my piece looks like - the Warm & Natural really looks almost like felt.  You could also use a piece of fleece as batting, which wouldn't require an additional backing piece either.  If you do use fleece, though, be sure it doesn't show through your block!  

Your next step will be to cut two pieces for your pillow back.  Each one needs to be the same width as your quilted pillow front, and 22" long.  Fold each of them in half so that you have a piece the width of your pillow and 11" long.  Press the fold.  


Now lay your pillow front face down with the top up at the top of your worktable.  Take one of your backing pieces and lay it with raw edges against the bottom and right edges of your pillow top.  Pin from the corner about 2/3 of the way to the left along the bottom.  (If you are more precise than I am, and your backing piece is exactly as wide as your top, go ahead and pin all the way to the corner.)


Now lay the other backing piece on the top, matching up the top and right hand edges and pinning in place 2/3 of the way across the top and at the overlaps on the side.  If your backing pieces are the same width as your top, go ahead and pin the left side the same way as the right side.  If not, flip it over to trim the pieces to the correct size.


See!  This is what happens when you cut all your pieces at the beginning - quilting almost always makes your front smaller than it started out.  So it's time to trim!


Lay your ruler on top of the pillow top and trim the backing excess away.


Now that it's all the same size, finish pinning around the top.  Be sure to catch the ends of the overlap so they don't get folded under when you are attaching the binding.

Now let me explain about the binding!  I REALLY hate piping.  My grandmother used to make beautiful pillows, and she put piping all around the edges.  Hers were always perfect.  Mine, not so much - I can't ever get nice corners with it.  So it kept me from making pillows for a long time. But after I started quilting, I got good at binding - and I realized that pillows could be bound just as easy (or even easier!) than finishing with piping. EUREKA!!!


So make your binding and sew it to the back side of the pillow cover.  I like to start on the bottom of the pillow so that my join is down there too.


After you finish sewing the binding all around and joining the ends, trim the corners.  Pull the binding back and trim just the pillow, not the binding.  This will help your corners lay nicely.


Sew down the binding on the front of the pillow cover...


...and then it's done!  Wasn't that simple?  No turning, no pushing out the corners, and they're beautifully sharp.


Here you can see both the back and the front.  You should have about a 3" overlap on the back, which ensures your pillow form won't be showing through a gap.


And here's what the finished pillow looks like with pillow form!  Super simple, they make great gifts, and they use up stash, scraps, and orphan blocks!  A winning prospect all around!

I hope you'll share your own creations on a Whoop-Whoop Friday sometime soon!

Hugs!

Sarah

Wednesday, October 4, 2017

I May Have A Scrap Problem... Gypsy Wife Progress, and Some Stashbusting!

Hi, all!

Wow, this week is really flying by!!  And this is my third post in three days, so I'm going to keep it short and sweet this week.  

I finished the next block for Gypsy Wife - this week's block is called Nurses Cross.


And here's a picture of all of the blocks I've made so far...


I really love how this is coming along, and can't wait until I can start assembling it!

Next, I've been working with my scraps to create more pillow covers...


...pulling out some UFO/practice pieces to turn into more pillow covers...


...and even dipping into the orphan blocks for inspiration! 


I've still got some quilting to do on this one, but once that's done, it will become another pillow cover.   I'm having a lot of fun pulling pieces out of my stash to use for these - burning through lots of scraps and yardage, too!  

So that's what I've been doing with my scraps this week.  How about you?  Been working on anything interesting?  Link up below to share so we can be inspired!

Hugs!

Sarah