Showing posts with label pillows. Show all posts

Sunday, April 11, 2021

Hands2Help - Meet Guest Blogger Carole With A Hometown Heroes Idea!

Hi, all!

It's time for another Hands2Help post, and this week our guest blogger is Carole, who blogs at From My Carolina Home.  Carole designs beautiful quilts and hosts mystery quilt-alongs for her designs, which are always named for dances.  Her current mystery is the Pachanga, which always makes me think of Dirty Dancing - how about you?  

This week Carole has a great suggestion and tutorial for our Hometown Heroes project, so let's get started!

Oh, and don't forget - this is a check-in week, so if you've got some progress to share, you can link up at the end of this post.  I can't wait to see what you've been working on!

*&*&*&*&*&*&*

Thank you, Sarah, for putting this super charity event together again for another year.  I'm Carole, and I blog at From My Carolina Home.  I have to say I was so inspired by your idea to make something for our heroes of the pandemic.  There are so many I would like to thank, and a small project makes a great way to thank a lot of people.  These could be made by your guilds for presentation to ER units, fire departments, vaccine clinic personnel, or other people who made a difference this past year.  So, here's a quick tutorial for you!

"You're a Star" Pillow or Wall Hanging

1 6-1/2-inch squares
4 4-inch scrappy squares
4 4-inch background squares
4 3-1/2-inch background squares
2 strips 1-1/2 x 12-1/2 inches
2 strips 1-1/2 x 14-1/2 inches
1 14-1/2-inch backing
Fiberfill stuffing


Embroider or paint “You’re a Star” on a piece of fabric and cut to 6-1/2-inches square. 


Pair the 4-inch scraps with the 4-inch background squares, mark a diagonal line on the background, and sew 1/4-inch away from the line on either side. 

Cut apart and press, square to 3-1/2 inches.  Arrange embroidered square, HSTs and 3-1/2-inch background squares in a star block as shown.  


Add border strips, beginning with the 12-1/2-inch long one on opposite sides, then add the longer strip to the remaining sides. 


Place block and backing right sides together and sew along the edge leaving a space for turning.  Turn right side out.  Sew in the ditch between the border and block the same way, leaving a space in the same area.

Stuff pillow with fiberfill.


Sew the remaining ditch.  


Sew the last opening closed either by hand, or by machine continuing the stitching all the way around the pillow for continuity.  


Give to someone who has been a star in this pandemic time.  This same idea can be made into a wall hanging as well.  I'd love to see your creations too, anything inspired by my blog, on the Friends of From My Carolina Home Facebook group, accessible from my blog's Facebook page.  Thanks again, Sarah, and happy sewing everyone!!

*&*&*&*&*&*&*

Now, didn't I tell you true? That is a fabulous idea, and makes it so easy to share some love with our pandemic Hometown Heroes!  Thank you, Carole, for this fantastic tutorial.

And now it's time for you all to show off what you are working on for Hands2Help!   It doesn't matter if it's just a little, or if you have finished and gifted your quilts already - just take some time to cheer on your fellow H2Hers!  Link up below - and if you don't have a blog or Instagram, you can email me a picture you want to share at salliesue57 (at) gmail (dot) com, and I'll pull together a post to show off your stuff.  (FYI I usually put all those submissions in one post, so try to get them to me by Thursday morning so I can put them in Friday's post!)

Hugs and see you next week!

Sarah


Friday, November 29, 2019

Can I Get A Whoop Whoop? A Finish, and a (Sort of) Clean Studio!

Hi, all!

Friday has arrived in a rush this week, but it's here now and you know what that means - it's time for us to get our whoop whoop on!    So let's get started...

*&*&*&*&*&*&*

Surprisingly enough, even though it seems like it was a VERY short week, I managed to have a couple of finishes!  The first was this pretty baby quilt, actually a memory quilt...


The purple plaid was part of a well-loved childhood comforter and became part of this sweet little baby quilt.


If this looks familiar, it should - it's the same pattern as a baby quilt I made earlier this year.  Mom decided she wanted one for her younger daughter, too, and thus we have sister quilts!


The back of this quilt is a favorite sheet with lavender rosebuds. Sweet!


On Wednesday, I shared this pillow, made with the cut-off corners of the snowball blocks in the quilt - a lovely match!

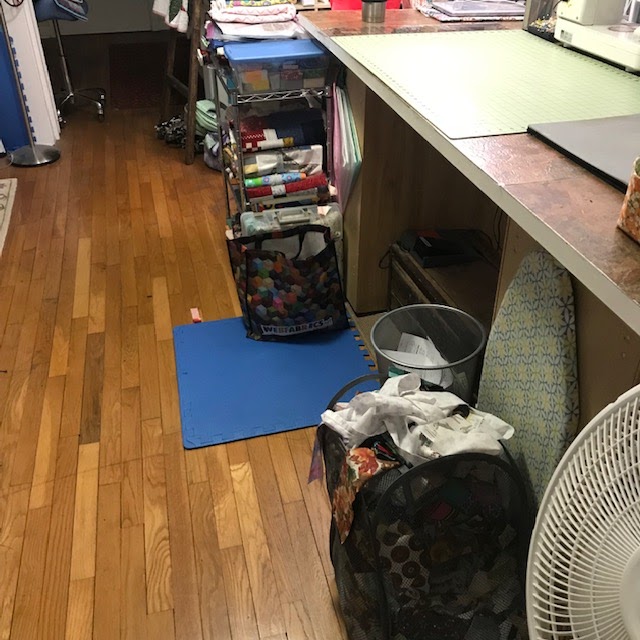
And then today, while between projects, I decided that I HAD to do something about my workstation!  It was a hideous mess - lots of leftovers from recent projects that I had not had time to put away.  But now...


Empty scrap buckets!


And the other end is cleaned up too!


Of course, just to be honest with you, there's still a LOT of cleaning to be done...


...but there are still projects to be completed before Christmas - so I think I'll just have to muddle along, happy for a clean worktable!

So - - - can I get a whoop whoop?

*&*&*&*&*&*&*

And now it's your turn!

What's making you whoop it up this week?


What's making you do a little happy dance?

Share! We want to dance right along with you,

And it's always more fun to dance with friends!

The party will stay open until Sunday midnight.

Hope to see you there!

Hugs!

Sarah


Wednesday, November 27, 2019

I May Have a Scrap Problem... Using Up The Scraps!

Hi, all!

Drum roll please...... 

I actually did some scrappy sewing this week!! 

You may remember this quilt that I made earlier this year...


This was a memory quilt for a customer, made from a well-loved comforter for her daughter.  Well, she decided she wanted one for her other daughter...


...so this quilt, also made using fabric from a well-loved comforter, went on the frame today.  I'll share more pictures of it Friday!

But making a quilt like this - a snowball design - results in bonus half-square triangles when you make the snowball corners.   And I just can't let those little bonus HSTs go to waste!  So I made this cute little pillow to go with the quilt...


Isn't that fun?  

So remember, it pays to hang on to those little cut-off triangles!  There's no limit to the adorable designs you can come up with using HSTs, and pillow covers make GREAT Christmas gifts!  

Sorry about saying the dreaded "C" word...

Instead, I'll wish you the happiest of Thanksgivings, filled with family, food, and all wonderful things!


Hugs!

Sarah

Wednesday, July 31, 2019

I May Have A Scrap Problem... How About a Tutorial, and a Giveaway Winner?

Hi, all!

Well, another busy month has passed, and not much scrappy sewing has been going on.  The Twelve Days of Christmas in July Blog Hop and Quilt-Along took up most of my time and energy.  For those who are interested, you will find the winner of the giveaway at the end of this post.

BUT - I did make a fun pillow this month using some random yardage from my stash, and I thought it would be a useful tutorial to share with you.


I'm sure that you, like me, have random yards of fabric in your stash - something that was either just to pretty to leave in the store, or that you thought would match something and then it didn't.  Or if you were part of a subscription service, like I was, you probably received fabrics that really didn't work with anything else you had.  (Why I'm not part of a subscription service now!)  And those random yards sit on the shelves, lonely and unloved.  This pillow cover will be a perfect use for those!  

Or maybe you have random fat quarters, leftovers from a larger project or, once again, just too pretty to leave in the store.  Drag them out and see how many of these great pillows you can make!

This is the perfect quick gift for someone.  Need something for that new college student moving into her first dorm room?  Or new parents, to encourage them to read to their children?  It's also perfect for your kids or grandkids, a wonderful place for them to store their current reading or coloring material - and just imagine always being able to find your Kindle!  Senior citizens love them too - a handy little storage spot for whatever you want to tuck inside.  I bet you can think of even more uses!  

Here's what you'll need to make one of these pillows:

One 16" pillow form

4 fat quarters, or three different pieces of yardage at least 18" in length

Batting scraps

Binding

CUTTING INSTRUCTIONS:

One 16.5" square for front of pillow

One  17" square for pocket

Two rectangles 20-22" x 16.5" for envelope backing. These can be in the form of two different or matching fat quarters or a WOF piece of yardage 16.5" wide cut in half on the fold.

One 18" square of batting for front of pillow

One 9" x 18" rectangle of batting for the pocket

About 70" of your preferred width of binding.

CONSTRUCTION:


Using your preferred method of basting (I spray baste), baste the 16.5" square of fabric to the 18" square of batting.  Quilt as desired.  


I did a cross-hatch diamond design on mine, marking the guidelines with my Hera marker.  I do not put a backing on this piece, because I use Warm & Natural batting, which is a good firm batting that doesn't fray or separate.  


If you use a batting that doesn't "hold its own", so to speak, you might want to back this piece before quilting.  It will be inside the pillow, so it doesn't really matter what it looks like.


Using a large square ruler, trim the excess batting off and make sure your corners are square.  


Now it's time to make the pocket piece.  Take the 17" square of fabric and fold it in half, pressing the fold with your iron.  Place the 9" x 18" rectangle of batting between the two sides, pushing it up firmly into the fold.  Baste this piece, then quilt as desired.  


I stitched a straight line right along the top edge, about 1/16" in, then again about 1/4" from that.  Then I quilted vertical lines from the top to bottom all across the piece.  


Trim the excess batting off the bottom of the piece.


Lay the pocket on top of the earlier-quilted square, lining up the bottom edge and trimming off any excess on the sides.  Pin the piece at the bottom corners, top edge of the pockets, and center bottom.

Now we'll work with the backing pieces.  Fold them in half so that you have two pieces 16.5" wide and approximately 10-11" tall.  Press the fold line.  Flip the front of the pillow over so that the backing is now face up.  Lining up the corners and raw edges, lay one backing piece on the bottom half of the pillow cover.


The pressed fold should be up towards the center of the pillow.  Now lay the other backing piece on the top half, lining up the raw edges and corners.  The two pressed edges will overlap each other by about four inches.  


Now pin all the pieces together, starting with the corners and overlap points. Add a couple of pins along the top and bottom to hold all the pieces in alignment.  


You can remove all the pins you placed in the front now, EXCEPT for the ones that hold the top corners of the pocket in place.


I bind all my pillow covers just like a quilt, using the binding stitching to hold all the layers together.  I sew the binding to the back of the pillow cover, starting on the bottom and going all the way around, then flipping the binding to the from and sewing it down by machine.  Once that binding is attached and the pins removed, you've got a finished pillow cover!  No corners to turn at all.  I don't know about you, but I don't have good luck turning corners - I almost always punch a hole through!


There are so many creative ways to gift these pillows!  For instance, upon the birth of a grandchild, you could give your son or daughter one of these pillows with a favorite childhood book of theirs tucked inside it.  Or an adult coloring book and box of coloring pencils fit in nicely, and it's such a good way to keep them close at hand.  

So now, the question is - - - how many of these will YOU be making?

∆*∆*∆*∆*∆*∆

And now for the winner of the 12DCIJ giveaway!  I am accompanied this morning by the Amazing Lilli, who has generously agreed to choose a winner for us....


We ended up with over 4000 entries across all the participating blogs, which is amazing!  When I asked Lilli to choose any number between 1 and the total, she chose to go minimalist - number 6!  Christi S., who gets her email on aol.com is our winner!  As a reminder, here's the pretty prize package...


A beautiful bundle of Wintertide, the newest Christmas line from FIGO fabrics!  Christi, I'll be emailing you to get your snail mail address ASAP.  Watch for it!

Hugs!

Sarah

Friday, July 26, 2019

Can I Get A Whoop Whoop? A Fun Little Pillow...

Hi, all!

It's finally Friday!!  Seems like forever since we've had a Whoop-Whoop Friday around here, but I hope you've enjoyed the 12 Days of Christmas in July Blog Hop and Quilt-Along in its place.  But now, since it's Friday, we all know what that means - it's time for us to get our whoop whoop on!  Are you ready? I know I am - so let's get started!

*&*&*&*&*&*&*

Writing twelve days of blog posts in a row can be quite a challenge, and as I finished the last one (finally!) I realized that I still needed a post for today (erk!).  What in the world would I share?  You can't just whoop about having survived writing twelve straight days of blogposts (although that's totally whoop-worthy, IMHO!).  Then I remembered a little project I had my eye on, and realized it would be perfect!


How about a reader's pillow?  This is a great gift for a kid, complete with a color-coordinated book - and I know a little boy who loves green who might just be getting this for Christmas!


But why limit it to kids?  Maybe you like to do some adult coloring in the evenings - this is a great place to stash your coloring book and some nice colored pencils.  I can see other uses for it, too - maybe a diary or journal for a preteen, or a place for a well-loved stuffed animal to sleep during the day - maybe you've got some other suggestions?  I'd love to hear them!

I'll be posting a tutorial for this pillow next Wednesday, as I get back in the regular swing of posting.  This is a great stash-busting pillow, as you'll see when you read the tutorial!  And just think of the jump you could get on Christmas!  This pillow took me about an hour and a half to make, and that included auditioning fabrics.

So - - - can I get a whoop whoop?

*&*&*&*&*&*&*

And now it's your turn!

What's got you whooping it up this week?


What's making you do a little happy dance?

Share!  We want to dance right along with you,

And it's always more fun to dance with friends!

The party will stay open until Sunday midnight.

Hope to see you there!

Hugs!

Sarah

Friday, April 26, 2019

Can I Get A Whoop Whoop? Feeling a Little Hygge.....

Hi, all!

Once again, Friday has rolled around and that means one thing - it's time for us to get our whoop whoop on!  After putting my nose to the grindstone on Thursday, I'm ready - are you?  Let's get started!

*&*&*&*&*&*&*

First of all, I need to share my internet research with you.  Maybe you've heard the word "hygge" but don't know quite what it means. Here's what I found out...

hyg·ge
/ˈh(y)o͞oɡə,ˈho͝oɡə/
noun

A quality of coziness and comfortable conviviality that engenders a feeling of contentment or well-being.


When I went to Ohio last fall, I found a beautiful bundle of Essex yarn-dyed linen...


...which of course had to come home with me!  I've been looking at it on my shelf since then, reveling in the beautiful soft colors and textures of the linen.  It always reminded me of that word "hygge" because it always made me feel content and cozy.  This week I didn't have an ongoing project, so I decided it was time to put that fat quarter bundle to work.  One of my favorite quilts is the postage stamp quilt, which goes together fairly quickly from a fat quarter bundle, so I grabbed it from the shelf and started cutting!  And here's my finished top...


Sorry for the less-than-optimum picture - clouds and rain and lots of wind came in while I was working on finishing this on Thursday, so I couldn't get a good picture outside.  But I'll be sure to get some good pics once it's quilted!

And I had some leftover 5-patch strips after finishing the blocks for this quilt!  Rather than throw them in the orphan block box, I decided to put them to use.  I got a new chair yesterday, and it looked a little plain, so here's what I came up with...


A simple little pillow, about 11"x15", with an envelope closure and binding on the edges!  And not only one, but two - one for each of the chairs in the room!


And you know the very best thing about this project?  I have absolutely no scraps left over!  Not one!

I also want to share a friend's whoop whoop moment, recorded last Wednesday night...


My friend Mary has been working on string blocks for about two months now, and last Wednesday night she put her finished blocks up on the design wall!  She finally has enough for a whole quilt!!

So - - - can we get a whoop whoop??

*&*&*&*&*&*&*

And now it's your turn!

What's got you whooping it up this week?


What's making you do a little happy dance?

Share!  We want to dance right along with you,

And it's always more fun to dance with friends!

The party will stay open until Sunday midnight.

Hope to see you there!

Hugs!

Sarah