Sunday, January 31, 2021

Won't You Join Me For A Little String Therapy?

 
Hi, all!

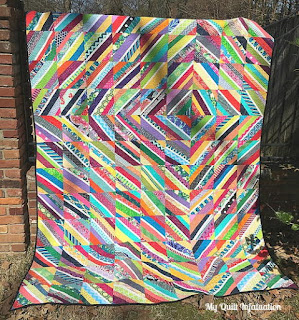
Welcome to this year's tutorial series, String Therapy!  I figure after the year we've had, a little therapy is in order - and what better way than with fabric?  If you're anything like me, you've got tons of string-y scraps - narrow pieces cut off from the edge of quilts, little bits left over after cutting pieces for quilt blocks - and if you're anything like me, you just can't bear to throw away fabric!  (Come on, I know I'm not alone in this!)  So let's take all those pieces, see if we can come up with some fun quilts, and diminish the piles a little bit.  Not a chance we can make them go away completely probably, but at least make a dent!


String quilts can be some of the easiest and most forgiving quilts to make.  You can use scraps that are cut unevenly, or take the time to trim them to uniformity.  Seam allowances don't really matter when making the blocks, so they are a great learning tool.  

Another local church used to make string blocks in group meetings once a week because they could always be trimmed to the same size. Even people with little sewing experience could participate and help create beautiful quilts!

So I hope you'll join me in a little group String Therapy and learn some simple patterns that can be used for comfort quilts as we prepare for Hands2Help 2021!

*&*&*&*&*&*&*


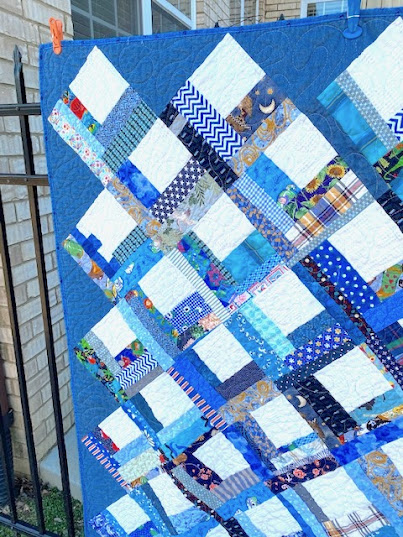
Here's our first string quilt, which for this tutorial we'll call "I Feel Blue".  I had an overwhelming amount of blue string scraps (doesn't everyone?) so this definitely seemed like the place to start.  The basic block is called a quarter cabin block, a variation on a classic log cabin block.

The pattern for this quilt is not original to me.  My good friend Christina Cameli suggested this tutorial of hers when I asked her about the possibility of her writing us a tutorial for a new quilt she was making, and it was absolutely perfect for this quilt!  She's a busy lady these days, so I was more than happy that she had an alternative. And what an alternative!  I'm going to show you how I made mine, but I suggest for more pictures about how to construct the blocks, and some great improvisational tips and ideas, you read her tutorial before starting.  Let's get started!

I took some time before beginning on all of these tutorials to divide my strings out by color, and arrange them neatly in color-coordinated drawers.  I highly recommend this if you want to stick within color families, as it makes the process of creating your quilts much faster.


Or maybe your string collection looks more like this?  No worries!  Either way works just fine!


For this quilt, you need a square to build your block around.  I dug around in my scrap drawers and came up with forty-six 4.5" squares of a textured white fabric that had been in my drawer F.O.R.E.V.E.R.  Perfect! Let's use that and get it out of here!  (At this point, I will add that it turned out I needed 50 squares to finish off the quilt, and I was fortunate enough to find four 5" squares of a white fabric with tiny blue random dots that blended in well enough to finish everything off. Whew!)  Your corner square doesn't have to be 4.5" - it could be larger or smaller, your choice.  If you go larger, you may wish to make a larger block, to give room for at least two strings on each side.  


Isn't that a lovely pre-quilt?  And at this point I was worried I might not have enough strips in my chosen color (HA!).  If that is something you are worried about, you can either choose a secondary color to add in (I suggest sticking in the warm or cool category of your primary color) or you can look at your stash and see if there are any pieces of yardage or precuts that you might be willing to harvest some strips from.  Reclaimed materials are always a good source, too - many of my husband's shirts, once headed for Goodwill, have ended up in my sewing stash, as there is a lot of 100% cotton fabric in a man's shirt!  But always keep in mind, scraps go a LOT further than you think they will.  This quilt barely made a dent in that drawer, as you can see by this "after" shot!


And now I'll give you some tips about making the block.  Here's what we're aiming for as an end result.  But don't worry - this isn't precision sewing. It's mindless and easy, and it all gets looking neat and professional at the end.  


So - for each block, I took one white square and a blue string, and sewed the string to one side of the block.  Pretty easy, right?  Cut off any excess with scissors (you don't have to be precise at this point, it can even be a little longer than the edge of your white block).  You will sew the next strip to the long side created by your corner square and the strip you just sewed on.  Keep adding strips to each side, alternating (or not - you can see that on some of my blocks I decided that one side needed a little extra before I proceeded to the other side) until your block is a little larger than your desired size.  I made mine 8.5" square, because it was small enough that I didn't get bored making it, AND because I had an 8.5" square ruler to measure and trim it with.  It's the little things, right?


Here's what my block looked like once I finished sewing it.  A little wonky, but we're going to fix that now.


Lay your ruler on top of the block, and decide where you want to position it.  In this case, I lined the corner of the ruler up with the corner of the white block, pretty much close to square.  I checked the side strips to be sure they would have at least an inch left on each side after I trimmed, because little skinny strips can be a real trip to piece, and make for bulky seams sometimes.  Not that you might not want one or two but it's better if they are a choice rather than an afterthought!


Another option is to intentionally make your block just a little wonky.  You can see in this picture that I chose to twist the ruler just a little so that the white square isn't square any more.  I like the way this looks in a quilt - it gives it a little movement and makes it feel less regimented. Just remember, it's your quilt and your choice!  Do what makes you happy!


You may also choose to make your corner square not so square! I cut this one into more of a rectangular shape. Oh, the possibilities!


Now comes the fun part - building your quilt design!  Start popping those blocks up on your design wall or laying them out on your design floor.  You may feel the need to structure yours somehow - mine had so many different fabrics that I really was just able to slap them up there willy-nilly.  


One thing I do notice in these pictures, though - see the upper corners?  You really want one block in each corner rather than two - it makes it easier to add the setting blocks for the edges.  So you want one more block on your first row than your second row, to get that layout.  You can see here that I used five blocks on my first row, and four on my second row.  I had five sets of nine blocks like that, and a final row of five blocks at the bottom, for a total of 50 blocks in this quilt.  After washing, it ended up at 53" x 63", a good size for a comfort quilt!


Once you have your blocks all laid out, you will notice, possibly with dismay, that you have triangular spots along the edges with no fabric in them.  Do not fear!  Setting blocks are a lot easier than you think they are, and I'm going to give you a tip that will make figuring out the right size even easier.

Go into the app store on your phone or computer, and type in quilting calculator.  Find this little gem offered for free by Robert Kaufman Fabrics.  It is a LIFESAVER!  Among the many things it can figure for you is the size of the setting and corner blocks you need for an on-point quilt.  You simply enter the size of your FINISHED blocks (in my case, that was 8") and it tells you what size to cut the squares for your setting and corner blocks, and it even shows you how to cut them.  FYI, for setting blocks, it told me to cut a 12 5/8" square and cut it across both diagonals to yield four setting blocks.  I am not a precision sewist, and I want the white squares to have nice corners along the edges, so I cut my squares 13" instead.  I needed 18 setting triangles for this quilt, so I cut five 13" squares, cut them diagonally twice to yield 20 triangles, and threw the two extras in my scrap bin.  For the corner triangles, the app told me I would need a 6 5/8" square, so I cut my square 7" (same reason).  For corner triangles, you only cut your square once on the diagonal, so you will need two 7" squares to do all four corners.  

And here's a little info on why the squares are cut diagonally.  Once you place the setting triangles in place, you will see that the bias edges are against your blocks, and the straight of the grain is along the outer edge.  Same with the corner triangles.  This keeps your quilt from stretching along the outer edge!  It does mean, though, that you need to be careful not to stretch your setting triangle edge as you sew it to the block.  Not hard, just something to keep in mind.

I chose to make my setting triangles and corners out of a piece of denim I had on hand.  (Oh the things COVID has taught us to do!)  It ended up being the perfect thing - the colors all blended well, and it makes a nice sturdy quilt without being too heavy.


When you are ready to start assembling your quilt, take one of the corner blocks and sew a setting triangle on opposing sides.  Then take one of your corner triangles and fold it in half, making a crease on the long side so you can see where the halfway mark is.  Fold your block in a similar fashion along the edge where you will be sewing the corner triangle.  Match up the creases, pin there and anywhere else you feel a need to, and sew the triangle on.


Here you can see the finished corner piece, and the adjoining row I sewed up next.  It's easy to see how they go together, and there are few seams to match - just the corners of the blocks.  And it's no sweat if your setting triangles don't match up perfectly along the edges (although they shouldn't be far off) because you can trim them after quilting.  Oh the joys of cutting a little larger!

When assembling, I usually put half the quilt together from one direction, then start over again in the opposite corner, finally joining two large pieces at the end.  That way you don't have to wrangle a huge piece all the time.  

Once the quilt top is finished, decide on a back.  For this quilt, I chose to use a single piece of fabric because, time constraints! But you could also piece a back out of unloved and long forgotten fat quarters in your color family, or combine larger but not quite large enough pieces of yardage that have sat neglected in your stash for too long. Maybe you don't love them any more, but would they make a nice back?  Look at it this way - someday the fabric stores will start having loads of fabric again, and if your stash is cleaned out, you'll HAVE to replenish, right?


Quilt your top in whatever way you are most comfortable with.  You could do a random meander, or organic straight or wavy lines. You could tie your quilt if you don't feel comfortable with free motion quilting yet, although you should be aware that some charities prefer that quilts be quilted rather than tied, because they hold up better under hard use.  Add binding (scrappy or one color) and it's done!


Go out with your photography assistant (mine was a little unwilling on this particular day!) and snap some beautiful pictures so you will always remember your quilt!  Then I hope you will take a look at the wonderful organizations hoping to benefit from this year's Hands2Help Comfort Quilt Challenge (there's a link right under my blog header) and see if you can find a worthy group to send your quilt to.  We'd love to have you join in!


See you next week with another session of String Therapy!

Hugs!

Sarah

Friday, January 29, 2021

Can I Get A Whoop Whoop? Just Chugging Along...


Hi, all!

Wow!  It's Friday again, already?  Where did the week go?  I hope you had a good one, and have lots to whoop about today.  I'm looking forward to seeing what you have on your plate - so let's get started!  

*&*&*&*&*&*&*

This week I've been working on a trio of memory quilts, and I'm definitely whooping about having finished two of the tops so far...


...and the third one is up on the design wall and partially sewn together!


I should have all three tops done sometime today, and maybe the backs too!  Now that really would make me do a happy dance!

I've also been sending lots of emails this week, trying to find sponsors for this year's Hands2Help Comfort Quilt Challenge, and the responses have started rolling in.  And not only responses, but even boxes!


This ginormous box showed up on my doorstep on Wednesday...


...stuffed full as a tick with crib size quilt batts!  Now that's definitely whoop-worthy!!

And on a very happy note, I have enough guest bloggers now, plus a couple of extras!  Thanks to everyone who responded to my call for help - I LOVE this quilting community!

So - - - can I get a whoop whoop?

*&*&*&*&*&*&*

And now it's your turn!

What's got you whooping it up this week?


What's making you do a little happy dance?

Share!  We want to dance right along with you,

And it's always more fun to dance with friends!

The party will stay open until Sunday midnight.

Hope to see you there!

Hugs!

Sarah


Wednesday, January 27, 2021

I May Have A Scrap Problem... And I Bet You Do Too!


Hi, all!

It has been a busy busy week here, and only promises to get busier!  I'm working on three memory quilts, and the customer has also commissioned two t-shirt quilts after that; another customer wants one t-shirt quilt by late February; and I just got another commission for two t-shirt quilts by April and June.  Whew!  All that on top of doing the administrative work for this year's Hands2Help Challenge and prepping for this year's tutorial series, String Therapy.  

All that to say, this week I am tapped out as far as scrappy sewing.  Of course, if memory quilts qualify, I'm up to my eyeballs in it...


I have the blocks done for all three, and one laid out on the design wall and ready to assemble.  Hooray for progress!  

And now I have a request!  As part of getting ready for Hands2Help, I arrange for guest bloggers to post on my blog during the Challenge.  I have four people who have volunteered, but I still need two more.  Guest blogging is easy - the choice of topic is up to you!  You could write about why you quilt, show off your sewing studio, share a tutorial or give out some great tips - almost anything goes.  So - anyone out there interested in being a guest blogger?  

One more thing, too - I'm in the process of contacting companies for giveaway items for the people who participate.  We have LOTS of participants each year, so this is a big job.  I try to expand the pool of donors every year, which was much easier when I went to QuiltCon and could make personal contacts.  So - if you have an in or a contact with a quilt-related business that might be interested in helping out, could you please contact me directly at salliesue57 (at) gmail (dot) com?  If it's one I haven't already contacted and you are willing to share the info or contact them yourself, that would be really helpful.

Thanks for the help, and I'll try to have something more substantial next week!

My scraps are feeling neglected, but I have big plans for them....

Hugs!

Sarah

Monday, January 25, 2021

Make-A-List Monday - Back On Track!


Hi, all!

Monday has rolled around once again, and it feels totally different from last week!  Staying focused really helped - I've accomplished a lot and feel better about how things are going.  Of course, it didn't hurt that it was 62 degrees here today!  It won't last, but it was a lovely one-day break from winter weather.

So let's take a look at last week's list...

1.  Finish the list of charities and update the H2H Page on my blog.
Done!  I do hope you'll check it out - we've got a great list of options for participants, plus an extra special challenge!  And we've already got 17 people signed up, even though technically signups don't start for a couple of months!

2.  Contact potential H2H quilting community sponsors.
I've started this, and there were even a bunch of responses in my email inbox tonight.  It's going to be a good year!

3.  Write at least one String Therapy tutorial.
Well, I didn't write the tutorial yet, but I did quilt one of the quilts!


Fly was overseeing the photo shoot!

4.  Quilt at least one ministry quilt.
Done!  And for once, I got a fabulous "spin" shot!  


5.  Deconstruct the clothing for the memory quilts commission.
Done!  And not only deconstructed, but cut up and ready to be pieced!


Three quilt "eggs" all ready to hatch!

And in addition to that, I found time to clean and organize my pantry!


So a good productive week, all in all!  I feel like I've got a better handle on things now, but there's still a lot to do.  Here's what I'll be working on this week...

1.  Write at least one String Therapy tutorial.

2.  Keep contacting potential H2H quilting community sponsors.

3.  Quilt at least one ministry quilt.

4.  Work on the commission memory quilts.

This is plenty to keep me busy, I'm sure!  So now, I really want to know - - - what are YOU working on this week?

Hugs!

Sarah

Friday, January 22, 2021

Can I Get A Whoop Whoop? Things Are Coming Together!


Hi, all!

Friday is here and you know what that means - it's time for us to get our whoop whoop on!!  Monday I made a promise to focus on my to-do list, and that has done wonders for my productivity, so I've got some things to whoop about - I hope you do too!  Let's get started!

*&*&*&*&*&*&*


Here's today's finish - repairing this little guy for my grandson!  If you look carefully you can see on the upper left side of the beige piece, there's about a two inch place that I had to resew.  He was willing to wait until Saturday to get it back, but I took it to him today and he did a little happy dance himself!


I also finished the last prototype for the String Therapy tutorial series this week, AND found backs for all of them!


And I managed to quilt one for the first tutorial post!  Now to get some great pictures (if the sun would ever shine again...) and write the post. This series will start on Sunday, January 31st - mark your calendars!


I also made barbecue ribs in the instant pot this week for the very first time - and yowza, were they good!  Fall off the bone tender and super easy.  And for those of you who will ask, I used this recipe!  Paired with some homemade coleslaw, they made an indulgent and fairly healthy feast!

But the very biggest thing I've done this week?


I've been working on this year's Hands2Help Comfort Quilt Challenge info, and the new blog Page is up!  The button isn't ready yet, but it should be soon.  I'm writing potential sponsors, too!  

If you are interested in being a guest blogger for Hands2Help, please drop me a line at salliesue57 (at) gmail (dot) com.  I think I still have five slots open, and I'd love to get those nailed down this week!

So - - - can I get a whoop whoop?

*&*&*&*&*&*&*

And now it's your turn!

What's got you whooping it up this week?

Now this was definitely whoop-worthy!!

What's making you do a little happy dance?

Share!  We want to dance right along with you,

And it's always more fun to dance with friends!

The party will stay open until Sunday midnight.

Hope to see you there!

Hugs!

Sarah


Wednesday, January 20, 2021

I May Have A Scrap Problem... But This May Help!


Hi, all!

Scrappy sewing has been the main focus around here lately, as I completed the final prototypes for the String Therapy series coming up the end of this month! 


But all that sewing meant a whole lot less time looking for inspiration on the internet...  Fortunately, though, Joy of The Joyful Quilter has come to the rescue with a year-long challenge that is right up our scrappy alleys!!  It's called The 2021 Table Scraps Challenge - a challenge to make a scrappy table topper each month, and I bet we've all got enough scraps - and time - to do that!  You can read more about the challenge by clicking here.  Joy has made it very easy to participate - easy "requirements" and almost no rules - and who doesn't need more pretty table coverings?  There's even time to make one before the January link-up on January 30th.  I hope you'll join in the fun!

So go dig through those scraps and see what you can create!

Hugs!

Sarah

Monday, January 18, 2021

Make-A-List Monday - Where Did The Week Go?


Hi, all!

Monday? How did that happen?  Holiday weekends always mess with my timing, it seems - but that's really no excuse for my results this week.  I need to get back on track with following my list!  

Here's how last week's list went...

1.  Keeping working on the fifth String Therapy prototype.

I'm happy to say that not only is the fifth prototype finished...

...but I also finished the sixth and final one!  


This kind of grabbed all my attention this week, which will explain how I did on the rest of the list.....

2.  Write up estimates for the commission quilts.

Done!  Deposit received, and fabric ordered and received, too, so I'm ready to start on these this week.

3.  Contact potential H2H sponsors and charities.

I have a comprehensive list of sponsors ready, but haven't written my request letter yet.  The charities are chosen, except for one for which I need to formulate a proposal.  

4.  Quilt some tops for the quilt ministry.

Didn't get to this one (hanging head in shame...)

5.  Start writing the String Therapy tutorials.

Didn't get to this one either. Looks like I need to spend some time at the computer during the day this week!

6.  Update the H2H Page on my blog.

I haven't finished everything I need to do before updating the page, but I did create this year's blog avatar!


So I didn't do so well on last week's list, but I will work hard to make up for it this week - I'll have to!  The end of the month is coming fast! Here's what I WILL be working on this week...

1.  Finish the list of charities and update the H2H Page on my blog.

2.  Contact potential H2H quilting community sponsors.

3.  Write at least one String Therapy tutorial.

4.  Quilt at least one ministry quilt.

5.  Deconstruct the clothing for the memory quilts commission.

In an effort to do better this week, I'm going to stop there and try to stay focused.  Hopefully that will help me get a bit more done!

And now, I really want to know - - - what are YOU working on this week?

Hugs!

Sarah

Friday, January 15, 2021

Can I Get a Whoop Whoop? Comfort Sewing For The Win!


Hi, all!

Friday has rolled around once again, and it's been another wild and turbulent week, hasn't it?  I don't know about you, but I've been indulging in "comfort sewing" as a way to cope with everything that's going on.  I hope, if you have, you will join in today's whoop whoop session so we can all boost each other up a little bit. That's important in times like these!  So let's get started...

*&*&*&*&*&*&*

As I told you, I've been indulging in comfort sewing. That's been a good thing, because I've been ripping through the prototypes for the String Therapy tutorial series that comes up later this month.  Since I last posted, I finished this one...


Hard to believe, but that quilt top came out of strips contained in the plastic storage bin at the upper right of this picture. And it wasn't even full!  It always amazes me how far those scraps will go.


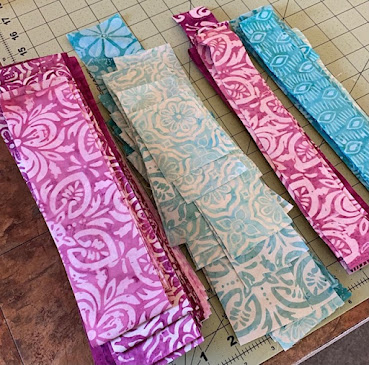
Thursday I grabbed my tub of Kate Spain Latitude batik scraps, and started cutting strips for the next (and final!) quilt.


And here's my progress so far on that one - about 1/3 of the way to finished.  I've still got a ways to go!  But I'm so excited that this is the last one, and I can start writing the tutorials soon!

So - - - can I get a whoop whoop?

*&*&*&*&*&*&*

And now it's your turn!

What's got you whooping it up this week?


What's making you do a little happy dance?

Share! We want to dance right along with you,

And it's always more fun to dance with friends!

The party will stay open until Sunday midnight.

Hope to see you there!

Hugs!

Sarah