Showing posts with label Working Wednesdays. Show all posts

Wednesday, March 26, 2014

Working Wednesdays - Why We Quilt!

Hi, all!

Today I want to share a little bit about why we do what we do.  A couple of years ago, I was asked to write a very short article for a magazine about the quilt ministry.  They asked if there was anyone who could do a companion piece about how the ministry had affected them, and I knew the perfect person.  The following are the two articles that were published….

My Story…

My grandmother taught me how to sew when I was a little girl. She gee me a love for the texture, color and feel of fabric, which started a collection that in 45 years threatened to take over my house.  

But two years ago, God gave my fabric stash a purpose by urging me to gather my friends and make a quilt for a woman battling cancer.  Since then, our quilt ministry has donated more than 160 quilts (almost 750 now) to people going through medical, spiritual, or emotional hard times.  The quilts serve as a physical reminder of God's love for each recipient.  We also partner with quilt bloggers around the world who donate fabric and quilts-in-progress to the ministry.

Who doesn't love the feel of a freshly washed quilt, bringing comfort and warmth on a less-than-perfect day?  

It warms my heart to see how God took a group of women who really didn't know how to quilt and used them to create a vital, growing ministry that touches lives around the world.  Because of my grandmother's legacy and the promptings of the Holy Spirit, I've discovered my More!


Nancy's Story

One week after my cancer surgery, I received an amazing quilt from my church.  It's the 47th one made by Gladeville Baptist's Piece*Love*Quilt ministry.  The quilt is a beautiful illustration of God's perfect timing.  Just 24 hours earlier, I'd learned that my cancer had spread.  But the expression of love and the prayers sewn into every stitch of my quilt gave me sweet peace.  I knew Sarah and her team of quilters were lifting me up. 

My quilt and I were inseparable throughout visits for radiation, chemo treatments, and countless trips to the doctor's office.  My fear was real and cold - - not of physical death, but rather the side effects of cancer treatment:  weakness, pain, brain fog, and nausea.  But God continually showed me His peace is far greater than my fear.  As I continually wrapped myself in my quilt, I claimed Psalm 23. 

At times, I wondered if the hospital visits would ever end. But God used those visits for His glory.  Other patients, doctors, and nurses often commented on my quilt, opening the door for me to witness to people I would not have otherwise known.  My life has been enriched and God has been glorified through the Piece*Love*Quilt ministry.

I am now cancer free.  Still, my quilt is always close by.  A simple look or touch reminds me of God's love, the power of prayer, and the love God's people have for one another. I truly am a living example of the power of More.

*&*&*&*&*&*

As many times as I've read this story, it still amazes me at how God uses a simple quilt for so many purposes.  It makes me appreciate what we get to do so much more, knowing that it has a purpose so far beyond what we can imagine!

Hugs!

Sarah

Wednesday, March 12, 2014

Working Wednesday - Batting and Other Necessities

Hi, all!

I'm trying hard to get back into the swing of Working Wednesdays - I had to miss a few weeks because of all the administrative work behind the Hands2Help Charity Quilt Challenge (signups begin this Sunday!) but it's time to get going again!

I had a few people ask some interesting questions after the last WW post, so I thought I'd address some of them in this post.  They are things that really should make it into the book at some point…

BATTING!

Batting is so important!  Not only is it an essential part of your quilt, but it's one of your largest expenses if your charity quilting subsists on a lot of donations.  Very few people donate batting, or if they do, it's usually polyester batting.  All of the batting we use is 100% cotton, or 80/20 cotton/polyester.  Personally, I just like the feel of a cotton batting better than a 100% polyester batting - it's softer, more flexible, and not quite as puffy.  

But even 100% cotton battings can vary greatly in quality.  When I purchase batting, I look for a batt with a consistent quality - no thin spots or places where the filling is doubled up.  I want to be able to cut it and get a very clean edge.  If a batt fills both of those requirements, it can be pieced to make larger pieces from scraps - a great time-saving technique.  


As you can see in the picture above, I've butted two pieces of batting together, both with clean-cut edges.  Using the zig-zag foot  for my machine, I center the foot over the line where the two pieces butt together and, using a fairly wide, open zigzag stitch, sew the two pieces together. 


Here you can see the two pieces stitched together.  It's important to merely guide the pieces through the machine, letting the feed dogs do most of the work.  If you push one side, or drag the other, you will get a warpy looking seam.  It just takes a little practice to get nice flat large pieces of batting from your scraps!

You may find a local quilt shop that will order batting at cost (plus shipping charges) for your charity quilting.  I've also found that the big box stores sometimes have batting on "door buster specials" that come in nearly at cost, and don't have the shipping charges on top of the price.   Buying batting by the bolt is the most cost-efficient way to purchase, if you can afford the large expense at one time.  We've found that with careful purchasing, we can put batting in a quilt for about $5-6 per quilt. 

Other Necessities….


Another part of "reaching the finish line" on a quilt that I forgot to mention is washing the quilt!  We wash most of the quilts we make - the lovely crush of a freshly washed and dried quilt is something special!  The picture above shows two absolute necessities for us - Shout Color Catchers to prevent bleeding in the wash, and Downy with Febreze for a great smell.  It sounds funny, but everyone who gets one of our quilts comments on the great smell.  The only real constant in what we use to wash them is the Downy with Febreze, so I'm not going to mess with success!  It's the only fabric softener we use.  We wash our quilts in cold water, gentle cycle, then dry them in a hot dryer for that crinkly goodness.  The only quilts we don't wash are flannel quilts - I love the feel of a flannel quilt that has been washed, but it tends to look a little bit used when it comes out of the wash.  You can toss a flannel quilt in the dryer for a bit of fluff if you choose not to wash it.


And just because no post is complete without a quilt picture, here's a picture of Nolan with his "smell good blanket".  He wanted it with him in the hospital and all the time at home, too.  Even at three years of age, he noticed the lovely smell!  Remember that your quilts can appeal to many senses - sight, feel, smell - and each is important!!

*&*&*&*&*&*&*

Thanks for bearing with me through this whole process - I really appreciate your comments and encouragement!  I hope you'll join us in the Hands2Help Challenge, too - be sure to check back in on Sunday and sign up!!

Hugs!

Sarah

Wednesday, February 19, 2014

Working Wednesday - Taking a Little Hiatus...

Hi, all!

Here it is, Wednesday again --- andI have been working so hard on the Hands2Help Challenge setup for this year that I haven't had a chance to work at all on the book.  So I think until I get all this preliminary work done, the book will have to take a backseat!  

Challenges are fun, but a whole lot of work to organize!  Last week I finally got the button finished…


…and managed to finally get the code attached to it so you can put it on your own blog!  You can pick it up in the right side bar if you want to add it to your blog - and I'd appreciate it immensely!


I've finally worked out the schedule for this year's challenge, and am working on updating the Page with all the new info.  


I'm also working on contacting last year's sponsors, and locating new ones!


And I had the most amazing conversation today with the woman who runs one of this year's charities!  In listening to her talk about her journey, I heard so many similarities to our church's quilt ministry.  It actually kind of freaked me out, because her ministry is so much larger than ours - but then I remembered that she has been doing this for fifteen years now and we've only been doing it for four years.  God will give us the resources and workers we need as we need them - but I can look at her ministry and see where we could be in ten or twelve years.  It's pretty amazing! I can't wait to tell you more about her charity, and the others we'll be quilting for this year.  Soon!!

So - - - because there are only 24 hours in a day and I haven't found a way to clone myself yet, a short hiatus from thinking and working on the book is in order.  Watch for more on the Hands2Help Charity Quilt Challenge very soon!!

Hugs!

Sarah

Wednesday, February 12, 2014

Working Wednesday - The Finish Line!

Hi, all!

With Jolene out of commission, I've been much more aware this week of how we complete quilts.  Therefore, that's what I'll be writing about this week!

*&*&*&*&*&*&*

Once you've made your quilt tops, the question arises how to finish it off.  When you first start making charity quilts, you may not have access to a long arm quilter or quilting service.  There are several options for finishing your quilts, and we'll look at some of them here.


You've made your top, and it's time to make a back.  You can piece your back with a creative design using the scraps from your front, or you can do something simpler with one or two fabrics.  Remember that a pieced back can be hard to center to your top, particularly if you are new to quilting.  I always make my pieced backs asymmetrical so that if the top is not quite centered, it looks intentional.  

Once you've created your back, you sandwich your quilt.  Lots of choices here, too. You can thread-baste the top, batting and back together.  You can pin it together using safety pins.  Or you can use basting spray to basically glue the layers together.  Whichever method you choose to use, be sure that your quilt sandwich is as smooth and wrinkle free as possible.   


Now on to quilting!  When we first started, quilting was very new to all of us.  Our very first ministry quilt was simply stitched in the ditch, and so were the next several quilts.  This is a simple and effective way to do it, but doesn't do much to enhance the piecing you've taken the time to do!  


You might consider stitching 1/4 inch to each side of the seams as an alternative.  This is actually easier than stitching in the ditch, because you don't have to hit such a small mark.


Then we moved on to straight line quilting, on the diagonal of square-blocked quilts.  Also simple, but it gave the quilts some texture.  All of this quilting was done on our tabletop domestic sewing machines, and we were learning how to manipulate the quilts through the machine throats.  


Starting to feel a bit more confident, our next step was more organic straight line quilting.  Sometimes we echoed the pattern in the fabric with the quilting; other times we just did straight or wavy lines to secure the batting and create texture.


Then we moved on to free motion quilting.  This can be a terrifying thing the first time you do it!  But practice makes perfect, or at least better - and charity quilting gives you lots of opportunity for practice!


Do you notice the label on the binding in the picture above?  This is one way to label your quilts, simple and effective.  We decided we didn't like the look of a flat label on the back, so we chose this as our standard label.  However you choose to do it, you should always label your quilts!


Some ministries choose to tie their quilts rather than quilt them.  Many will pray a prayer with each knot that is tied, and even involve non-quilters in the process of tying the knots.  This is a great way to allow more to participate in the creation of each quilt.  However, it may not make as sturdy a quilt, so if it is likely to need a lot of washing (for example, a quilt for a young child), you may wish to keep that in mind.

Once the quilting is done, you will need to bind the quilt.  You have several choices here too - you can choose to self bind, turning the backing over to the front to finish off the edges of the quilt.  (The frog quilt pictured above was bound that way.)  Or you can attach a separate binding by machine and either hand sew or machine sew to the opposite side of the quilt.  Many charity groups request that quilts be machine pieced, quilted and bound to make them as sturdy as possible, able to withstand washing in a commercial machine.  This is a factor to keep in mind when you are deciding how to finish off your quilt.  There are many great tutorials on how to bind your quilt, so it's easy to review the options and decide which one works best for you.  We originally started by attaching the binding to the front by machine, then stitching it down to the back by hand.  However, the day we had seven quilts to finish before the next day, we learned how to complete the binding by machine!  Sometimes necessity dictates technique….


Once your quilt is finished, take pictures!  You'll be giving this quilt away - your pictures will be the only record you have of what you created.  Believe me, after you've given away enough quilts, they'll start to blur together.  You will want to be able to look back and see what you have done in the past.  Look at pictures others take of their quilts - blogs or Pinterest are a great place to do this.  Improve your picture taking skills by analyzing what you like about certain pictures.  Natural lighting, an artful setting, close-ups - all of these things will make your pictures more interesting.  But remember to take at least one picture flat and straight on so you can see the entire quilt!

Now fold up your quilt neatly, tie it with a pretty piece of ribbon or tulle, and add a card for your recipient.  We are fortunate to have a woman in our group who makes beautiful stamped cards as her contribution to the ministry, and we wrote a prayer to go in each card that goes out from our ministry.

Our Prayer For You

That the DESIGN or plan of this quilt will remind you:

“…I know the plans I have for you, declares the Lord, plans to prosper you and not to harm you, plans to give you hope and a future.”  Jeremiah 29:11

That the COLORS of this quilt and of all Creation will remind you:

“The earth is the Lord’s, and everything in it, the world, and all who live in it; for He founded it upon the seas and established it upon the waters.”  Psalm 24:1-2

That the WARMTH of this quilt will remind you of the love of God:

“…and hope does not disappoint us, because God has poured out his love into our hearts by the Holy Spirit, whom he has given us.”   Romans 5:5

That the many STITCHES in this quilt, like the many stars in the sky, will remind you:

“…so that you may become blameless and pure, children of God without fault in a crooked and depraved generation, in which you shine like stars in the universe as you hold out the word of life…” Philippians 2:15

That the HANDS that worked on this quilt will remind you:

“But I trust in you, O Lord; I say, “You are my God.” My times are in your hands; deliver me from my enemies and from those who pursue me.” Psalm 31:14-15


PIECE · LOVE · QUILT

A Ministry of Gladeville Baptist Church

Now bask in the glow of a job well done…….  and then get to work on the next quilt!

*&*&*&*&*&*&*

OK folks - did I miss anything?  Do you finish your charity quilts differently?  If you've got any great tips, I'd love to hear them - we've been swamped with requests lately and anything we can do to streamline the process would be fabulous!

Thanks for your input, and for helping me along this journey!

Hugs!

Sarah


Wednesday, February 5, 2014

Working Wednesday - Kitting It Up!

Hi, all!

It's time again for Working Wednesday - that day when I make myself sit down and think about what I'd like to put in my book!  I'm glad you are all putting up with this process, because it makes me do something and not just put it off, once again.  I appreciate all your comments and suggestions!

Today I thought I'd talk about the process we go through to kit up projects.  Lots of the folks in our group are new to quilting, and most are intimidated by the thought of picking out a bunch of fabrics to coordinate together in a quilt.  We don't buy a lot of fabric, but work out of donated stuff, so we don't have the luxury of choosing a "line" of fabric most of the time.  So sometimes a few of us get together to make kits.


When we do this, we will usually pick a pattern that we are going to kit up that day.  I've been trying to write up our usual patterns in simple format, and the final page contains the kitting instructions.  Here's an example of the kitting directions for a pattern…

Kitting Instructions:

1 1/4 yards of solid accent fabric for blocks and border
1/4 yard solid for inner border
49 dark value 5” print squares for blocks
66 dark value 3.5” print squares for border
200 dark value 2” print squares for blocks
If Pre-Cutting:

Cut 19 2” width of fabric (WOF) strips from the solid accent fabric.  Set 8 strips aside for the blocks, uncut.  Cut 5 strips into 100 2” squares for the block piecing.  Set 6 strips aside for the borders.

Cut six 1 1/4” WOF strips from the inner border fabric. 


One set of directions


Assemble all in a zip loc bag


Kits may be put together with just the fabric, and leave the cutting to the person who chooses it, but some kits are completely pre-cut for those who don't have good cutting skills, or who have physical limitations that keep them from being able to cut easily. 

We put our kits together in gallon ziploc bags - aren't those things wonderful?  They make it easy to keep all the pieces together during construction, too, and can be sent back, attached to the finished quilt top, with all the scraps and the pattern sheet inside.  Those scraps can then be used in the back, or easily sorted into the scrap tubs, and the pattern sheet saved for re-use in another kit.


We've found that the simplest quilt to kit up is the Sudoku quilt.  Nine fat quarters that look nice together, a coordinating sashing, a completed sudoku puzzle and a copy of the directions.  We usually chose the border after the center is completed because it's hard to tell what will look best with the quilt until the "puzzle" is put together.  


Another quilt that lends itself to kitting is this simple block, which was part of a Fat Quarterly quilt-along a few years ago.  For this quilt, we put together kits to make ten of the one hundred blocks necessary.  All that is required is ten of the 2.5" squares that you will be using for the centers of the blocks, and ten 18" x 2.5" strips.  The recipient of the kit will need to cut two 6.5" x 2.5" strips and two 2.5" squares from each strips.  Ten blocks take about 45 minutes to make, so this is a small time commitment that most people are willing to make.


It's a great project if you only have a short period of time and want a quickie kit that you can look back at an hour later and realize you accomplished something!  If you're working on your own, ten of those short quickie projects later, and you've got yourself everything you need to make a great quilt top!

We store our kits in large plastic tubs, so they are easy to go through and choose what to work on.  It's also easy to see when the supply is running low!  As we get better at this, I can also see "grading" the kits on a difficulty scale, so that newer quilters can easily see which quilts are at their skill level.


Having kits available has also enabled some ministry members who are unable to attend regular meetings to participate.  They know that they can come in and pick up a kit to take home at any time, and this has allowed a much wider participation in the ministry.

*&*&*&*&*&*&*

Truthfully, I have to say I got the idea of making kits from Quilts For Kids.  If you are unaware of this organization, you should check them out.  


They will send you, free of charge, a kit for a child's quilt.  You put it together, add batting, do the quilting and binding, and return the finished quilt to them at your expense. They will distribute it to a hospitalized child in need of a quilt-y hug and smile.  The idea of the kits was so simple, but it takes all the guesswork out of the process.  

The first group of Quilts For Kids quilts we made as a ministry!

How do you feel about kits for charity quilting?  Do you like the idea of having the "hard work" done for you, leaving you free to do the fun part?  Or do you love the process of choosing all your fabrics?

As always, your comments and suggestions are greatly appreciated!  Please feel free to weigh in with anything I might have overlooked or with suggestions about how you would do it differently!

Hugs!

Sarah

Wednesday, January 22, 2014

Working Wednesday - "What Are You Doing?"

Hi, all!

Is it cold where you are?  It's been unusually cold here in Tennessee this week, and I've found myself checking in with social medial more often than usual because I don't want to go outside in the cold to interact with folks! So this week I thought I'd work on the section of the book dealing with social media.  

*&*&*&*&*&*&*


If you've watched Wheel of Fortune recently, you've probably seen this category - What Are You Doing?  With the advent of social media, it seems like there are lots of ways to let others know what you are doing - and it's a great tool to share your charity quilting efforts with others!

Obviously, Facebook is a simple and easy way to share.  Most people have a personal account and friends already - so posting about what you are working on is a simple way to share.  You can also set up a group page to share the efforts of your charity quilting group, too.  When others like, share or comment on your post, word will spread quickly! (Tips here about how to post to get the widest spread on your posts)

Blogging is a little more complicated, but a very rewarding way to share a longer story.  There are many platforms available where you can build your blog for free, so it can be accomplished with minimal monetary investment.  It does require a good bit of time to maintain a blog properly, though.  Networking with other blogs is essential to build your readership, through blog hops, linky parties, and other activities.  Regular posts will bring regular readers.  Responding to comments that readers leave is a great way to make new friends and contacts, too, along with being simple good manners.  As a newbie blogger, I was very fortunate to have a good example in my friend Kelley.  I became acquainted with the world of blogging when I started reading her blog.  Every time I left a comment, she would write me back, even though we would probably see each other in a day or two.  I loved the extra dimension the emails gave our friendship, so when I started my own blog, I followed her example and responded to every comment left on my blog.  Because of that, I have developed wonderful relationships with fellow bloggers from around the world.  I may never meet these people in person, but I certainly count them among my friends! (Links to great tutorials on how to start blogging here)

Instagram is an amazing way to share your efforts through pictures.  Linking it to your Twitter or Facebook account allows you to spread the word even further!  (Boy do I need more info about this - I think I need to pick my daughter's brain!)

Twitter allows you to send quick, short messages to those who follow you.  Start trends with #hashtags that connect your messages with others using the same #hashtag.  (I need more info on this one, too - can you tell which platforms I don't use routinely?  LOL!)

And never forget Pinterest!  What originally started as a great way to keep track of things seen on the Internet has became a huge social media platform.  You can search for pins on almost anything, follow people whose pinning appeals to you, and promote your business or cause through the pins you add to your own boards.

At this point, you may be overwhelmed, and wondering why you need all these social platforms.  What benefit are they to me?  Well, I can tell you from personal experience that people who read about the quilt ministry on our blog have donated enough fabric, blocks, unfinished projects (more commonly known as UFOs), quilt tops and finished quilts to keep our ministry running with minimal outside funding.  We purchase batting, thread, minor amounts of fabric, and other expendable supplies such as rotary cutter blades, but seldom make large purchases of fabric.  It's almost as if we have a two-fold ministry - quilts for those in need, and a place for unwanted or unneeded fabric to live, relieving the UFO guilt and over-stuffed stashes of fellow quilters! Spreading the word about what you do allows others to receive the blessing of participating in whatever way they feel most comfortable.  Our ministry is so much more than the forty or so active members in our church.  It also encompasses quilters around the world who have joined in our efforts through their donations and encouragement!

*&*&*&*&*&*&*&*

Wow, it feels good to get that down in writing! It's just bare-bones and needs to be expanded, but it's a start.  Obviously, though, I need to take my own advice and brush up on some of these skills myself. Fortunately, my daughter is much more tech-savvy than I am, so I will pick her brain and put the info to good use.  

Is there anything you would add to this section?  What other social media platforms do you use?  Do you have a special technique for getting your information out there? I'd love to hear about it!

Thanks for letting me share with you - it's wonderful to hear what you all have to say, and so very helpful!

Hugs!

Sarah

PS Here's the gratuitous quilt picture - just because it's fun and no post is complete without the picture of a quilt!


Wednesday, January 15, 2014

Working Wednesday - The Quilts!

Hi, all!

Here it is, Working Wednesday again - I've been racking my brain this week trying to decide what to write about.  The problem is where to start - because there's so much to write!  But the one thing that kept cropping up in my mind is the quilts I'd like to feature, so I think I'll start there - with a list of some of the quilts that we'll be telling stories about and providing patterns for.

One of the first quilts we started making for the ministry was a variation of this pretty quilt


This is a pattern we originally picked up from Quilts For Kids, an organization that gives quilts to kids in hospitals.  It's quick, easy, and looks good!  

Then we moved on to the sudoku quilt…


This is a great quilt if you are overwhelmed with how to arrange the colors in a quilt - you use a sudoku puzzle to determine how to arrange the nine different colored squares.  Easy peasy!  And see those little feet at the bottom of that quilt?


Guess who?  Lilli - much younger of course!  She was a great photography assistant!

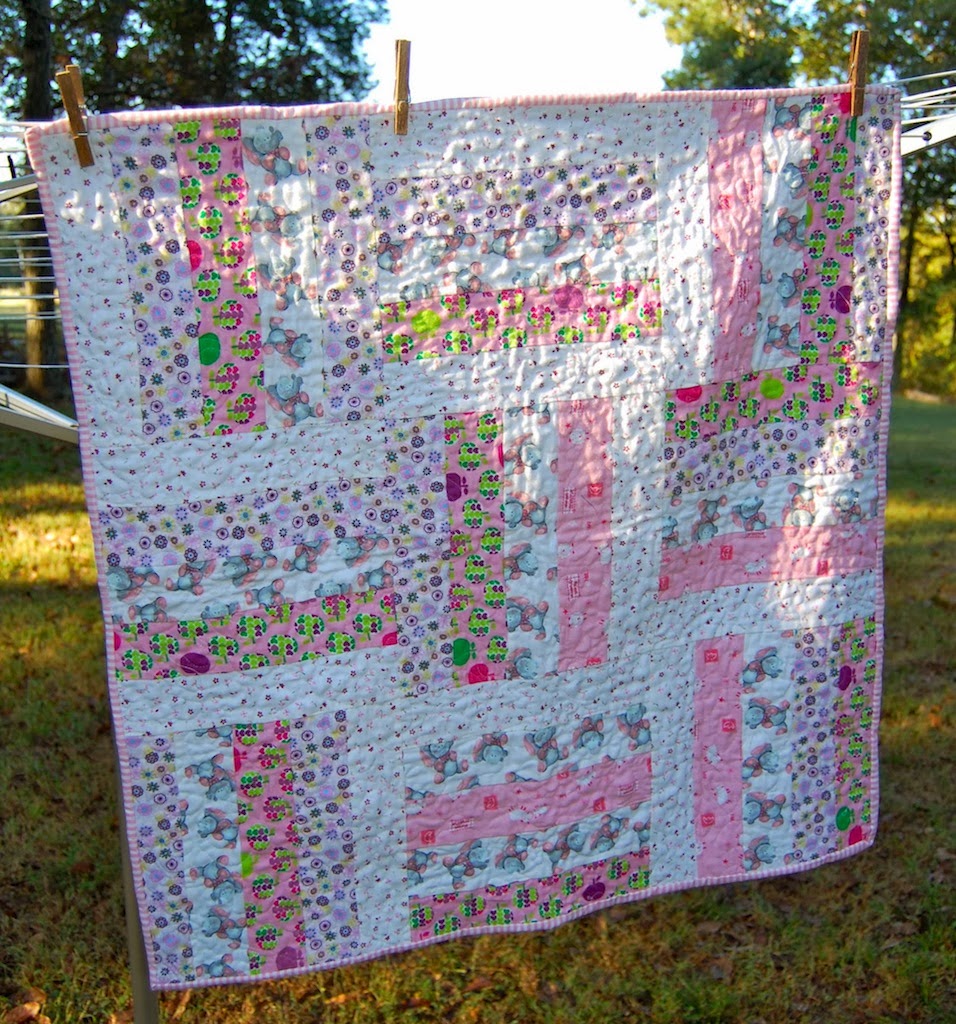
Then we started making baby quilts - and we used this great little rail fence quilt design from Beth of Love Laugh Quilt


A simple fence rail made of flannel strips.  This one works up so quickly and was a great way to learn strip piecing!  We also honed our skills in straight line and free motion quilting on these quilts.  

Then, of course, there's the ever-versatile disappearing nine-patch! This is such an easy pattern, although it was a real challenge to cut up what we had just sewn together!  Here's one example of a D9P we made for the ministry…


…and here's one of my favorite D9Ps, because it has such a fun story!  The girl who made this was so excited about making her first quilt that she started before we had a class - and she cut her squares out with scissors, sewed them together and brought the blocks in to class.  Well, they were a little wonky to say the least (remember YOUR first attempts to sew?) and we were trying to figure out how to turn them into something usable.  One of our members suggested cutting a smaller block out of the large block, so we took a template and set it wonky on the original block and cut new blocks.  I love this Wonky Sudoku Quilt!!


And here's another great quilt pattern, designed by Lisa of Shiner's View.  You might recognize this quilt - it's the one in my blog header.  This particular quilt was made for a gentleman who lived in Hawaii for a long time - we ordered the fabrics from Hawaii and made this very special quilt for him.


This has been a really popular pattern - we've made several and lots of folks have asked for the directions to use it for charity quilts for other groups.  It's easy, shows the fabrics nicely, and works up quickly.

I also want to add in suggestions about working with orphan blocks, improv blocks, and hopefully write a few original designs too!  

What would you want to see as far as patterns in a book like this?  Variations on simple designs?  Things to do to make them unique? Kitting instructions?  Or all new stuff?

I really appreciated all the feedback you all gave last week - some great ideas that I hope to work in to this project.  Thanks!!

Hugs!

Sarah

Monday, January 13, 2014

Make-A-List Monday - A Good Start for 2014!

Hi, all!

Wow!  2014 has really gotten off to a bang for me - how about you?  I feel like I've really made some progress on both my weekly list and on my goals for 2014 - and that's a good thing!!

Let's see how last week's list went…

1.  Sort out the scraps that have accumulated over the past few months into the color tubs (Lilli and I will be doing this tomorrow afternoon - a great "snow day" activity!)
Done!  We had a great time and now my scraps look like this:


Isn't that wonderful?

2.  Finish the table runner I started last week.
Done!  I'm so pleased with this, and I was also very happy to have something to replace my pretty Christmas runner!


3.  Work on revamping the studio a bit.
Well, I've put away the scraps, tried my ironing board out in another spot (didn't like it there!) and put away all the new goodies that DH got me for Christmas.  That's all for now!

4.  Make a new cover for my ironing board.  
Done!  This is so much better…


4.  Meet with the quilt ministry ladies to discuss new cataloguing techniques and set dates for three technique classes for the quilt ministry.
Done!  We decided to have the three technique classes on extra meeting days, so we'll be scheduling those over the next year.  We also started using the new cataloguing system this week.  You can see what we came up with here! (This is one of my 2014 goals.)

5.  Write an estimate for a commission t-shirt quilt job.
Done!  That's a bit of work, but totally worth it to have everything set out in writing.  Still waiting for the go-ahead to do the job...

6.  Prep a new blogsite to focus on ministry quilt stories.
Done!  Hop over and check out the new blog - it's called Piece*Love*Quilt! I'll be using the new blog to feature more in-depth stories about the quilts and the ministry.  I hope you'll follow that blog, too! (A 2014 goal.)


7.  Put one of last week's quilts on the frame and quilt it.
I did not do this one, replacing it instead with piecing a ministry quilt for a current need.  That quilt top is about halfway done.


8.  Begin writing a book about the ministry!
Begun!!  I started a new regular weekly post for this blog called "Working Wednesdays" which I'll use to post about progress I've made on the book.  I'm hoping for lots of feedback and constructive criticism, so I'm hoping you'll all help me out!  You can see the first WW post here! (A 2014 goal.)


9.  Keep up with any quilt ministry needs as they arise.
Done! I sandwiched, quilted and bound a baby quilt today, and put the binding on another.  I also worked on piecing a quilt top for a ministry need.

So last week's list went very well.  I've been taking advantage of one of my DH's Christmas presents, a subscription to Audible, to listen to some books while I've been working.  It's a nice change, and fortunately we like the same kinds of books!

And here's what I'm going to be working on this week…

1.  Finish piecing the ministry top I'm working on.

2.  Quilt and bind that top.

3.  Write two posts for the Piece*Love*Quilt blog.

4.  Write something for the book and prepare a blogpost for Wednesday.

5.  Piece together some orphan house blocks into a quilt top for the ministry.

6.  Quilt at least two other quilts for the ministry.

7.  Keep up with any quilt ministry needs that arise.

So that's what I'll be working on this week, in between spending time with Lilli and Emmy.  A busy week ahead!

And now the question is - - - what are YOU working on this week?

Hugs!

Sarah