Wednesday, April 29, 2020

I May Have A Scrap Problem... Waste Not, Want Not!

Hi, all!

Do you ever have trouble throwing away leftovers from a project?  Ha!  I think that's why all of us are in the "overflowing scrap bin" boat!  Well, Tuesday I spent the day making t-shirt quilt blocks....


...and by the way, I am loving having a design floor!  This quilt is going to be a monster - queen size - and having a room that is only mine, with floor space to spare, makes it so easy to lay it out.  And as an added bonus, the dog absolutely refuses to come upstairs, so I don't have to worry about her walking through the pieces!


Well, after cutting out those blocks I had a well-loaded trash can...


But I also had a good-sized tub filled with the larger pieces left over after cutting out those blocks.  Now, that's a lot of good fabric, and it hurts my heart to throw it away.  

And if this crazy time that we're in now has proven anything, it's the benefits to not throwing things away!  I have other tubs full of t-shirt quilt left overs, and this past month those scraps have come in handy to make face mask ear loops and ear-relief headbands for nurses.  So never let anyone rag on you for saving things - we now know that there may come a time when those "bits and bobs" are necessary!

These pieces, though, will probably be turned into another one of these quilts...

...a simple beach blanket, made with no interfacing on the t-shirt pieces, and no batting.  Just sewn together, spray basted to a piece of backing, quilted with stitch-in-the-ditch, and bound.  


And even though we can't be at the beach right now, we can still enjoy laying out in the sunshine!  We also discovered that if you use Crayola washable markers, you can draw on this quilt to your heart's content, then throw it in the wash - and it will be clean for the next time!  

I hope this gives you some inspiration for what to do with your leftovers from projects - remember there's always a use for those scraps!

Hugs!

Sarah

Monday, April 27, 2020

Make-A-List Monday - Chasing A Squirrel!

Hi, all!

Another week of sheltering in place has passed - what is it, five weeks now?  Seems like it's been forever.  And it's not horrible - there are much worse places to be - but it is very different, and it's hard to stay on track sometimes, isn't it?  So while trying to stay on track this week, I ended up chasing a squirrel!


As I was putting together a template for a puzzle-style t-shirt quilt, I decided to check out the BluPrint free classes, and was pleased to find a class by Christina Cameli available called The Scrappy Market Tote.  Christina had amazing suggestions for scrappy improv piecing, making it all look so easy!  PS Let me state for the record that happiness is turning your dumb tv into a smart tv thanks to a Fire Stick - now I can stream BluPrint and YouTube videos right there in my studio!  Happy Mother's Day to me!!


Anyway, back on the main point - I pulled these fabrics Sunday morning, all excited about playing with my scraps.  Took a break, enjoyed worship online, ate lunch, and went back up to the studio to play.  And couldn't make it work!  How frustrating!  I had a plan to finish a bag for this blogpost, and my scraps just weren't playing well with me.  But never fear - I had a Moda Scrap Bag with some interesting neutrals, and grabbing a strip of peach solid from my scrap pile, I pulled together a bunch of the neutral strips and started creating my own scrappy piece of fabric. And while I was quilting the piece, nearly ready to start making the tote bag, my browser cut out and I didn't get to see the instructions for the tote.

But I've made lots of totes, so I decided to take things into my own hands and create my own "design".  And here's what I made...


Here you can see the finished bag, along with the peach scrap and the Moda Scrap Bag.


I did some fancy quilting - well, not fancy, but full!  I did straight horizontal lines on the upper two-thirds of the bag, and a cross-hatch design for the bottom of the bag.


And because I was too lazy to look for another fabric to line it with, I decided to go with binding the seams.  I boxed the bottom corners and voila!  A market bag all ready to go!  I actually used it when I did the grocery shopping this morning, and it worked great!

So that is my squirrel for the week. Now I need to get busy and work on the t-shirt quilt.  That should keep me out of trouble!

What have you been working on?

Hugs!

Sarah

Sunday, April 26, 2020

Hands2Help 2020 - Meet Quiltygirl!

Hi, all!

Welcome back to another week of Hands2Help 2020, and I hope you'll help me welcome another great guest blogger!  Alycia blogs over at Alycia Quilts, and goes by the very cool name of Quiltygirl - so much better than "crazy quilt lady"!  I think you'll enjoy learning a little more about her quilting journey, so I'll turn the blog over to her now - but be sure to stay with us until the end, when you can link up and share your Hands2Help progress!

*&*&*&*&*&*&*

Good Morning! I am so happy to be here! I am Alycia – aka Quiltygirl!  

17 years ago I became a quilter by accident and my kids were very much into Super Heroes – so I asked them what I should call my new Business and they decided Quiltygirl!!

So you can find me at Quiltygirl.com, or on Instagram @quiltygirlquilts , and on Facebook at Quiltygirl.com, and on my blog… Alyciaquilts.blogspot.com !


How does one become a Quilter by accident? 

My Dad was one of the second wave of responders at the Twin Towers on 9/11 . He worked with all of the different fire departments that were called in, and as things calmed down the firefighters all traded patches with the different fire departments. He had about 30 patches and my dear sweet aunt said.. you should make him a quilt!

So I did – only I didn’t know anything about quilting and I ended up with a 120” x 140” quilt… with no idea how to quilt it…. Until!


I saw a photo for a long arm. I purchased a Nolting and have been Quilting ever since! This lead me to Quilts of Valor – it was not quite a foundation yet, and still in the beginning of figuring things out – and I thought Wow! This is really for me. My two cousins, my best friend, my friend’s husband - all were deployed and a comforting Quilt made sense to me. My Dad had such a sense of comfort when we gave him his quilt – that I could not imagine what a Hug from grateful people could do for our Marines and Soldiers deployed… it spoke to me!


The funniest thing was – I had made two quilts, and I was invited to one of my son’s classes to talk about Quilts of Valor. The class loved the idea so much that we ended up making 10 quilts in class that year, and we were invited to our Army Post to award them to wounded Soldiers – I have never been more compelled to go home and make more quilts than at that moment.  PS – Teaching kids is a great way to learn to quilt yourself – especially when they ask questions that you don’t know the answer to.


Today – not only do I quilt for Clients, I quilt for Quilts of Valor, I write Mystery patterns, and block patterns. I teach 5th grade, high school and at a lot of service groups to make QOV’s– and we love awarding our Quilts to Veterans touched by war. It is so heartwarming to see the love, the gratitude and the feeling of relief on these Vets Faces.


If you are interested – I have a TON of free patterns on my blog. I also host mysteries – and some of those patterns are still on the blog, as well as in my Etsy store. I try really hard to make patterns that are fun, quick, easy and have a pretty visual impact – so that everyone can participate.


Thanks for reading this far! For More information on Quilts of Valor – check out QOVF.org - and thanks for participating in Hands2Help!
*&*&*&*&*&*&*

Thanks, Alycia!  It's always fun to hear about how people got into quilting, and it amazes me how many of us got started because we wanted to give a quilt to someone who needed a quilt-y hug.  Quilters really are generous people!

And now, folks, it's your chance to link up and show what you're working on for Hands2Help this year!  No pressure, just a chance to check in.  Maybe you've only picked out fabrics, or a pattern - maybe your quilt is finished and ready to be shipped out!  It's all good, so share and inspire those of us who may be feeling a little uninspired these days.

See you next week!

Hugs!

Sarah


Friday, April 24, 2020

Can I Get A Whoop Whoop? A Productive Week!

Hi, all!

Friday has finally rolled around again - or maybe you call it "thatotherday" now?  The days do seem to run together but according to my calendar, it IS Friday - and that means it's time for us to get our whoop whoop on!  Are you ready?  I sure am - so let's get started!

*&*&*&*&*&*&*

This week was a very good week!  I think people started cleaning out their closets, and I had several requests about t-shirt quilts and other assorted commission work.  


This quilt, a gift for a retiring co-worker, was made by a friend of mine.  I wish I could show you more - it is a lovely quilt made with lots of thought about the recipient!  I'm happy I got to be a small part of this quilt's story as I did the quilting and binding.


And I really enjoyed quilting this beautiful top - look at all those wonderful Kaffe fabrics!  This one really brightened up my sewing room this week.  I'm going to miss it when I give it back to my customer this weekend!


And then came the masks!  I had a request from my husband to make masks for the wife of one of his co-workers, who will be starting chemo treatments next week - and of course I said yes.  I made ten masks for her and her husband (and of course I forgot to take a picture of the finished masks - but there they are in nascent form!)  Five of those pictured above went to a couple of ladies who requested masks via email on Wednesday, and those were mailed off Thursday afternoon.


Then after I got back from delivering masks, I decided I might better make some more to keep on hand for future requests - and I finished fifteen more.  Good thing, too, because I checked my email while making supper and found another request for more masks!


And speaking of supper, doesn't that look yummy?  An Italian chicken stew, made in my instant pot.  It was delicious, and will be a frequent favorite at our house.  Came in a frozen bag from Walmart and took about half an hour to make from start to dishing up - I'm hoping they have other flavors!


Thursday I also finished this ministry quilt, which will be going to a young woman, pregnant with twins, who has been put on bed rest.


And just in case you think I'll sit back now and take it easy, never fear - that double stack of t-shirts represents my next project - a queen size puzzle style t-shirt quilt!  That should keep me busy most of next week, I imagine!

So - - - can I get a whoop whoop?

*&*&*&*&*&*&*

And now it's your turn!

What's got you whooping it up this week?


What's making you do a little happy dance?

Share!  We want to dance right along with you,

And it's always more fun to dance with friends!

The party will stay open until Sunday midnight.

Hope to see you there!

Hugs!

Sarah

Monday, April 20, 2020

Make-A-List Monday - Show Me The Mini!!

Hi, all!

I'm so excited - I can't wait to see who else made a mini this week! I had a lot of fun making mine, and it's already hanging up in my studio.  


I started with sixteen denim 5"squares from the scrap bin.  


 Then I whacked and re-assembled...


...turned it once, whacked and re-assembled again!


Then I whacked it again and added some strips of 1.5" square scraps sewn together, and ended up with this!  I love seeing the sun shining through it.


But I wasn't done there - I decided since I live in the Nashville area, there needed to be some bling to go with those denim blues.  A container of the kids' craft items yielded some silver beads and I stitched them on.


And here's my finished mini!


I particularly like this little motif I found in a box while I was looking for embellishments!  Since this won't be washed I figured it would be ok to add it on.


I found a pretty linen stripe for the binding...


...and these cute little gray hedgehogs for the back!


And now it hangs on the wall just inside the entrance to my studio! I have another large quilt to hang in the big empty space, I just haven't found the hanging rod yet.  Maybe tomorrow!

*&*&*&*&*&*&*

So now, I want to see what you've created!  Did you have a chance to make a mini this week?  Or maybe you've made one in the past that you love and you'd like to share.  (It can even be from an old blogpost or Instagram post!)  Whatever it is, "Show Me The Mini"!!

Hugs!

Sarah

Sunday, April 19, 2020

Hands2Help 2020 - With Susan and her Scrappy Strippy Chevron Quilt!

Hi, all!

Welcome back!  I hope everyone is staying healthy and busy - there's certainly plenty to do these days, even if you are stuck at home.  I know I've discovered hidden treasures in my own stash AND it seems like lots of folks have been cleaning and organizing, which means that I'm getting calls about t-shirt quilts more and more lately!  

Today we've got another great guest blogger joining us - Susan of Stitched by Susan!  I do hope you'll check out her blog - just a quick glance through her posts and you'll find so many great tips, beautiful eye candy, and I'm guessing a new regular stopping place!  She's also going to be hosting a beautiful block of the month quilt along designed to improve your piecing skills.  The best way to stay abreast of info on that is to sign up for her newsletter (I just did!)  She also named her long arm machine, just like I did.  (Mine is named Jolene; hers is Lucy.)  I like people with the same kind of crazy as me!  She's got a great tutorial for us today, and I just know you'll want to go digging in your string bucket after seeing this one.  So without further ado, let's get started!

*&*&*&*&*&*&*

Scrappy Strippy Chevron


I'm Susan Smith, and I love scrappy quilts! I've been making quilts most of my life, but I lived in a fairly remote area of northern Canada, and I had never attended a class or show until about 6 years ago. Then the quilting bug REALLY bit, and shortly thereafter I adopted a long arm named Lucy. The rest, as they say, is history. She and I share our work on my website and on social media. There isn't a part of the quilt making process I don't love, but always and forever, my pioneer roots bring me back to my scraps. 

A huge thank you to Sarah for inviting me as a guest onto her blog, to share my scrappy, strippy chevron quilt - it's one of my all time favorites. 


I've drafted this project in two sizes; the baby version is 48" x 58", and the lap size is 56" x 72", just perfect for cuddling on the couch. You will want to print the diagram so you can refer to it and mark it up.

I find it helpful to choose either a focus fabric and pull colors from it (this one began with a Kaffe Fassett print), or a theme (such as western which might include browns and reds and bandana prints etc). This will help you decide which background to use as well; perhaps dark as mine is, or neutral gray or tan, or maybe a jewel bright color.  You can read more about the audition I held for my scraps in this post. For the current project I chose navy Essex linen for my background.

From the background cut all the alternate pieces, as shown in the picture below, following the sizes on the diagram.  The 2" grid of the diagram makes it easy to determine the sizes, however, seam allowances need to be added.  So first off, cut strips which are 8 1/2" and 6 1/2" wide.  Sub cut these into the half-chevron shapes, using the 45-degree-angle markings on your cutting mat. The lengths also vary; 8 1/2", 6 1/2", and 4 1/2" on the straight side. It's easiest to lay them out in place as you cut them, and you will be able to use the odd-shaped ends of some of your cutting strips for the ends of the rows. 

 Next, from the prints cut strips in any length and of varying widths. I suggest about 1-2" in width, but no measuring is necessary; just slide your ruler and randomly cut a variety of widths.

Because of the varying widths of the chevrons, not all the points extend to the end of the quilt.  So leave some extra length, both in the background and the pieced chevrons, and trim up later. 

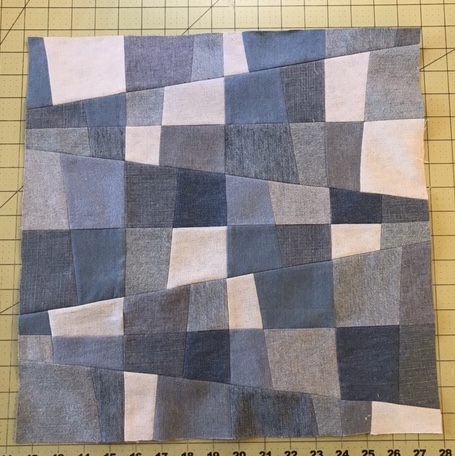
This is mine, all laid out on my design floor, ready to start making the scrappy bits. You can see the elongated end pieces at the top.


Randomly sew your scrappy strips into groups at least 6 1/2" or 8 1/2" wide. There is no easy way to plan this as the strips are all different lengths.  Just begin by making a unit of strips wide enough or a little extra, then sub cut into the sizes required, and fit them in between the background pieces of your design.  Just like the background, there are two widths - 8 1/2" and 6 1/2", and three lengths - 8 1/2", 6 1/2", and 4 1/2".  Cut the longer ones first from your strip, and then the shorter ones. 

Also, be aware that half of the units angle downwards, and half angle upwards.  It pays to check the diagram often! On your printed copy, mark a big X on the units as you fill them in; this will help to keep track of what sizes remain to be cut. 


To keep the blocks looking random, rotate some of them so the order of the stripes looks different.  


Once the entire quilt is laid out, begin to sew it together in rows. Don't forget to match up AT THE SEAM LINE, not at the edge of the fabric.


All these seams edges are on the bias, so it's really important not to stretch or distort them.  If one seems to be a smidge longer than the other, it's better to ease in the longer one than to stretch the shorter one.  The tip of a seam ripper is great for easing in a tiny bit of fullness under the presser foot as you're sewing.

After an entire row has been sewn, press all the seams toward the background. If you can, use the straight edge of your pressing surface to keep your row on the straight and narrow. Press well, and allow the whole strip to cool before lifting and moving it.


If you love efficient piecing like I do, you can stack up a whole row before carrying it to your sewing machine.  You can see how I stacked mine below, but of course it's critical to pick up the stack and keep it facing the same direction when you move to your machine. Then simply pick up the top two pieces, flip the top one to the left over the first one, and sew. Shift left, and flip the third piece over, and so on to the end of the row.


Once all the rows are sewn and pressed, it's easy to put them together.  All the seams will now nest together, and you can press these to either side, or open; whichever you prefer.

Remember there is still excess length on many of the rows; don't try to ease that all in! 

Finally, trim both ends of the quilt nice and straight. I missed taking a photo of the entire quilt laying flat, but here it is on my long arm, all assembled and ready to quilt.


I chose to do straight line quilting, with about 1/2" spacing.  It's simple and elegant, and it lets all those lovely scraps be the stars.


If you make this quilt, please share it with me!  Tag me @stitchedbysusan on Facebook or Instagram.

*&*&*&*&*&*&*

See what I mean?  Scrappy strips, here I come!  Thank you, Susan, for such a wonderful, inspirational post.  I bet we'll be seeing a lot of these in the future - and if you make one, be sure to share it with Susan.  I can say from experience that it's thrilling to see what others do with your designs!

Be sure to come back next week and link up your progress shots - it's our first check-in date!  I'm excited to see what everyone is working on.

Oh, and here's a treat - I know many of you have made quilts for Emily Bailey's Quilty Hugs charity, and now Emily has a button you can put on your blog if you have!  


Isn't that a wonderful little button!  I am so proud to be able to put it on my sidebar to tell the world.  Thanks, Emily!!

See you next week!

Hugs!

Sarah