Sunday, February 28, 2021

Time For A Little String Therapy! Where's Your Happy Place?


Hi, all!

Welcome to another session of String Therapy!  Today we're going to explore that most wonderful of things, your "happy place".  

For me, that is most often the beach.  I would rather be at the beach than almost anywhere, and it is our favorite choice for vacation.  Something about the sound of the waves, the warm sun, the laidback-ness of it all - if you ask my husband what time it is when we are at the beach, his response is always "I don't know, and I don't care!"  

But for my grandmother, it was her yard.  She loved growing things, and her yard reflected it.  She had the largest red-bud tree I've ever seen, and a rose bush that was her mother's when she was a little girl.  It was always an exciting day when that bush had a rose on it.  (It came long before the many-bloomed hybrid rose bushes we have now, and didn't bloom frequently.)  Her yard was always a treasure trove to explore, with blooming plants tucked away in unexpected corners, creeping charlie that gave off a wonderful smell when you brushed up against it, tiny tart wild strawberries nurtured in a corner, and soft, velvety Irish moss at the foot of the pine trees.  She loved to travel, but loved most getting back to her "green place" where she said her soul could rest.

I'm sure you have a happy place too - most of us do!  My quilt today reflects a little bit of mine, and a little bit of my grandmother's, I think.  When I wrap up in it, I feel connected to both, and that makes me happy.  See?  String Therapy!

*&*&*&*&*&*&*

I will preface this post by saying that this quilt tutorial is really more for a confident quilter or an adventurous beginner who can roll with the punches and incorporate any mistakes into a finished product to be proud of.  It is a "seat of the pants" kind of quilt, and I'm afraid this tutorial reflects that a bit, as there are no precise measurements for people who need them.  But I love this quilt and wanted to show it to you as a springboard for creativity if nothing else.  


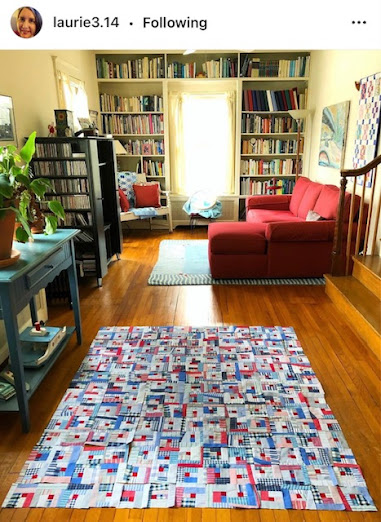
This is the picture that got my own creative juices flowing.  I loved the scrappiness of it, and the diagonal flow of the quilt.  As I studied it, I realized that she had a gray strip between every three strips of scraps, with a larger 5-row section of scraps running diagonally across the center.  Once I saw that, I knew I could figure out how to make the quilt myself.  The gray stripe gives a cohesiveness to the design, and a place for the eye to "rest", which is important in a busy quilt!

And I had the perfect fabrics for it - a box full of Latitude batik scraps that the fabulous Kate Spain had gifted me with.  I've made several quilts using them, but still had a lot of strings left.  So I took the cool tones and cut as many 2.5" wide strips as I could.  I then cut them down into pieces of varying lengths, from around 4" to around 12", and sewed them together into a l-o-n-n-n-n-g-g-g-g strip, jelly roll style.  I cut that strip into three fairly equal lengths, and sewed them together side by side to make a very long piece of fabric, 6.5" wide and who knows how long? I didn't measure - I knew if I didn't end up with enough, I could always make more. (Like I said, "by the seat of my pants"!)


Then I took 2.5" x width-of-fabric strips of my gray and sewed them together into a long strip, and added it to one side of my scrap panel.  Now I'm ready to cut!


You can see in the above picture that I have laid my ruler diagonally on the fabric strip.  This is how you will cut the pieces for your quilt, building the quilt diagonally from both corners until you meet in the middle.  The first cut is the easiest, because you line up the tip of the ruler with the top of the gray strip and the bottom corner with the side of your ruler.  It really doesn't matter which end of the strip you work from at this point, but be aware you will be alternating ends to get the right shaped pieces.


You will now work to cut the second piece from the opposite end of the strip in order to get the gray strip on the correct side of your cut piece.  (Flipping the strip will also allow you to get the most pieces from your scrap strip without waste, as the angles will be correct on the opposite end for your next piece. You'll see!)  The easiest way I found to be sure I was cutting correctly was to lay the piece I needed to join to above the scrap strip so I could easily see that (a) the diagonal was going the right direction and (b) the gray strip was in the correct position.  For this next strip, cut the end of the strip on the diagonal in the same direction as the strip above. (see picture if that's clear as mud!)  Then measure the long edge of the strip that you will be joining to and subtract 3/4" from that measurement to get the length of the SHORT side of your next strip.  For example, if the long edge of your first triangle is 12", you will subtract 3/4" from that and cut the long edge of the next strip 11 1/4" long.


In the alternative, you can lay your corner on the strip face down with the stripes aligned...


...then measure in 1/4" to see where your cut should be.  This is how I figured out my first piece, then measured to see the difference between the two.  It worked well for the first cut, but could be problematic for the rest as your corners get larger so I recommend using the "subtract 3/4" technique.


Now, being sure your scrap strip is placed so the gray strip is on the bottom, add a short piece of gray, still 2.5" wide, to the top edge so you can cut the triangle for the opposite bottom corner of your quilt.  


Use the same technique as before to cut the second corner piece.  Now you have your two opposing corners!


Now, flipping your scrap strip from end to end, keep cutting pieces and adding to the quilt, working from side to side to keep the gray strip on the correct side of your addition.  Work evenly so each side is the same size.  When it gets near to the size you want (or you get close to running out of scraps never mind!) you'll be ready to make that larger center strip.  


Add one more scrap panel strip to one side.  Then create a long strip of two more rows of scraps only to add to the other side of the quilt.  I highly recommend making that strip a good bit longer than you need so  you can trim the quilt square easily.  I had enough scraps left in my box to create this last strip easily, but if you made more of the scrap panel than you needed for the initial strips, you could always just seam-rip a row of scraps and a row of gray off to get your long 2-row strip.   Once you have added the pieces and connected your top all together, you can square up the corners using a large square ruler.  


And there you have it, a **mostly square** quilt top!  I will warn you, the edges are all on the bias so it takes some care not to get it too out of whack.  Definitely a quilt for a confident quilter, or one who doesn't get too freaked out by improvisation and learning-as-you-go!


But once it's done comes the fun part - the quilting! Because Jolene, my long arm machine, is waiting for her buddy Joe to come see if he can figure out why she started making a really strange noise, I chose to use wavy straight lines down each of the scrap strips on this quilt, working on my tabletop Juki TL98-Q.  It gives it a nice texture and just enough quilting to hold it together and keep it soft and cuddly.


The colors are so much truer in these outdoor shots, too - it was a slightly overcast day which turned out to be perfect for capturing the colors well.


And I love the backing fabric I found for this quilt - the perfect shade of blue, and modern enough to match the top without being overbearing.


*&*&*&*&*&*&*

I hope you've enjoyed our little session of String Therapy this week!  What kind of quilt would you make using your own happy place as an inspiration?  What colors would you use?  


Well, what are you waiting for?  LOL!

Hugs!

Sarah


PS It's my beautiful daughter Nancy's 9 1/4th birthday!  I'm so glad I can put it that way, as the other way makes me feel really old....

Friday, February 26, 2021

Can I Get A Whoop Whoop? Things are Rolling Along...


Hi, all!

Guess what, y'all?  It's Friday again!  And we all know what that means - - - it's time for us to get our whoop whoop on!  So let's get started....

*&*&*&*&*&*&*

This week I ignored the beautiful spring weather we had and holed up in my studio to work one of the t-shirt commission quilts... and it paid off!


The top is finished!  And once again, with Lilli's help laying it out and charting it out on graph paper, it went together like a dream.  It's square, straight, and came together with a minimum of fuss.  I did make one mistake, cutting a tiny piece 2"x3" rather than 2"x4", so the last seam didn't match up correctly the first time, but once I pulled it out and replaced it with the right size, it all worked out!

Then, since I was still waiting for the backing fabric to arrive, I started ironing some fabric for the next project - - - but then realized I hadn't quilted this week's String Theory quilt!  So a quick basting and some down-and-dirty quilting, and that's finished too....


Now I just have to write the tutorial.  I guess that's what weekends are for!

So - - - can I get a whoop whoop?

*&*&*&*&*&*&*

And now it's your turn!

What's got you whooping it up this week?


What's making you do a little happy dance?

Share!  We want to dance right along with you,

And it's always more fun to dance with friends!

The party will stay open until Sunday midnight.

Hope to see you there!

Hugs!

Sarah


Wednesday, February 24, 2021

I May Have A Scrap Problem... Inspiration!


Hi, all!

It's been a busy week around here, with not much time for scrap sewing.  With a full roster of t-shirt quilt orders, I'm making hay while the sun shines and knocking them out as quickly as I can!  Today one of my customers sent me a picture of her daughter with her new quilt...


And that's why I love making memory quilts!  It's wonderful to see people react to a tangible, useful recollection of their treasured items.  

That being said, I haven't had much time for scrap sewing (although I've been making a lot of scraps!) but I did find some really cool inspiration on Instagram this week.....


Look at all those wonderful tiny scrappy houses and trees!  I cannot imagine the work that went into this, but I sure can appreciate it!


And look at all that glorious color!!  I definitely need to find out if there's a pattern for this one...


Isn't this one fun?  It's made of shirt fabric!  Such a great way to repurpose those old shirts.  Men's shirts show wear at collar and cuffs, but usually the rest of the fabric is still in pretty good shape - and there's a LOT of fabric in an XL man's shirt!

But this quilt is my favorite of the week.  I love a snail's trail block, but I've never seen a quilt made of scrappy snail's trails - isn't it wonderful?  This one is definitely going on my bucket list!

That's all I've got this week, but hopefully I'll be able to do some personal sewing soon - I just have to decide which project to work on!


Go forth and conquer those scraps!


Hugs

Sarah


Monday, February 22, 2021

Make-A-List Monday - What A Difference a Week Makes!

Hi, all!

What a difference a week makes!  Last Monday we were iced in, soon to be followed by a mess of snow that kept us inside until Saturday.  It certainly made for a lot of sewing (and jigsaw-puzzling) time!  But today there's just a little bit of ice left in the shady spots, which deserves a huge whoop whoop!  I did enjoy the extra sewing time, and binge-watched my way through about half of the Marvel universe, in order.  I think I've watched the first fourteen movies so far.  FYI, Disney+ has a great feature which places all the movies in chronological sequence, so you don't have to look it up on another website.  I just keep working my way down the list.

But I guess it's time to get down to business.  Here's how last week's list went...

1.  Quilt and bind the red t-shirt quilt.
    Done!  And the quilt is winging its way to my customer as we speak.  Hooray!

2.  Make blocks for the third and fourth t-shirt quilts.
Done!  Although I did find it ironic to be working with USPS t-shirts as I wondered when, if ever, my mail would be delivered...

3.  Quilt and bind the fourth String Therapy quilt.
4.  Write the tutorial for that quilt.
Done, and done!  This is such a fun quilt, and has received a lot of "likes" on Instagram - I think it will definitely be on my Top 9 for 2021!


5.   Deliver the puzzle t-shirt quilt.  
Done!  The roads weren't safe enough until Saturday, but fortunately it made it to my customer before she celebrated her daughter's birthday!  

6.  Organize a new box of t-shirts (if it EVER gets here) and write an estimate for another t-shirt quilt.
Done! The box finally arrived Saturday (24 days after it left California) and Lilli and I spent a fun morning arranging and graphing it out.  Then after returning her home, I wrote the estimate for my customer.  She accepted, so the fabric needed is on order and I'm ready to start assembling the top!


7.  Start looking at a pattern for a quilt for a friend.
Done! And I realized when I get ready to make it, I will need 4 yards of background fabric, so I ordered it today when I placed the order for the t-shirt quilt fabric.  I'll be ready to go with it once I get through the commission work!

9.  Weather permitting, have the kids over for Mardi Gras pancakes and king cake!    
Alas, the weather did not permit, so we will be celebrating a little late, this Wednesday night!

I also looked at another top for my friend that she had partially pieced before giving it to me to complete. It turns out she had completed the four quarters of the quilt, so I joined them all together.  It's now ready for a turn on the quilt frame when I get time!

So a good and productive week (like I had a choice!) and I have a plan for this week, too.  Here's my list...

1.  Make the blocks and assemble the puzzle quilt.

2.  Quilt the next String Therapy quilt.

3.  Write the next String Therapy tutorial.

4.  Cut the sashing for the USPS t-shirt quilts.

It's a short list this week, because it's really important that I finish that puzzle quilt ASAP.  So that's where most of my focus will be this week.  Fortunately tomorrow my husband has to go to work at his old office (he's been working from home since last March, except for a handful of days when he has gone in) so I will have the house to myself with no obligations but to cook supper.  That should give me a good chunk of time to make some serious progress.  Maybe I can even get the top finished!  Wouldn't that be something?

So now, I really want to know - - - what are YOU working on this week?

Hugs!

Sarah

Sunday, February 21, 2021

Our String Therapy Prompt This Week? Find Joy!

Hi, all!

Wow, what a week it has been.  Starting Sunday we had ice, freezing rain, sleet, and more ice.  Then snow.  Then more snow - lots more snow! And no sunshine.  Even with all the extra sewing time, it was enough to make one feel blue.  And then Friday, the clouds cleared, the sun came out, and everything started to melt.  Driving around, it was a pleasure to see the ice-covered trees sparkling like diamonds in the sun.  It was a truly joyful sight!

There are so many things that bring us joy, and sometimes the answer to a blue mood is to find one of those things.  It's a good habit to develop, finding joy even in the midst of an unjoyful time.  

The next quilt I'll be sharing brings me joy in many ways.  First, and most obvious, the colors are joyful, at least to me.  It reminds me of sunrise and bright shiny days.  It brings me joy that it used up a lot of scraps.  And it brings me joy that it is made as a variation on a tutorial I wrote back in 2017 that has become one of the most requested tutorials on my blog, with almost 80,000 views since I wrote it!  So let's get started....

*&*&*&*&*&*


I was definitely finding joy in the snow for this photo of the quilt - it shows up so pretty against the white!  We'll call this quilt "Joy", and it all started when I found this great tutorial by my friend Kat of Kat&Cat Quilts.  In it, she discusses how to cut down your skinny strings into uniform 1.5" widths and sewing them together to create new fabric - and I was hooked.  


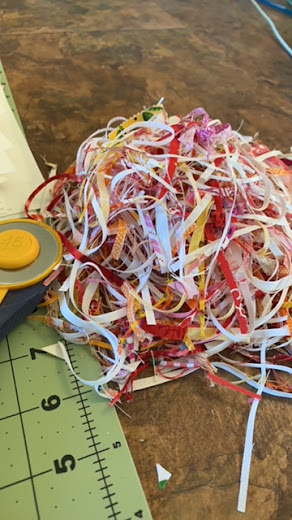
I had already sorted all my strings into color bins, so it was easy to pull what I wanted - in this case, warm colors - red, yellow, orange, pink and purple.  Anything that was wide enough went in the pile, and I trimmed away.


Then came sewing.  Lots of sewing. Lots and lots of sewing!  


But in the end it was worth it, and I had a VERY long piece of scrappy fabric, only 1.5" wide.  But that's not very useful, is it?


So after pressing the seams all in one direction,  I put the two ends together and sewed the long edge!  When I got to the end, wonder of wonders, it wasn't twisted - that NEVER happens - but if yours is, just cut it before you get to the end and the twist magically goes away!  (It took me a long time to figure that one out - I used to get it all straightened out before sewing it - what a timesaver!)


Next step?  Take that long 2.5" wide strip to the ironing board (please excuse the state of mine!) and press the seam open all the way down.  Trust me, you will be so much happier if you do this as you go rather than all at the end.


Repeat the process twice more until you have a long panel 8 strips wide, which should make it 8.5" wide(ish).  Measure yours to be sure what size it is, then cut it into squares in that measurement. So if your strip is 8.5" wide, you will cut it into 8.5" squares.  If it's 8.75" wide, you'll cut 8.75" squares.  It's all good!


Now you can play with your blocks.  Originally, I thought I wanted to use them in a railroad or basketweave pattern, and while this is pretty, I found it to be rather frantic and not calm-inducing at all.  So I experimented a little more, and looked at some pictures in Kat's blogpost.  I saw that she had turned hers into half-square triangles, and that's when it occurred to me that it might make a pretty Supernova quilt!  (You can find the tutorial here.) (My strip of "made fabric" yielded 41 8.5" squares, which meant I could make 82 half square triangles - enough for a 9x9 layout with one left over.  My HSTs ended up being trimmed down to a little less than 7.5", and my quilt is about 63" square.  If you didn't make enough squares, you can either make more made fabric, or make your quilt smaller.)


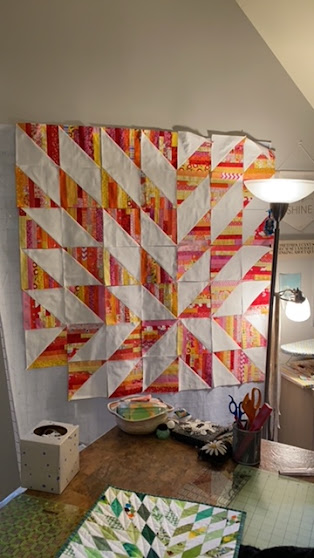
So after making the obligatory pile of pretty trimmings (yes, you should ALWAYS square up your half-square triangle blocks), I started laying it out on the design wall...


Oh, yeah, I like where this is going!  You can see my mini version of the Supernova quilt in the foreground - I was using it as my pattern for the layout.


I have to admit, I did leave it up on the design wall once it was pieced for a while because it was so bright and cheerful!

And then it was finished, and time for a photo shoot!


My photography assistant thought he'd be cute as I explained to him the proper way to hold a quilt for pictures...


I apparently still haven't taught him the finer points of holding the corners!


Look at how it shines in the beautiful sunshine!


And here's the only shot I managed to get of the back - a really cute moon print from Far Far Away II by Heather Ross. It was PERFECT for the back of this quilt!  And of course, my photographer's assistant (aka Best Husband Ever) trying to hide...


*&*&*&*&*&*

So remember this week to find joy - it may be hiding in your string stash!!!

Hugs!

Sarah