Friday, May 2, 2014

Can I Get A Whoop Whoop? Time For A Giveaway!!!

Hi, all!

It’s Friday again - are you ready to get your whoop-whoop on?  I know I am!!!  And hopefully my whoop-whoop will make you want to whoop too.....  Because.....


...is such a wonderful number!!!  Last Friday night at 10:35, just as I was getting ready to shut down my computer and go to bed, the little counter on my Followers button turned over to 1000!  Woohoo and whoop whoop!!  The ladies that I was staying with in Paducah thought I was a little odd when I got up and did a little happy dance - but who cares?  It’s a silly thing to be excited about, but since I am, I thought you all should be too - so let’s have a giveaway!!

How would you like to have a chance to take this home..

A Chacco chalk fabric marker (truly a great little tool - the built in wheel makes it really easy to make lovely straight and curved lines)

and these....

two packages of fabric addict post-it notes!

and this....

A charm pack of Bear Country School!

and this....

a covered pocket grid journal!

and this...

a hexie shaped paper pieced pin cushion!

and this... 


a quilter’s pillow cover, custom made by me!

and yes, even this!


One yard of Heather Ross’s cute froggie picnic print from the Briar Patch line!

This lovely bundle of loot will go to one lucky person!  Here’s how you can get in on the fun

1.  Leave a comment answering the question, “If you could buy any fabric in the world, past or present, which one would it be?”

2.  If you are a follower, you get another entry!  Leave another comment letting me know you’re a follower.

3.  If you link up for Whoop Whoop Friday, you get another entry!

I’ll draw a winner next Thursday night and post it in next Friday’s Whoop Whoop post - giving someone else a reason to whoop it up!

*&*&*&*&*&*&*


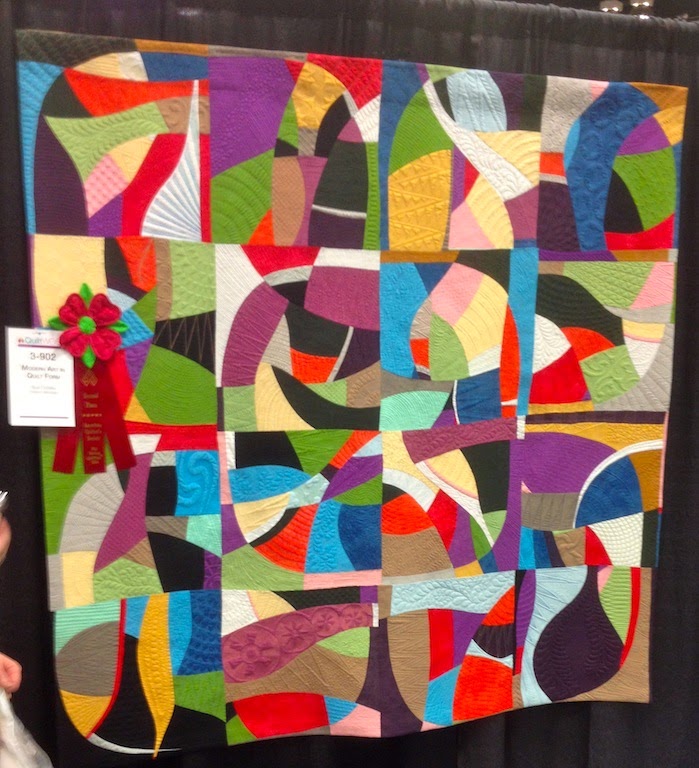
And now, because I didn’t had a chance to do this earlier this week, here’s some photos from our trip to the AQS Show in Paducah....  I’ll let you enjoy these without commentary - just lots of pretty eye candy!


Feel inspired?  I know I sure do!!

*&*&*&*&*&*&*

And now it's your turn!


What's made you dance the happy dance this week?

Share with us - we want to dance right along with you!

For those of you new to Whoop Whoop Fridays,
It doesn't have to be a finish - just something
that's made you happy!

The party will stay open longer this week - 

Until next Thursday at 6 pm CST.

I hope you'll join in the fun!

Hugs!

Sarah


Monday, April 28, 2014

Make-A-List Monday - Back From Paducah!

Hi, all!


It’s Monday, and Quilt Week in Paducah is over!  We had a blast on our adventure there - I even took Flat Lilli with me, and look who she met!  Quilt Man and Bobbin!


Paducah really goes all out for Quilt Week - if you ever have a chance to go, you should!  I’ll share some pictures from the show later on this week.

For now, though, let’s see how last week’s list went

1.  Quilt the Swoon quilt.
Done!  I’m so happy - I finished this quilt about 20 minutes before I walked out the door to go to Paducah - binding and everything!  Woohoo!!  I promise better pictures on Friday (if the weather clears up before then!)


2.  Quilt the t-shirt commission quilt!
Also done!  This turned out beautifully, thanks to fusible woven interfacing and straight line quilting.  It’s all delivered, ready to be given to its new owner at graduation!


3.  Work on changing my email address over with 
everyone under the sun...
Started.  I’ve sent out a blanket email (you may have received one!) and I’m changing it with companies that I receive email from, but it’s a slow process!

4.  Put the borders on the Celtic Solstice quilt top.
Started, but not nearly finished.  I just ran out of time!

5.  Make a ministry quilt for a man with brain issues.
Fortunately, Tommy had finished a quilt last week that didn’t have a home yet, so that quilt went to this gentleman.  Isn’t it gorgeous?


6.  Work on designing blocks for two upcoming blog hops.
The designs are ready - I just need to do the tutorials now!

7.  Keep up with all other quilt ministry needs as they arise.
We had one more quilt request come in this week, and I was really worried that I wouldn’t be able to get it done in time for us to pray over it on Wednesday night.  But then, according to God’s plan, I’m sure, we received a box with several finished quilts in it!  One of them was perfect for this need.  This quilt is going to a gentleman with cancer of the esophagus.

Whew!  I sure am glad for God’s provision - He knows just when we need something and always provides!  

Here’s what’s on tap for this week

1.  Quilt a ministry member’s quilt for her neighbor who is sick.

2.  Finish a ministry quilt for a woman getting ready 
for open heart surgery.

3.  Finish a ministry quilt for a man with bilateral lung cancer.

4.  Write the tutorials for the block blog hops.

5.  Write up a quilt tutorial that has been requested.

6.  Put the borders on the Celtic Solstice quilt top.

7.  Continue switching over email addresses.

8.  Pull yard sale items for my daughter’s sale.

9.  Quilt a couple of ministry quilts to get ahead of the need.

10. Keep up with any ministry needs as they arise.

11. Research monetizing my blog.

As much as I hate to add that last item to the list, I think I’m going to have to do it.  When we switched over our internet service, we traded unlimited poor service for better service with a limit on how many gigabytes of data we could access each month.  Our previous ISP gave us unlimited access, or should I say it was unlimited as long as it was working!  But the new one has limits, and it’s expensive to increase those limits.  I miss being able to surf and check out everyone’s blogs at home freely, so I’m planning to do some limited advertising on my blog to help cover the cost of the internet service.  I’m going to do my best to insure that the advertising is relevant to what I blog about, and as unobtrusive as possible.  So please bear with me as I go through the learning process!  And if you’ve had experience with this and have any words of advice, I’d love to hear them.

So now it’s time to get to work!  But the last question on my mind is - - - what are YOU working on this week?

Hugs!

Sarah

PS - Be sure to check back in on Friday - there will be a giveaway to celebrate 1000 followers!!!  Woohoo!!


Sunday, April 27, 2014

Hands2Help - Jamie's Southern H2H Tutorial

Hi, all!

I am so very happy to introduce you to one of my favorite people today - Jamie of L'Fair Quilts!  I found Jamie's blog long ago, when I first started blogging, and she's been a great source of inspiration to me as I learned to quilt.  She's also been a huge supporter of my blogging efforts, and of the Hands2Help Challenge.

She's also a fabulous quilt designer - here's a quilt I made from her pattern "Blue Me Away" - - - 


I call my version "Orange You Glad" - and it's my favorite quilt.  Every time I look at it, I smile!  Be sure to check out more of her patterns at Black Cat Creations.

Today, Jamie's bringing us a tutorial for a great quilt she's designed.  I'm so excited to see how to make this quilt - I've seen it in person, but didn't know how she made it.  Now I'll have to make one of my own!  Enjoy!!

*&*&*&*&*&*&*&*


Hi ya'll, I am Jamie, coming to you from southern Houma, Louisiana, I bring to you a versatile quilt pattern that can be used for the youngest to the oldest (boy or girl, man or women)  I have made this quilt several times now ….. as a baby quilt, the 2012 Hands2Help Challenge and earlier this year, for a baseball team fund raiser.   Each of these samples are shown on my blog today, at L’Fair Quilts.
 
The version I have chosen to share today is color-blocked…. something that makes you think of the 1960s.  Against the black background, the bright colors pop, each defining a quadrant radiating from a yellow center.

Finished 66" x 78"


Here is what you need (will have left-overs)

One (1) yard each of orange, green, blue and purple
Quarter yard (1/4) of yellow
Four (4) yards of black (includes binding)
Five (5) yards of backing.

Are you ready:  let’s start cutting….


Orange:
Two (2) 6 7/8” x WOF strips, then cut seven (7) 6 7/8” squares
Six (6) 2 ½” x WOF strips

Blue:
Two (2) 6 7/8” x WOF strips, then seven (7) 6 7/8” squares
Six (6) 2 ½” x WOF strips

Green:
One (1) 6 7/8” X WOF strip, then five (5) 6 7/8” squares
Six (6) 2 ½” X WOF strips

Purple:
One (1) 6 7/8” X WOF strip, then five (5) 6 7/8” squares
Six (6) 2 ½” X WOF strips

Yellow:
Three (3) 2 ½” WOF strips, then cut one (1) 27” strip and five (5) 13” strips

Black:
Five (5) 6 7/8” X WOF strips, then (24) 6 7/8” squares
Three (3) 6 ½” x WOF strips, then (18) 6 ½” squares
Twenty-four (24) 2 ½” x WOF strips
Three (3) 2 ½” x WOF strips, then cut two (2) 27” strips, and four 13” strips
Eight (8) 2 ½” x WOF strips for the binding

Blocks Assembled:


Using (1) black 6 7/8”square and (1) orange 6 7/8” square, right sides together, draw a diagonal line on the back side of the orange.  Stitch ¼” on each side of drawn line.  Cut apart on drawn line making two (2) half-square triangles (HSTs).  Repeat to make a total of (14) orange/black HSTs.  Press toward the black.


Repeat for (14) blue/black HSTs.


Repeat for (10) green/black HSTs.


Repeat for (10) purple/black HSTs.


 Join (2) black 2 ½” WOF strips and (1) orange 2 ½” WOF strip as follows, then cut into five (5) 6 ½” rail fence units.


Repeat above instructions and make five (5) blue/black rail fences.


  Make five (5) green/black rail fences.


Make five (5) purple/black rail fences.


Join together (2) black 2 ½” x 27” strips with (1) yellow 2 ½” x 27” strip, cut into four (4) 6 ½” rail fences.


Join together (2) orange 2 ½” x WOF strips with (1) black 2 ½” x WOF strip, (Need two sets). Join together (1) orange 2 ½” x WOF strips with (2) black 2 ½” x WOF strips (one set).


 Cut each strip set into (13) 2 ½” sections to join one of each into (13) orange/black nine patches.

  
Repeat above instructions, for a total of (13) blue/black nine patches.


Repeat for a total of (11) green/black nine patches.


Repeat for a total of (11) purple/black nine patches.


Join together (2) yellow 2 ½” x 13” strips with (1) black 2 ½” x 13”, (Need two sets). Join together (1) yellow 2 ½” x 13” strips with (2) black 2 ½” x 13” strips (one set).  Cut each strip set into (5) 2 ½” sections to join one of each into (5) yellow/black nine patches.

Now the fun begins….using the picture and a design wall (or floor), lay out the blocks into 11 rows across and 13 down.  Sew your blocks together from top to bottom and then sew the columns together.

Layer the quilt top with your favorite batting and backing.  Bind with black.
*&*&*&*&*&*&*

Isn't this a fabulous quilt?  So easy, yet it looks so intricate!  Be sure to hop over and check out the other versions of this quilt on Jamie's blog today, too!  

Thanks for all you're doing for the Hands2Help Challenge - remember, you're making a huge difference in the lives of so many with your talents!  And be sure to check back next Sunday for a peek into the creative genius of our next guest blogger, Carol!

Hugs!

Sarah

PS - Did you notice the followers count on the top left side bar?  Yep, you know what that means - - - a giveaway will be coming soon!  Stay tuned.