
Sunday, February 11, 2024

Fat Quarter Frenzy Is Back, With Kaleidoscope!


Hi, all!

Time snuck up on me this week, and I almost forgot to write this week's Fat Quarter Frenzy post, but here I am!  If this is your first time stopping by, we've just started a series of tutorials for simple, quick quilts that can be made with fat quarters.  Last week we made a St. Louis 16-patch that used up sixteen fat quarters from my rather voluminous stash of them.  This week, we're moving from square to triangles as we create a beautiful top that reminds me of a kaleidoscope image.  Let's go!

*&*&*&*&*&*&*&*

Kaleidoscope

A Fat Quarter Frenzy Quilt


Materials:


14 Fat Quarters (FQ) measuring a minimum of 17” x 20” after squaring up.  

There should be a wide range of colors in your FQs to achieve a good effect.


Cutting:


From each squared up FQ, cut 7 strips 3” wide x 17”.  When finished, you should have 98 strips.


Assembly:


Sort the strips into 32 sets of three contrasting strips.  (You will have two left over)


Sew the strip sets together, always starting your seams from the same end of the set.


Once all your strip sets are sewn together, press the seams.  (I chose to press mine open so that they would be easier to match)


More Cutting:


Now you will crosscut your strip sets into two blocks.  Measure your strip sets and see how wide they are.  Mine were 8.25” wide, so I cut my blocks 8.25” square.  After cutting your strip sets, you will have 64 strip blocks.


Now pair up the blocks that will be in each large block.  You will need two sets of two identical strip blocks for each  block. (16 sets total) 
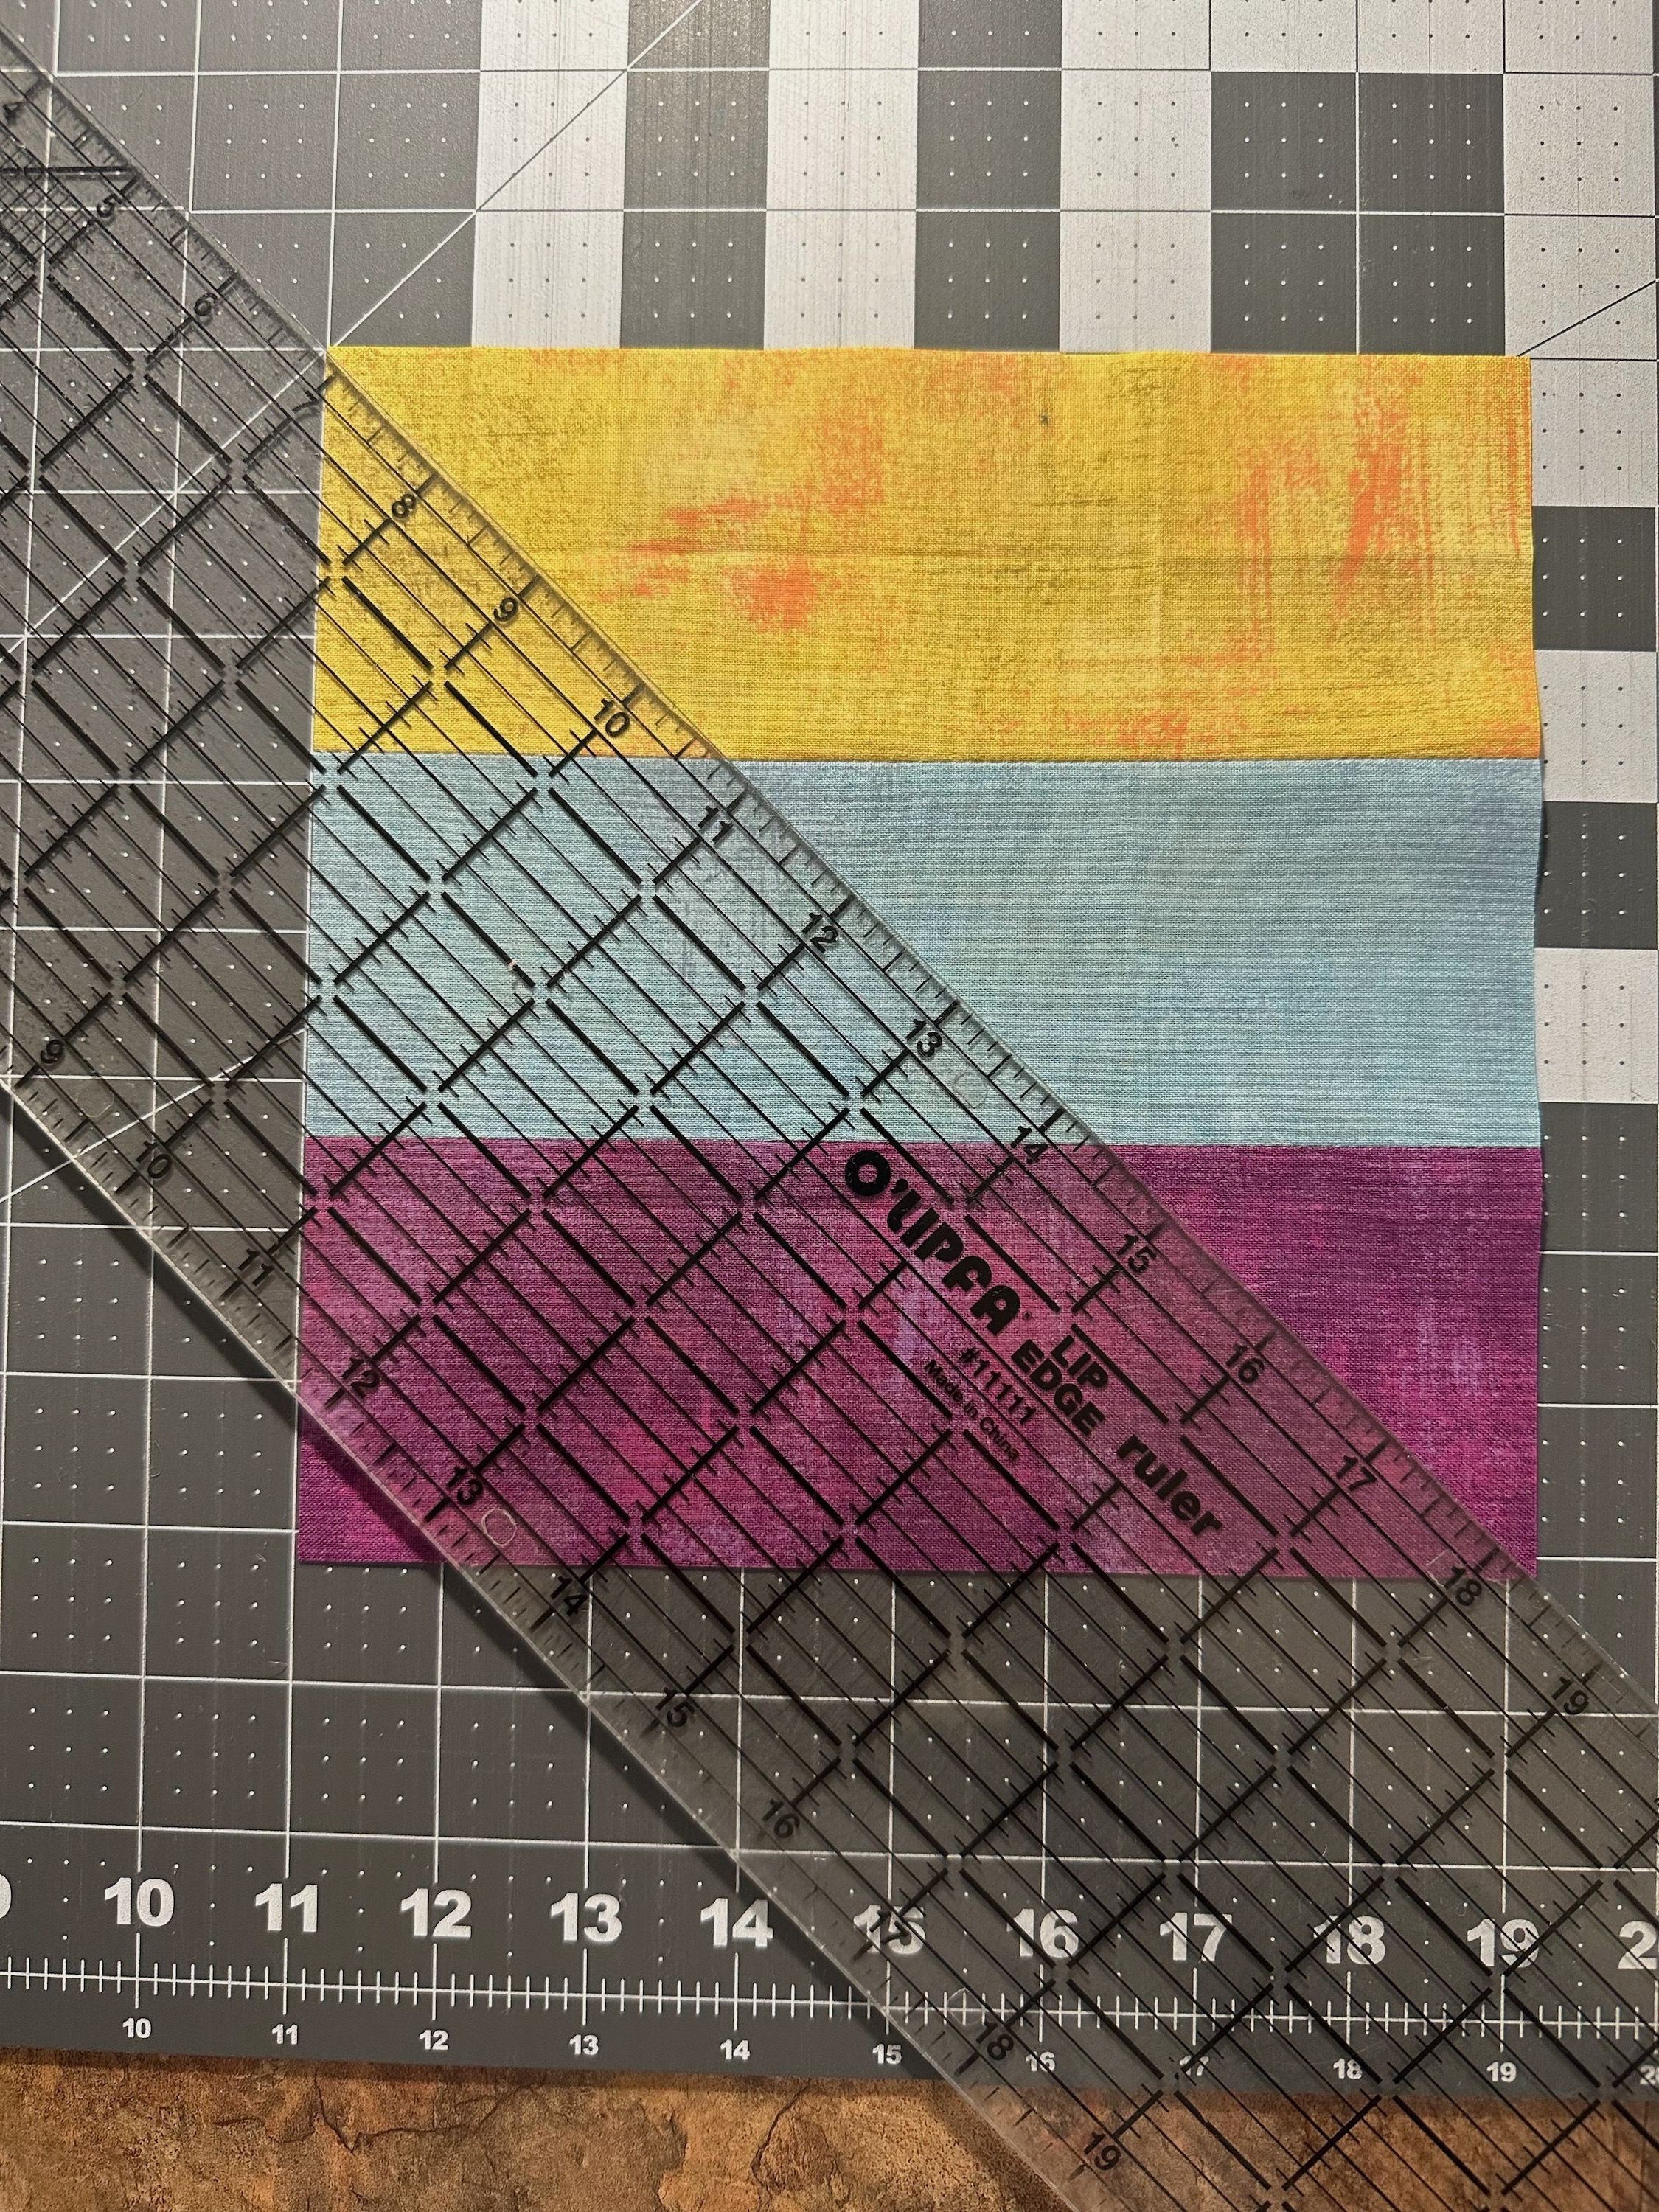


Choose one of the sets you just prepared, and take the first identical set of strip blocks and lay them on your cutting mat with the stripes going horizontally.  (BE SURE the blocks are laid with the same color at the top!)  Cut these two on the diagonal from upper left to lower right.


Take the second identical set of strip blocks and lay them on your cutting mat with the stripes going horizontally.  (BE SURE the blocks are laid with the same color at the top!) Cut these two on the diagonal from upper right to lower left.  Keep all of these triangle sets (2 sets of four triangles) together to be assembled into one large block.


Repeat for all 16 block sets.


Back to Sewing:


I chose to use two different block designs in my quilt, because I liked the secondary patterns it created.  If you prefer, you can assemble all of your blocks using just one or the other of the designs.


 For each of the two blocks, you will assemble the same basic component block.  Do this by taking one triangle of each color set and sewing them together along the long diagonal, matching the seams.  Take care not to stretch this seam as you sew - it is cut on the bias.  Press the seam open.


Repeat until all 64 component blocks are assembled.  You should have two sets of two identical component blocks for each large block.


 Square up those blocks so that they are all the same size, using a ruler that allows you to place a diagonal line along the diagonal seam of the block.  You may not trim off much, but believe me, but will make your quilt look much nicer in the end!


Now on to assembly of the blocks.


 Block #1:


Block #1 reminds me of the old TV test patterns!  It’s easy to assemble.  Take two sets of two identical blocks and place two identical blocks in the upper right and lower left corners, with the small triangles in the center.  Take the other two and place them in the upper left and lower right corners, with the small triangles in the center.  Assemble, pressing the seams open.  


If you are making the quilt as shown, make 8 of these blocks.  If you are using only this block, make 16.


Block #2:       


To assemble this block, lay your component blocks in a pinwheel formation, with the same color strips on the outside of the block.  Having all the same colored sides in the center is what creates the hooked pinwheel.  This block is a good one for the guideline “Look Twice, Sew Once”.  Be sure it is properly laid out before you sew it, and you will save yourself a good bit of time with our little friend Jack (the Ripper)!


If you are making the quilt as shown, make 8 of these blocks.  If you are using only this block, make 16.


 Once you have completed all sixteen blocks, arrange them in your preferred layout.  I laid mine out in a checkerboard pattern alternating Block #1 and Block #2 to achieve the secondary pattern shown.


Assemble your quilt top, and quilt as desired!


*&*&*&*&*&*&*

Now, I know some of you are looking at this design and thinking that it's a lot of seam matching - but while I agree there are a lot of seams to match, I didn't have any trouble achieving neat intersections.  I don't know if that's because I pressed my seams open, but being able to pin through the seams (over the threads) seemed to help make them match neatly.  And don't skip the squaring-up step - it's the most important part of making a half-square triangle quilt, and I guarantee you will be happier with your finished quilt if you do!

See you next week with another simple quilt!

Hugs!

Sarah

Friday, February 9, 2024

Can I Get a Whoop Whoop? A Bit of This and That!


Hi, all!

Welcome to the (almost) weekend!  It's finally Friday, and we all know what that means - it's time for us to get our whoop whoop on!  If you're new here, you should know that this doesn't have to be a finish - just something you're happy about.  We all need to celebrate the little things, don't we?  So let's go!

*&*&*&*&*&*&*

It's been a busy week around my place, starting with a re-visit of the bargello process...


As I made my first version, I realized there were some things I could do differently that would make the process easier.  So I decided to give it another whirl!  I tried to work more with the size of my vertical cuts, and while I made some mistakes - this one doesn't have an easy flow to it - I learned a lot that will help me the next time I try a bargello!


But once I finished that top, it was time to put away the sewing machine and start some serious t-shirt quilt planning.  I spent most of the day Thursday putting together the to-scale paper plan for a customer quilt - whew!


And one more thing I did this week - I made my first Tres Leches cake from scratch, and it was delicious!  My husband said it was a lovely thing to eat after a bowl of spicy chicken tortilla soup - creamy and sweet, and it has to be good for you with all that milk, right??

So - - - can I get a whoop whoop?

*&*&*&*&*&*&*

And now it's your turn!

What's got you whooping it up this week?


What's making you do a little happy dance?

Share!  We want to dance right along with you,

And it's always more fun to dance with friends!

The party will stay open until Sunday midnight.

Hope to see you there!

Hugs!

Sarah

Sunday, February 4, 2024

Fat Quarter Frenzy Begins with Meet Me In St. Louis!


Hi, all!

Welcome to this year's tutorial series, Fat Quarter Frenzy!  Born from the inspiration of my oldest granddaughter, who so kindly pointed out that I had a "butt-load of fat quarters", I'll be sharing six simple quilt tutorials, all using fat quarters as their source of fabric.  Of course, you can use yardage or scraps if you choose, but the tutorials are written using fat quarters.

If you're like me, you love to buy fat quarter bundles because they are such a fun way to get your hands on a full fabric line.  All those beautiful fabrics just waiting to be turned into quilts - but sometimes they just languish away on the shelf, looking pretty but not much else. So let's use them!

A word here about fat quarters!  As I've been prepping my own for use in these tutorials, I have found serious discrepancies in the sizes of fat quarters.  By definition, a fat quarter should be 18" x 20-22", but I have found many of my bundled fat quarters to be only approximately 17" wide when squared up.  So for purposes of these tutorials, I am assuming that fat quarters are 17" x 20".  Yours may be larger than that, and I trust that you will find good use for any scraps that are left over!

With that being said, let's get started with our first quilt tutorial, which I call "Meet Me In St. Louis" in honor of its classic block, the St. Louis 16-patch.  I was not familiar with this block before, but it certainly lends itself to fat quarters, as you will see that there is very little waste.


Meet Me In St. Louis

A Fat Quarter Friendly Quilt


Materials:


16 Fat Quarters (FQ) measuring (squared up) a minimum of 17” x 20”:

8 light (L) FQ, 8 dark (D) FQ *or two contrasting colors can be used*


Cutting:


Square up your FQ, using the selvage edge as your constant straight.  Line it up on the straight of your cutting mat, then trim the right and left edges to straight.


Leaving the FQ in place on the mat, cut four strips 4.25” wide by 20”+ long.  


Repeat for all 16 FQs.  You should now have 32 llght strips and 32 dark strips.


Assembly: 


Divide your strips into 16 sets, pairing two identical light (L) strips with two identical dark (D)  strips. 


Assemble strip sets, alternating the strips in a LDLD pattern.   I recommend starting sewing from the selvage ends so the sets are basically straight on that end for economy’s sake.


Press seams towards the dark strips.  (If you are using contrasting colors, press toward the same color on all strip sets)


Crosscut the strip sets in the following manner:  laying your strip set with the strips running horizontal on the mat, line up the straight bottom with the straight on your mat.  Cut off the selvage edges.  


Then cut the strip set into 4 4.25” wide block strips.  Repeat for all strip sets, being sure to keep the block strips from each strip set together.


Take the four block strips and arrange them in a checkerboard 16-patch pattern.  Your seams should nest into each other.  Assemble the block.  Repeat for all 16 blocks.


 Arrange your 16-patch blocks and  assemble your quilt!


Yields one approximately 60” square quilt.

*&*&*&*&*&*&*

And there you have it - the first of six tutorials for this year's series, Fat Quarter Frenzy!  I hope you'll enjoy making these quilts as much as I have.  Most are quick and simple, perfect for comfort quilts to give away - and hopefully they'll help you use up some stray fat quarters if you also have a "butt-load" of them!

See you next Sunday with another fun quilt tutorial!

Hugs!

Sarah