
Hi, all!
It's been so exciting seeing all of your progress on your Hands2Help quilts - sorry I haven't been commenting, but I've been so so busy! I'm glad you're back this week, because we've got an awesome guest post by Linda Swanekamp, who blogs over at Art In Search. You guys are going to LOVE this quilt tutorial!!
*&*&*&*&*&*&*&*

Maybe-
-You don't think you have any extra time to cut something out and make it by the deadline
-You only make complicated quilts that take up most of your energy
-You have a hard time with multiple blocks and steps
-You can't go and buy any fabric just now
-You are a new or inexperienced quilter
-You don't have the colors you want
-You hate making borders
-You don't think someone might like what you make
-You like what you see but you would tweak it with ...
-You just want to try something without a big investment of time and money
-You could try one
And more.
This quilt is very flexible, changeable, and forgiving. I am going to explain one arrangement , but please, share what you do with it. Most important, someone needs this quilt.
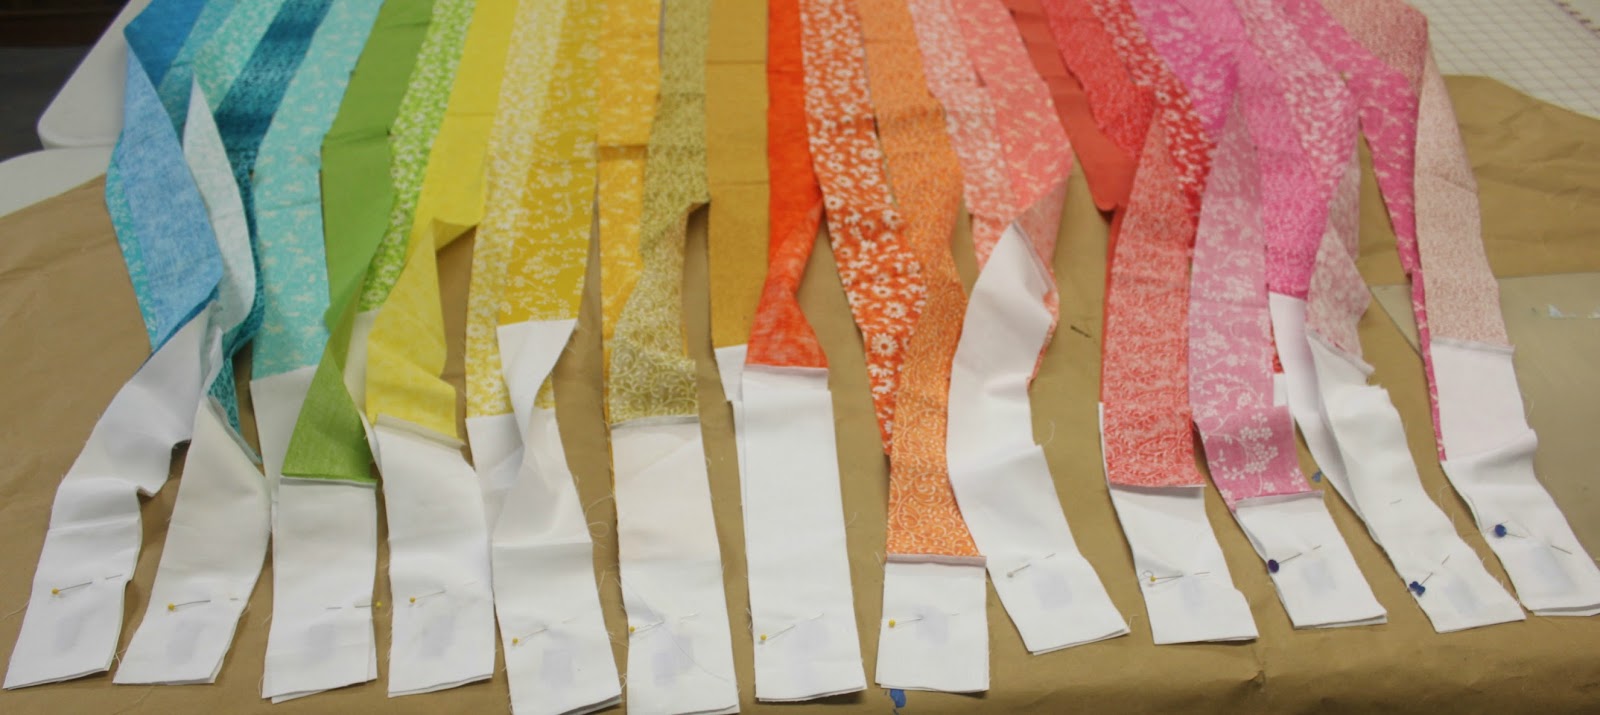
For this size, about 52" x 60", I used 26 different 2.5" WOF (width of fabric) strips and 13- 2.5" white WOF strips (you can use any one solid color- I have used black tones). The 26 different strips could be any theme or color temperature or pattern. I have used batiks, kid fabric, Redwhiteblue, rainbow tones, etc.

 |
| Black tone strips instead of white |
I cut the Kona white strips in half so they were about 21" long.
Lay out the 26 strips to figure a rough placement, side by side the long (vertical) way, and then sew the 2 short ends of each strip to a white strip short ends, making a tube with each strip.
 |
| All the strips |
 |
| Trim off selvages |
 |
| Chain piecing the short ends of the strips |

 |
| The tube |
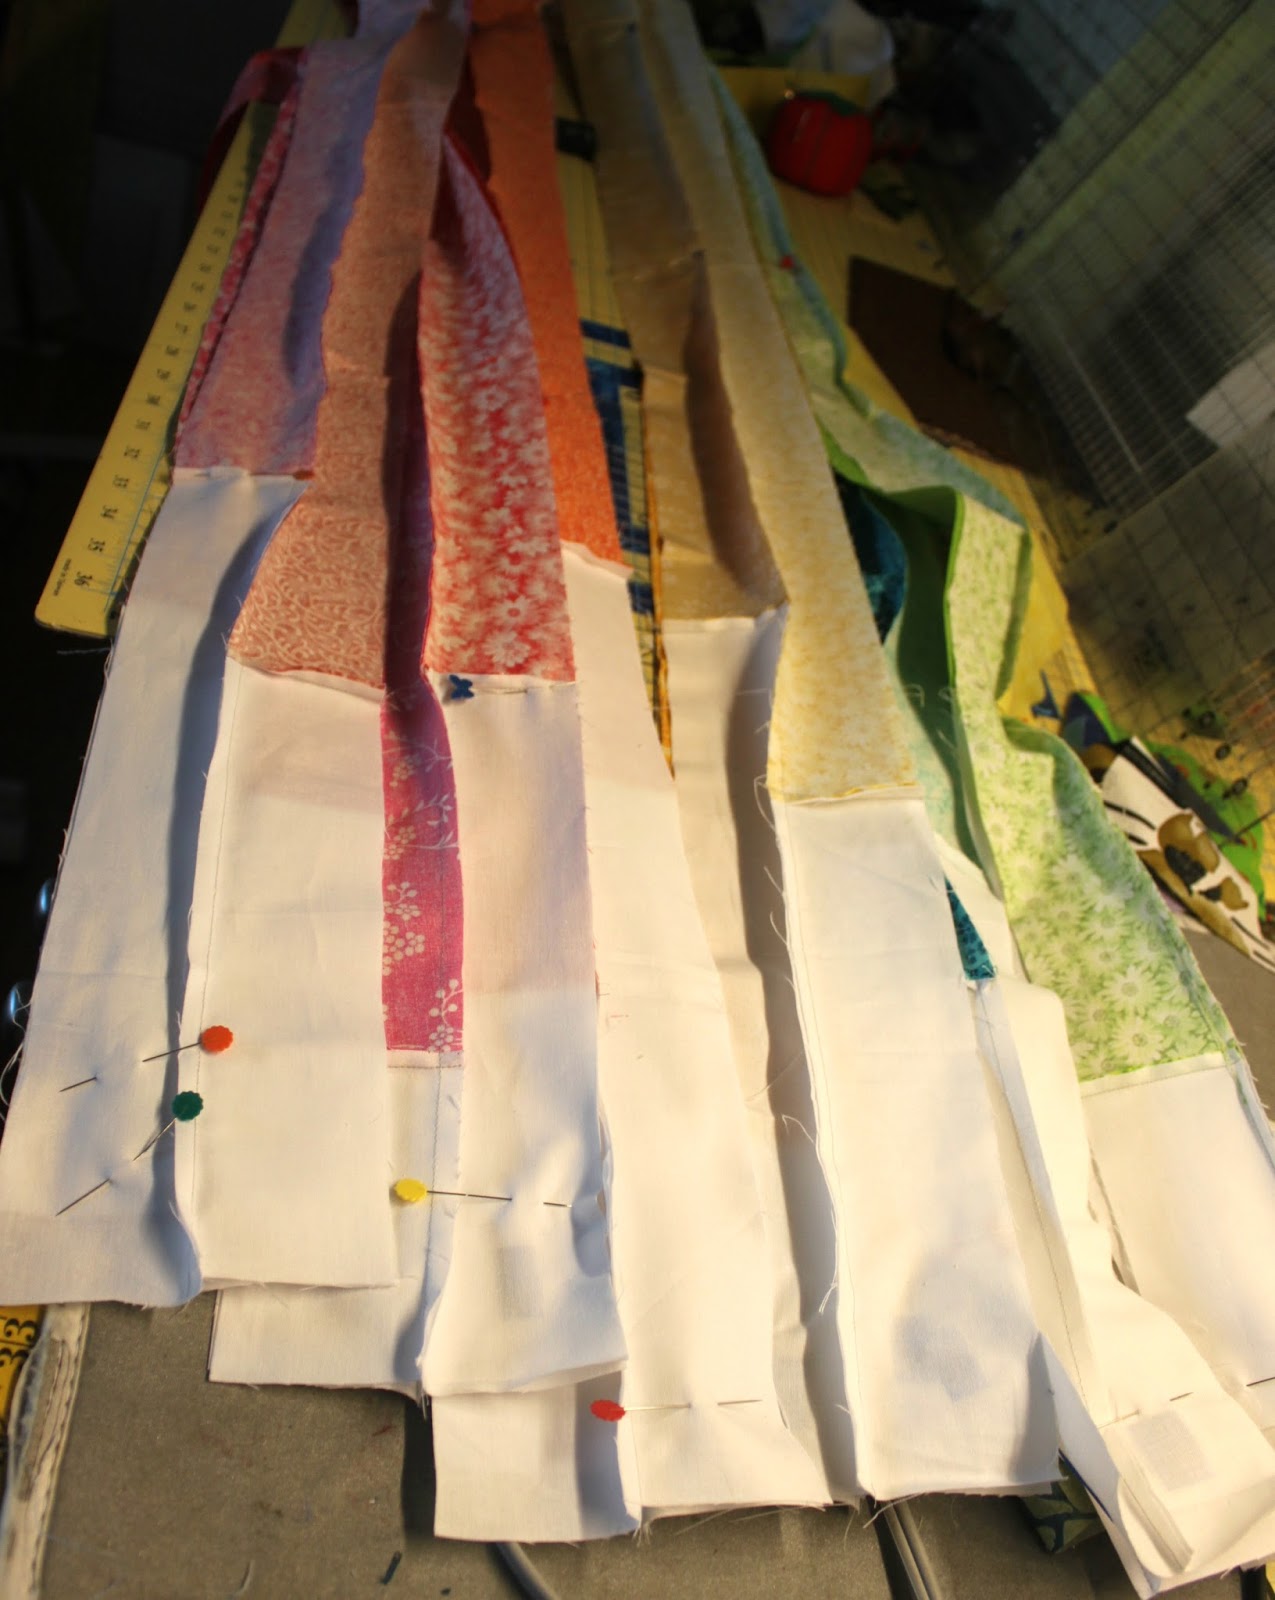
Starting at the first tube, cut the white strip randomly across the 2.5" width and open the tube the long way. The next strip, decide where to randomly cut the white to stagger the color fabric up or down. In this quilt, I cut the white strip.
 |
| Tubes on table laid out in order |

(In another quilt, I cut the color strips-the color strips are then at the top and bottom with the white staggered strips in the middle).
 |
| Cutting the colors instead of the white example |
After all the white strips were cut and I was satisfied with the placement, I used painters tape at the top of the strips and numbered 1 - 26. I made sure the tops were even.


Your choice- you could trim all the colored strips before you sew the short ends so everything is even top and bottom, but I just use the strips as is and the bottom is uneven until I am all done. If one strip is real short, I can just add some more white on that end instead of trimming everything short.
Sew all the long strips in pairs from the TOP. I pinned all the pairs right side together with the pin on the side of the seam that needed to be sewn and then chain pieced all the pairs.
 |
| All strip pairs ready at machine for sewing |
Cut the threads and now pin the pairs to the pairs next to them in number. I started a few pins at the top on the side that needed to be sewn and a pin in the middle, and then the bottom (in my case it was uneven). After pinning the pairs of pairs, sew the seams from the BOTTOM to the top so you do not get waves in the strips.
After these sets, pin the larger strip sets from the top to keep even, but sew from the BOTTOM to the top.
Eventually, all strip sets are sewn. I then pressed all the seams in one direction with my new Eurosteam iron, first on the back, then on the front.
 |
| Pairs pinned to pairs with pin on the side it will be sewn |
 |
| 2 sets of pairs, now pin and sew this seam |
As soon as you square up the bottom and top of the strips, you are done! No need for borders. If you would like it longer, you can sew on white strips across the top and bottom.
This quilt could even be sewn with the strips horizontal so it would be 60 inches across or longer depending on the length of your white strips.
 |
| Strips sewn horizontally |
You would have to add more colored strips (finish at 2"). For example, 40 horizontal strips would give you about 80" length.
I really am a much better quilter than writer, so if you have a question, please ask.
Now, maybe you have an urge to go and make one?
*&*&*&*&*&*&*
WOW! I know I certainly want to go make one of these - and I'm thinking about that overflowing binding box again! Such a simple quilt, it would work up in a snap - and if you use scraps, it's basically free! That's a win-win any way you look at it!! Thank you so much, Linda, for sharing this great tutorial. I bet it makes it on a lot of "bucket lists"!
See you next week when we have another great guest blogger - Sharon from Vrooman's Quilts. And keep on quilting, because there are lots of folks out there who need a quilty hug...
Hugs!
Sarah
(Sorry about the weird color and font at the end of this post - HTML is not my friend!!)
(Sorry about the weird color and font at the end of this post - HTML is not my friend!!)
I am in love with this! What a great way to use up some strips - so versatile, too. This would make a fun sit-n-sew project with my guild.
ReplyDeleteI really like this idea. I think this will be my pattern for the charity quilt. Thank you!
ReplyDeleteI started working on mine this week, stop by and see...https://mindingmomma.wordpress.com/2016/04/23/charity-quilt-cuttings/
ReplyDeleteGreat idea! Thank you, Linda. You are right. Someone needs this quilt! and it's perfect :-)
ReplyDeleteSuper fabulous tutorial--this is a great strippy quilt--so nice and modern looking would work with the lego like strips, too...hugs, Julierose
ReplyDeleteI love this tutorial. I had seen a quilt similar to this in a catalog and tore it out for inspiration...4 years ago! It's such a great modern take on quilts. Love the one where she cut the colored strips instead. Such a simple change, so much impact.
ReplyDeleteThank you Linda and Sarah for the tutorial. Love the rainbow look, but also the reverse look. So many choices.
ReplyDeleteHugs
Wow, wonderful tutorial...can't wait to go make one myself. Thanks so much for sharing!
ReplyDeleteGreat tutorial!
ReplyDeletesuch a great tutorial and I love how modern it looks. I don't have any 2.5 strips but I'm sure I can cut some from my stash ;-)
ReplyDeleteGreat idea, and very understandable tutorial. Thanks! I do still have a lot of strips around here, so I will have to think about that one when I finish the Batik H quilt.
ReplyDeleteWow!! What a FUN quilt... in ALL of its various iterations. I can't WAIT to make one (or MORE) of my own!!
ReplyDeleteWhat a great tutorial. What a great way to use up strips. Definitely need to bookmark this. Thanks for sharing.
ReplyDeleteLinda I really love why you named this quilt "Maybe"! Your tutorial is great and also very encouraging!
ReplyDeleteThanks for the useful tip...sometimes it can just be that easy!
ReplyDelete