
Hi, all!
It's hard to believe, but this Sunday marks the halfway point of this year's Hands2Help Comfort Quilt Challenge! I've already seen so many beautiful quilts heading their way to bring comfort and cheer - thank you all for your enthusiastic participation!
And today, we have a new guest blogger - actually, this is her first experience with blogging, as she doesn't have one of her own. Pam M. lives and creates in a fabulous little studio in DeLand, Florida. Take a virtual tour through her studio as she shares about it, and then give her a shout-out in the comments!
*&*&*&*&*&*&*
Becoming a guest blogger is a new first for me and I’m quite excited about it. When I offered to do this, Sarah was interested in my suggestion to blog about my quilting room. It has evolved over the last 10 years and it’s not only pretty but extremely functional.
First, a little bit about me. I come from a long line of sewists. Our mother sewed all of our clothes and we learned to sew from a young age. I made most of my clothes from age 14 until my husband graduated from law school when I was almost 30. Life then intervened (grad school, demanding jobs traveling 4-5 nights a week and then children) so the sewing machine lived in the closet for several decades.
I made my first quilt in 2010, bought my BabyLock Ellisimo Gold in 2011, retired as a CEO in 2013 and have made more than 50 quilts. I also love to do machine embroidery. Most of my quilts have a block with an embroidered name, monogram or design plus a custom embroidered label detailing the recipient, year, occasion, and my name as the maker.
Once both kids had left the nest, I started using the smaller bedroom as my studio. When I found a used Koala Dual Mate cabinet with the Outback, I moved to the bigger room! I would love more space (not possible in this house!) but I have tweaked this room to be very functional. I actually have enough space to include one or two quilting friends and every one has cutting space and easy access to the ironing center. Fun!


So, let’s start the tour. The first two pictures are shots of the entire room - from each end of the room. Four windows provide great light! The Koala quilting table is huge but wonderful. The BabyLock Ellisimo has pride of place and is lowered to square up a quilt using the 4’ x 6’ top. The BabyLock Presto II is in the other machine space and is used to go to classes or when someone needs a machine. There is a lot of storage in this cabinet in the machine side.

Under the other side with the “Outback” is more storage space including an Ikea cart with supplies and notions, a printer and various other items that aren’t used as much. (The top is covered with the Add-A-Mat cutting mats which allow various configurations depending on what needs to be covered. Ordered these from Nancy’s Notions and Jo-Anns. They are hard to find now.)

At the north end of the studio is a separate cutting/work table, also covered with the Add-A-Mats. It has a spinning tool caddy and a rack for most of the rulers. Additional rulers are hung on the wall with Command hooks or in another ruler rack sitting on top of a small chest. This table has great lighting! (Table came from World Market a number of years ago - I'm sure it's no longer available outlook for a work height table with storage space underneath.)


Underneath the cutting table are two shelves that contain my stash - 24 project boxes that each contain a “Quilt In Waiting” (QIW) with all fabric needed for the front and back and a label specifying the planned pattern! (I know - does anal retentive have a hyphen?) I have a cork board with all of the QIW shown as a reminder that I have more than 24 QIWs and not to buy more fabric. (Actually it has controlled me quite a bit in the last 3 years!)
On the wall to the right of the cutting table is a handy design wall. It’s a Fons & Porter design wall with the top grommets cut off, turned under, slid on a steel bar and held up with the quilt hanger from the MagnificentQuilt.com on top of styrofoam-like packing boards from sliding glass doors - free at Lowes if they save them!

One of my favorite work areas is the ironing center with the stabilizer cabinet to the right. The wine cabinet (T.J.Maxx) stores the most frequently used stabilizers in the cubbies. A few are in the cabinet drawer or the top right drawer of the ironing center. (Many wine racks will provide you with similar storage.)

The ironing center is one of the most efficient and well-lit workspaces. It is an IKEA sideboard (no longer available) with a top that is a fabric & batting wrapped thick plywood board - easy to replace the fabric when it gets stained. That board rests on non-skid shelf liner so it doesn’t move around while in use. It’s 48” wide x 18” deep to make it perfect to iron across the width of fabric. The hook rack above is where the larger scissors are easy to grab. The black magnetic bar for small scissors, snips and tweezers is a knife rack from Amazon. Underneath the ironing board are two shelves with 8 bins (Jo-Anns) that contain larger fabric pieces from completed quilts (I don’t do small pieces!) and some “unassigned” fabric.

A small wall shelf (Hobby Lobby) to the right of the ironing center holds the Best Press, water spritzers, and other pressing tools, etc. The tall black cabinet to the right (Hobby Lobby) holds an amazing amount of supplies, notions, and tools, with Command hooks on the right side holding the larger embroidery hoops.

The most frequently used hoops are on Command hooks on the side of the tall bookcase right near the Ellisimo. The book case holds machine manuals, reference books and inspirational magazines and books - along with some family memorabilia.

The most unusual area for a quilting studio is the martini bar that’s on top of the black IKEA dresser near the door! The machines are lowered occasionally for a small martini party with friends on top of the large worktable. I have 4 stools in the room in addition to my BabyLock sewing chair that rises to stool height. Perfect!
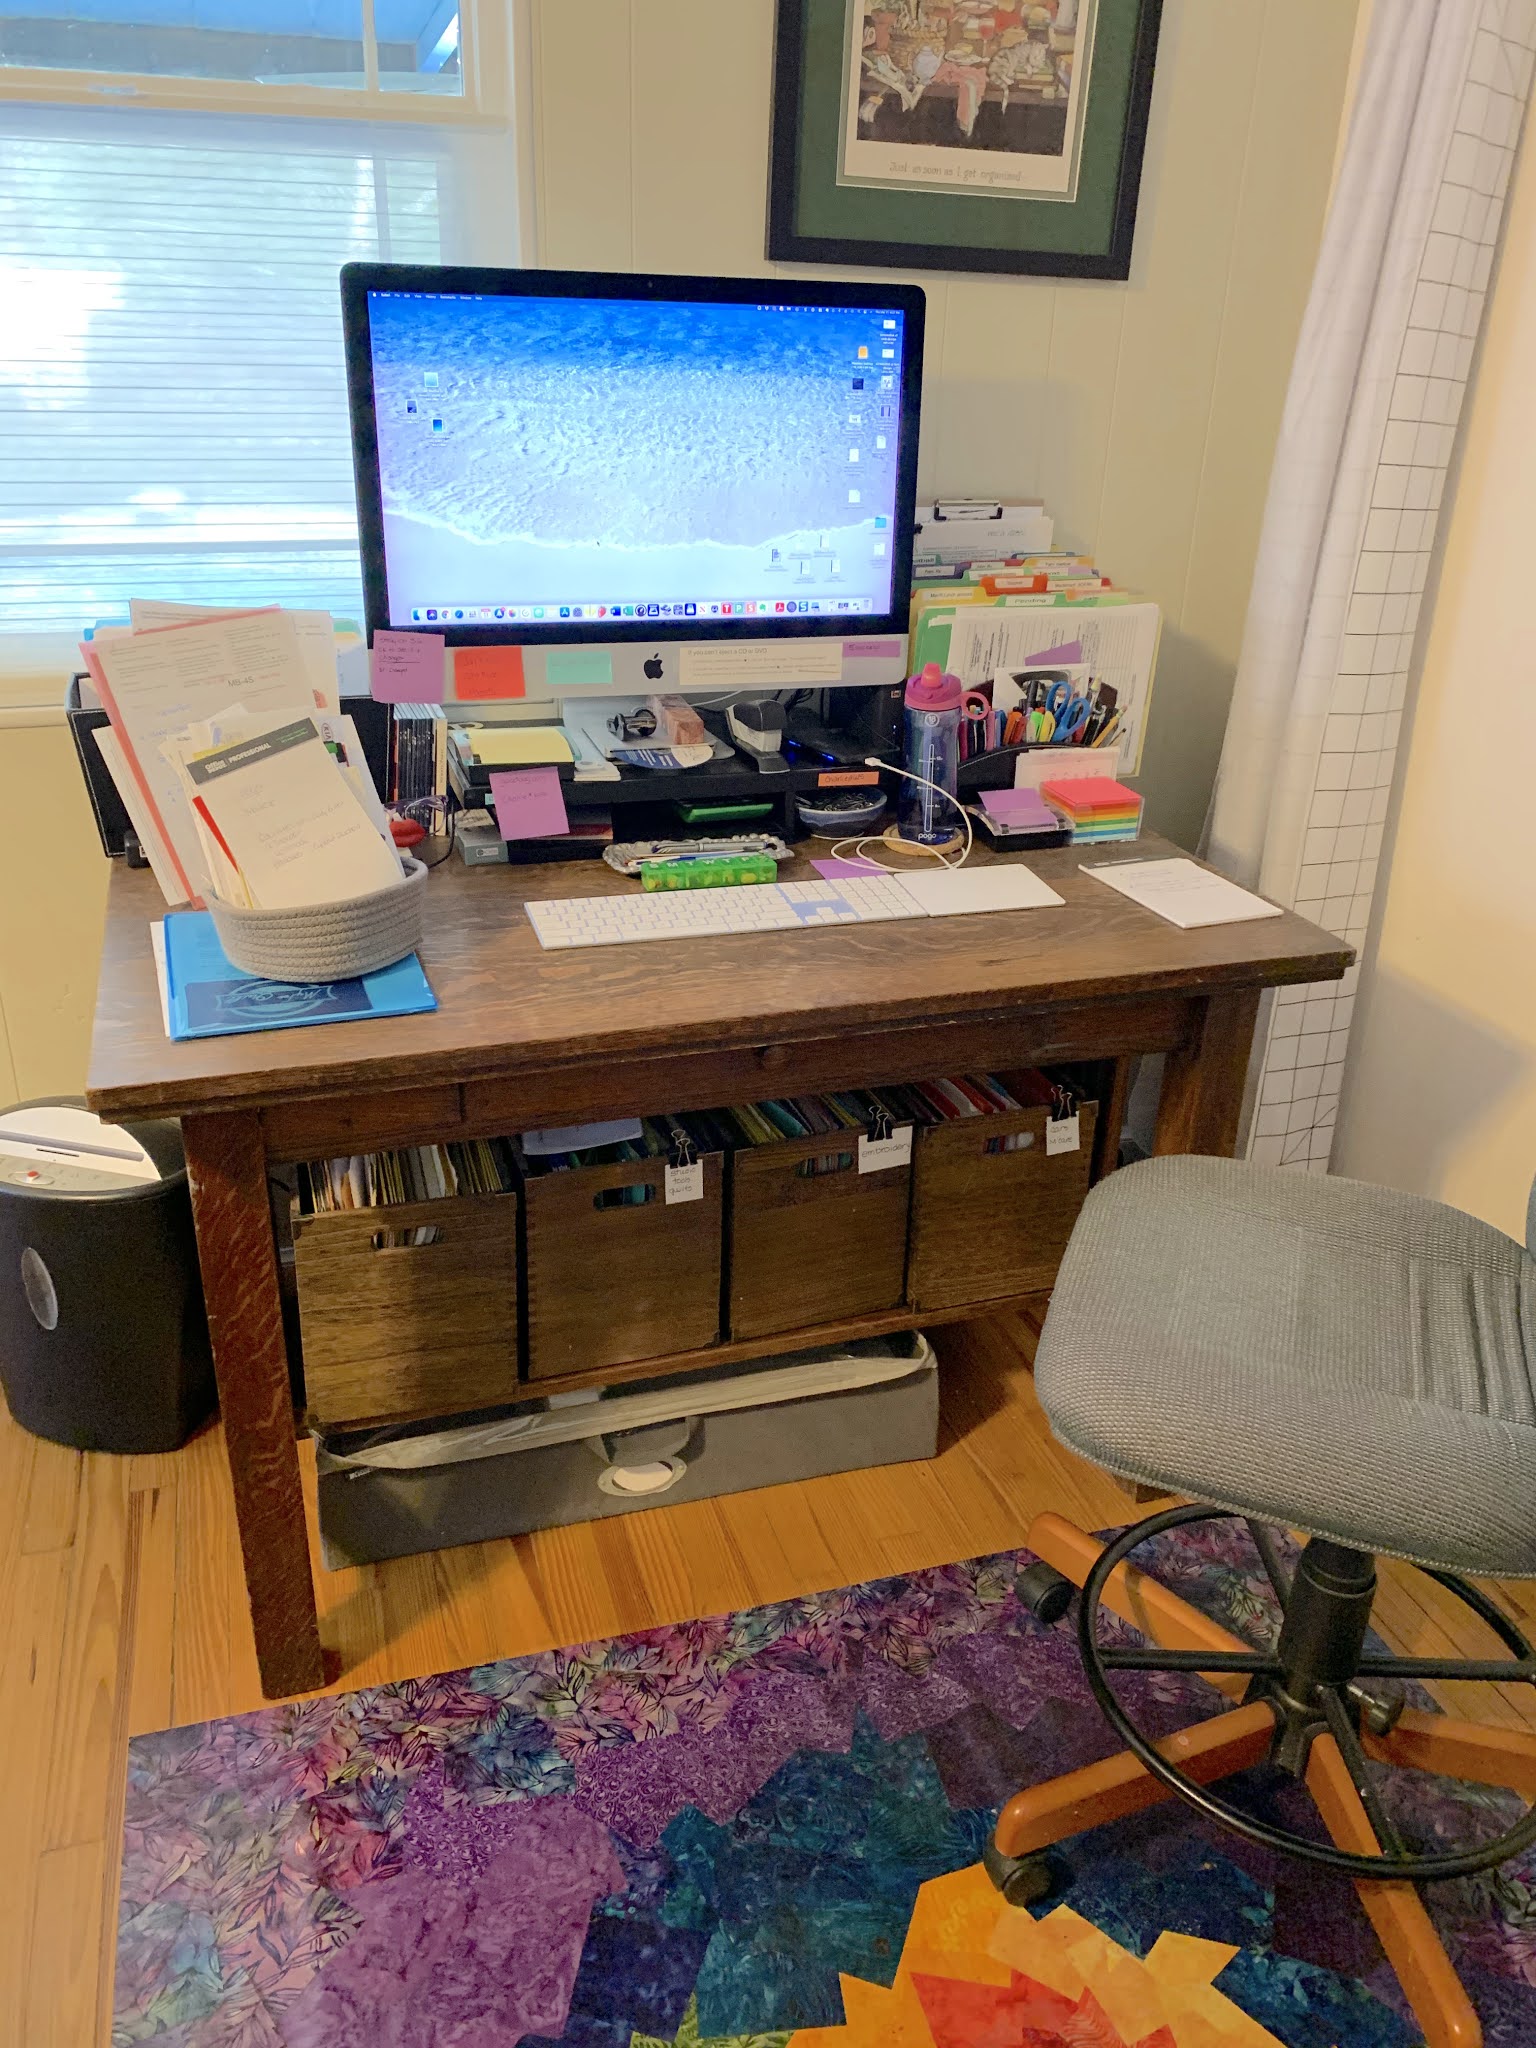
The desk is near the back (south wall) and has wooden file boxes on a low shelf and my embroidery unit underneath stored in an under-bed storage bag. The extra large closet has a curtain rod above the doors where another design wall can hang if needed.

Inside the closet are more project boxes, stabilizers on bolts or large packages and a large batch of fabrics (hanging on pants hangers) of fabric collected by my late Mother when my parents lived in St. Croix and St. Lucia. (I owe my sisters a number of quilts, table runners and bed runners made from this fabric!!)

I must confess that I have spilled over a little bit into the other bedroom. (Yikes!) Embroidery thread storage is on the backs of the 2 closet doors - my sister calls these the Thread Vaults! It keeps the thread away from light and the covers on the Hemingworth thread keeps the dust away. There is also a shelf for batting and another shelf for pillow forms in that closet. (And I swear that will be all I put in that room!)

Whew! I hope you have enjoyed the tour. I have tried to name sources whenever possible. I hope that the pictures and comments will inspire you to fine-tune your sewing area for a more enjoyable and functional area.
*&*&*&*&*&*&*
Thank you, Pam, for the fabulous tour through your studio! Now, I don't know about you, but my own studio is in a constant state of improvement as I find solutions that work better than what I'm currently using. It's always useful to see what other people have done in their own studios, and Pam has some great ideas. I can see I need to spend some time on the IKEA website...
Be sure to check back next Sunday for another great guest blogger! And keep working on those quilts....
Hugs!
Sarah
Pam has the dream quilting room of every quilter! So organized and complete. Hoping that she will start her own blog.
ReplyDeleteSuch a beautiful quilt room . Thank you and Pam both for sharing. I got a lot of ideas to help me in my endeavor to organize my quilt room. Happy quilting.
ReplyDeleteLoved the tour, Pam, and all the details., You have used every bench and cabinet to the very best way possible, and no wonder that you love threads, fabrics and quilting so much.
ReplyDeleteYes!!! It's AMAZING how much stuff you can organize into a small sewing space isn't it. I'm happy to see I'm not the only one who organizes quilt "kits" in totes. Love those snap totes. Thanks for sharing your space and cool ideas:)
ReplyDeleteWhat an inspiration! So many details were included.The post will help with researching product sources and ways to carefully consider functions in the crafting room. Thank you for sharing your wonderful, creative space.
ReplyDeleteConnie
Pam you sure know how to pack ALL the things into that space, and so organized and readily available. I love your project system. I will be bookmarking this for future thinking as I will be purchasing some IKEA cabinetry (one day, when their stocks get replenished and things open up again and we feel safe about driving up to Toronto). The martini bar--!! The best part! :-)
ReplyDeleteSuch a wonderful sewing space. I just love the martini bar! Perhaps I should adopt a QIW system to help control my fabric addiction and the huge number of projects I have in process. Thanks for all the inspiration
ReplyDeleteLove the QIW- sort of like ladies in waiting, helping the queen! And you have your kingdom laid out so well. I need for snap boxes for my QIW.
ReplyDeleteThat was some great inspiration. I think the wine rack is a great idea. I wish there was an IKEA closer to us. The nearest one is across the border in Toronto. My studio could definitely us a do-over.
ReplyDeletePat
Beautiful sewing room! Thanks for sharing!
ReplyDeleteWhat a wonderful space in which to work, Pam!! Thanks for sharing your mad organization skills with us. Wheels are tuning on some upgrades for my sewing space!
ReplyDeleteThank you, Pam! It's always fun to peek inside a quilter's studio :)
ReplyDeleteLoved the tour, very inspiring.
ReplyDeleteAh, you got me at Martini Bar, lol! So fun to get some quilty friends together and chat. Your room is amazing, and seems to work quite well for you. Awesome!
ReplyDeleteWOW! Thanks Pam for sharing your most organized sewing room!!!! You have some amazing ideas for storage and I can't wait to try them! And yes, you need to start your own blog.
ReplyDeleteI love seeing all the storage ideas and the project boxes are my favorite!
ReplyDeleteI recently purchased a koala cabinets from Top Notch Sew Vac, and I must say, I'm thoroughly impressed! The craftsmanship is exceptional, providing ample storage for all my sewing supplies while enhancing the aesthetic of my craft room. Definitely worth the investment for any sewing enthusiast!
ReplyDelete