Showing posts sorted by date for query Supernova. Sort by relevance Show all posts

Sunday, March 3, 2024

Fat Quarter Frenzy Is Woven Today!


Hi, all!

We are back this week with another Fat Quarter Frenzy quilt tutorial!  We've been discovering new ways to utilize fat quarters in quilts, and if you're like me and have way too many, a way to use up some of the stash!  So far, we've used 48 fat quarters (!) - 16 in Meet Me in St. Louis, 14 in Kaleidoscope, and most recently 18 in a new version of Supernova.  But I'm still overflowing with fat quarters, so today we will be exploring a new tutorial, this time for a quilt I call Woven.  Let's go!

*&*&*&*&*&*&*


Woven

A Fat Quarter Friendly Quilt


FABRIC REQUIREMENTS:


Fat Quarters (FQ) in three different contrasting color groups

Color A - 7

Color B - 5

Color C - 4


CUTTING:


From Color A FQs, cut:


26 4.5” x 12.5”

30 4.5” x 4.5”


To achieve this, and assuming your FQ have 17” x 20” of useable fabric, cut your first six FQ in this manner:


This will give you 24 long strips and 24 squares.


Take your remaining FQ and cut in this manner:


This will give you your remaining 2 long strips and 6 squares.


From Color B FQs, cut:


13 4.5” x 12.5”

30 4.5” x 4.5”


To achieve this, cut the first 3 FQ in this manner:


This will give you 12 long strips and 12 squares.


Take another FQ and cut four 4.5” x 17” strips.  From one strip, cut one 4.5” x 12.5” strip and one 4.5” square.  Cut the remaining strips into 9 squares.  This will give you one more long strip and 10 more squares, for a total of 13 long strips and 22 squares.

Take the final FQ and cut three more 4.5” strips, then crosscut into 8 4.5” squares, giving you a total of 13 long strips and 30 squares.


From Color C FQs, cut:


48 4.5” s 4.5”


To achieve this, cut four 4.5” x 17” strips from each of the four FQ, then cross cut them into 12 4.5” squares for a total of 48 4.5” squares.


ASSEMBLY


This quilt is made up of three separate blocks, shown as follows:


Block 1:  Make 13


Block 2:  Make 6


Block 3:  Make 6


LAYOUT:


While it may look complicated to lay out, it’s really quite simple.  First of all, take Block 1 and lay it out in a checkerboard design, with 3 blocks in the 1st, 3rd and 5th rows with the stripes running horizontally, and 2 blocks in the 2nd and 4th rows with the stripes running vertically.


Take Block 2 and place them between the horizontal stripe blocks in rows 1, 3, and 5. 


Now take Block 3 and place them between the vertical stripe blocks in rows 2 and 4.


Assemble and quilt as desired!


*&*&*&*&*&*&*


I hope you enjoy this quilt pattern, and that it helps you use up some random fat quarters in your stash!  See you next Sunday with another Fat Quarter Frenzy quilt!


Hugs!


Sarah

Sunday, February 18, 2024

Fat Quarter Frenzy Rediscovers Supernova!


Hi, all!

I. Am. Late.  So sorry!  And I will totally blame this on the state of my studio - it's a flipping mess, with about twelve quilt tops waiting to be quilted, a customer quilt just off the frame, a t-shirt quilt in progress, and now a new quilt started for a wedding shower gift.  My brain feels like my studio looks, and I just completely forgot what day it was yesterday when I should have been writing this post.

That being said, welcome back to Fat Quarter Frenzy, where we are exploring simple quilt designs made from fat quarters.  If you're like me, you've got a lot of fat quarters sitting around, and hopefully this will help you find a good quilt-y home for some of them!  So far I've used 30 fat quarters, 16 with Meet Me In St. Louis, and another 14 with Kaleidoscope.  

Today we're going to re-visit one of the most popular tutorials on my blog, Supernova.  I first posted this in 2017, as part of the Stunning Stars series, and it's been requested as a PDF hundreds (thousands?) of times since then.  But I'm always up for a new interpretation of this quilt, so here it is in mixed prints!

*&*&*&*&*&*&*


Land, Sea and Sky

A Fat Quarter Friendly Quilt


This is a very simple one-block quilt; its secret lies in the layout.

Finished size:  approximately 60” x 60”


Materials:


18 Fat Quarters - 9 each in two different color groups

For the purposes of this tutorial, choose one that you will 

        designate as the “background” fabric.  Dark fabrics tend 

        to pop, so you may find that the lighter of your two 

        fabrics works best as background.


CUTTING DIRECTIONS:


From each fat quarter, cut six 7” squares.  Once finished, you should have 54 each in two different color groups.  


Choose four foreground squares in the same print that will become your focal star.


MAKING THE BLOCKS:


Take the squares you have designated as background squares and draw a line from one corner diagonally across the square on the back of the fabric. This can be done with pencil, chalk, or my personal favorite, Hera marker, which just leaves a visible crease on the fabric.


Pair one background square with one foreground square, right sides together.


Stitch a scant 1/4” from each side of the diagonal line you drew on the background square.  Cut on the diagonal line.  Press seam to one side (it doesn’t matter which side, just be consistent.)   You will have 54 sets of two matching half square triangles (HSTs).  Trim your HSTs to 6.5” square.  Don’t skip this step - it will make your quilt go together faster and look better!


 I love using a Bloc-Loc ruler for this step - it makes everything go fast and easy.  However, if you don’t have one, a regular square ruler with a diagonal line will work!  And just look at how pretty all those trimmings are!


Locate your eight focal star HSTs to start your layout.


LAYOUT:


Use this diagram to lay out your blocks.  Start with the focal point star in the lower left quadrant, (the shadowed area) and work out from the star.  (The shadowed area and the dark lines are to help you see how the blocks lay.)  Step back often and check to see that your diamonds are going the right direction!  Fill in the gaps at the upper right and lower left edges with half diamonds, splitting up some of your pairs for the purpose.  


TIP:  If you have a design wall, or use a “design floor”, take a photo of your layout (before assembly) and look at it on your phone.  The distance this provides you visually makes it easier to see errors and places where you may wish to switch some blocks.  It usually takes four or five photos before I’m happy with the layout.  


Assemble the quilt top.  Quilt as desired!

*&*&*&*&*&*&* 

And that's it for today's tutorial!  I'm another 18 fat quarters down in my stash after making this quilt, and it's barely made a dent!  But I'm having fun and finding all kinds of inspiration for making more quilts and diminishing that stash.  See you next week!

Hugs!

Sarah

Friday, January 19, 2024

Can I Get a Whoop Whoop? Making Headway!


Hi, all!

Well, I don't know what it looks like in your part of the country, but this is DEFINITELY not normal for us!


This has been the view from my window since Monday morning - about 6 or 7 inches of snow that isn't going away!


And today when I ventured outside, I saw this hanging from the Christmas decorations that are still up on my railing (oh the shame!) and that is DEFINITELY not acceptable!  We don't do icicles!

But all of that aside, this long long week of forced seclusion has come to an end, and it's finally Friday!  And that means that it's time for us to get our whoop whoop on - so let's get started!

*&*&*&*&*&*&*&*

Last week I shared the first of the prototype quilts for this year's tutorial series, Fat Quarter Frenzy, and a peek at the block I was working on for the second one.  Well, I finished the second top!


Bree was acting as quilt inspector, and I do believe she approves!  The design kind of took on a life of its own, and went a different direction from where I thought it would, but I like it.

And then the spirit moved me and I got to work on the next prototype....


...and yet an other version of the Supernova quilt has come to life.  As my husband said, this one has a totally different vibe!  I was a little nervous about using all prints, but I think it works.

So - - - can I get a whoop whoop?

*&*&*&*&*&*&*

And now it's your turn!

What's got you whooping it up this week?


What's making you do a little happy dance?

Share!  We want to dance right along with you,

And it's always more fun to dance with friends!

The party will stay open until Sunday midnight.

Hope to see you there!

Hugs!

Sarah

Monday, March 6, 2023

Make-A-List Monday - Chugging Right Along!

Hi, all!

Wow, did this week just fly by!!  But it was a good, productive week, so let's see how I did on last week's list....

1.  Deliver quilts to church.

Done!  Take a look at all. those. quilts!  That's the combined product of Piper, Susan, and me for one week - thirty quilts!


2.  Pick up a new stack to work on this week.

Done!  This is the stack I picked up last Tuesday - and nine of them went back to church on Sunday.  The other two were still in the dryer!  And I picked up five more to bind on Sunday.

3.  Finish the final tutorial.

Done!  We revisited the Supernova quilt tutorial, and this is my most recent version...

4.  Help my SIL with the grandkids while my daughter is out of town.

Done!  It turned out to be pretty easy - just one afternoon!

5.  Quilt as many ministry quilts as possible.

I didn't quilt any this week, but I did put binding on 16 quilts that will be added to our piles!  Here's my stack just from today...

6.  Clean off that table top in my studio!!!

Done Done Done!!!  I am thoroughly excited about this - because the table top went from this....

...to this!!!

I wish I could move that large brown and white basket, but it holds my trash bag - because SOMEONE likes to steal things out of the trash so I have to keep most of it up there out of reach.....

And while I was at it, I cleaned off the other workstation table top...

It feels SO much better in my studio now!  Plus an added benefit - I found a few things that had gone missing when I cleaned up!  It's amazing how much easier it feels to work in a neater space.

So it was a very productive week, and I can only hope that this week is just as productive.  It's starting off well, with the five quilts I put binding on this afternoon.  Here's my list for the rest of this week....

1.  Meet with a quilting customer Tuesday morning.

2.  Pull together more "kits" to quilt at church Tuesday night.

3.  Quilt ministry quilts!

4.  Start on a reorganization of my fabric stash.

5.  Start prepping handwork to take on vacation in a few weeks.

6.  Start prep work for Hands2Help 2023!

I don't think I'll be bored this week, do you?  Bree and I have been enjoying the warmer weather outside, but we're coming up on some cooler and rainier days so it should be easier to work inside.  


And now, I really want to know - - - what are YOU working on this week?

Hugs!

Sarah

Sunday, March 5, 2023

Something Old, Something New - The Return Of Supernova!


Hi, all!

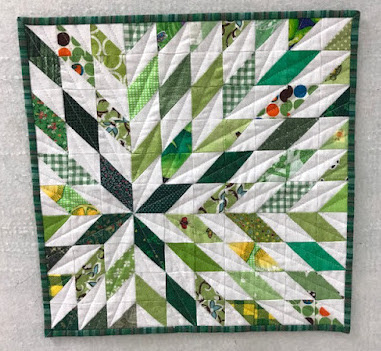
We have arrived at the last week of this year's tutorial series, and I've saved the best for last - Supernova!  This quilt has, hands-down, been my most popular.  I have pictures of the design made by so many people from Instagram and each is wonderfully unique!  I've personally made it at least six times, including a mini version using bonus triangles from another project....

The trick to making this quilt a wonderful experience for yourself is to take the time to square up your half-square triangles.  I know it's a hassle, but you will be so happy with the way your quilt finishes that it's totally worth taking the time.  


I highly recommend getting a Bloc-Loc ruler if you don't already have one - it makes the whole process of squaring up those HSTs so quick and simple.  I have two - a 6.5" and a 12.5" - and I've never had an HST block I couldn't simply square up using one of those two.  I'll admit that the 12.5" was an indulgence, but I wanted to make a Moda Love quilt using 10" squares and I was spoiled by my smaller Bloc Loc ruler!

And honestly, isn't that pile of trimmings pretty?  Such a nice sign that you've been virtuous!


So - - - are you ready to make one of your own?  Here's how!

*&*&*&*&*&*&*

“Supernova”
A Stunning Stars Quilt-Along Quilt


This is a very simple one-block quilt; its secret lies in the layout.

Finished size:  approximately 60” x 60”

FABRIC REQUIREMENTS:  

1 3/4 - 2 yards of background fabric

2 yards (or equivalent) of print fabric; this could be yardage, fat quarters, or scraps.  There are 50 diamond shapes in the quilt, so you could use up to 50 different fabrics.

CUTTING DIRECTIONS:

From the background fabric, cut fifty 7” squares.

Take your print fabrics and choose one that will become the focal star.  From that fabric, cut four 7” squares.  From the remainder of your print fabrics, cut forty-six 7” squares for a total of 50 squares.

MAKING THE BLOCKS:

Take your background squares and draw a line from one corner diagonally across the square on the back of the fabric using a pencil or Hera marker. Pair one background square with one print square, right sides together.


Using the traditional method, make your half-square triangles (HSTs), stitching slightly less than 1/4" from each side of the center diagonal line. You will have 50 sets of two matching HSTs.  Trim your HSTs to 6.5” square.  Don’t skip this step - it will make your quilt go together faster and look better!

Locate your eight focal star HSTs to start your layout.

LAYOUT:

To get a similar look to the finished quilt shown above, use the diagram below to lay out your blocks.  (NOTE: The orange quilt shown in this post has more blocks than this quilt tutorial calls for.  Don’t use that finished quilt as your layout guide!)  


Start with the focal point star in the lower left quadrant, and work out from the star.  Step back often and check to see that your diamonds are going the right direction!  Fill in the gaps at the upper right and lower left edges with half diamonds, splitting up some of your pairs for the purpose.  Assemble the quilt top.  Quilt as desired! 


*&*&*&*&*&*&*

And just so you can see some of the beautiful variations that this quilt can take...


And here's a peek at the beautiful backing I found for this year's version of Supernova...


If you make a Supernova quilt, please tag me on Instagram (@fabricaddictquilts) and use the hashtag #supernova. I love seeing them pop up - the variations are fabulous!!

*&*&*&*&*&*&*

And that's the last of the tutorials for Something Old, Something New.  I hope you've enjoyed these, and found one or more to add to your repertoire of quick, easy quilts!  Stay tuned in the coming weeks for the beginning of this year's Hands2Help Comfort Quilt Challenge!

Hugs!

Sarah

Monday, August 16, 2021

Make-a-List Monday - Nope, Still AWOL!


Hi, all!

Well, it's official - my sew-jo is still AWOL!  But it's Monday, and that means it's time to look back at last week and take stock, and then look at the week ahead and make plans.  So let's get started with a look at last week's list...

1.  Have a friend over for a long arm "teaching day".
Done, and we had a lot of fun!  And in the process, we quilted this large quilt and put the binding on the smaller one.  And I actually put the binding on the larger one by the end of the week....


2.  Cut out another annual quilt.
Done!  No pictures, but I cut out all the pieces for Nathanael's annual quilt, which will be another version of my Supernova pattern.

3.  Start working on the second memory quilt.
I finished the second memory quilt top.... 


and I started on the third memory quilt top, too!  Made a big booboo when I started putting on the borders, though, and had to do some major ripping.  It kind of put me off wanting to sew....


4.  Begin planning repairs on a vintage top.
Didn't get to this one...

5.  Quilt a top for a patient friend.
...or to this one.

My border mess-up really threw a monkey wrench in the works - I was going pretty well before that!  But I'll get back on the horse tomorrow and finish that third top.  After all, tomorrow is another day!

So here's what I'm hoping to accomplish this week...

1.  Finish the borders on the third memory quilt.

2.  Make the backs for those three quilts.

3.  Make the back for Lilli's annual quilt.

4.  Start working on the half-square triangles for Nathanael's annual quilt.

5.  Have a baking day/Spanish lesson day with Lilli.

I'm looking forward to that last one - since Lilli is home-schooling, we get to go at her lessons in some unusual ways.  She wants to make chocolate chip cookies (and we NEED more chocolate chip cookies!) so I've looked up all the Spanish words for the ingredients and the actions we'll be doing.  It will be interesting to see if we can figure it all out in Spanish!

So now I really need to know - - - what are YOU working on this week?

Hugs!

Sarah