Showing posts sorted by relevance for query Supernova. Sort by date Show all posts

Sunday, March 5, 2023

Something Old, Something New - The Return Of Supernova!


Hi, all!

We have arrived at the last week of this year's tutorial series, and I've saved the best for last - Supernova!  This quilt has, hands-down, been my most popular.  I have pictures of the design made by so many people from Instagram and each is wonderfully unique!  I've personally made it at least six times, including a mini version using bonus triangles from another project....
The trick to making this quilt a wonderful experience for yourself is to take the time to square up your half-square triangles.  I know it's a hassle, but you will be so happy with the way your quilt finishes that it's totally worth taking the time.  


I highly recommend getting a Bloc-Loc ruler if you don't already have one - it makes the whole process of squaring up those HSTs so quick and simple.  I have two - a 6.5" and a 12.5" - and I've never had an HST block I couldn't simply square up using one of those two.  I'll admit that the 12.5" was an indulgence, but I wanted to make a Moda Love quilt using 10" squares and I was spoiled by my smaller Bloc Loc ruler!

And honestly, isn't that pile of trimmings pretty?  Such a nice sign that you've been virtuous!


So - - - are you ready to make one of your own?  Here's how!

*&*&*&*&*&*&*

“Supernova”
A Stunning Stars Quilt-Along Quilt


This is a very simple one-block quilt; its secret lies in the layout.

Finished size:  approximately 60” x 60”

FABRIC REQUIREMENTS:  

1 3/4 - 2 yards of background fabric

2 yards (or equivalent) of print fabric; this could be yardage, fat quarters, or scraps.  There are 50 diamond shapes in the quilt, so you could use up to 50 different fabrics.

CUTTING DIRECTIONS:

From the background fabric, cut fifty 7” squares.

Take your print fabrics and choose one that will become the focal star.  From that fabric, cut four 7” squares.  From the remainder of your print fabrics, cut forty-six 7” squares for a total of 50 squares.

MAKING THE BLOCKS:

Take your background squares and draw a line from one corner diagonally across the square on the back of the fabric using a pencil or Hera marker. Pair one background square with one print square, right sides together.


Using the traditional method, make your half-square triangles (HSTs), stitching slightly less than 1/4" from each side of the center diagonal line. You will have 50 sets of two matching HSTs.  Trim your HSTs to 6.5” square.  Don’t skip this step - it will make your quilt go together faster and look better!

Locate your eight focal star HSTs to start your layout.

LAYOUT:

To get a similar look to the finished quilt shown above, use the diagram below to lay out your blocks.  (NOTE: The orange quilt shown in this post has more blocks than this quilt tutorial calls for.  Don’t use that finished quilt as your layout guide!)  


Start with the focal point star in the lower left quadrant, and work out from the star.  Step back often and check to see that your diamonds are going the right direction!  Fill in the gaps at the upper right and lower left edges with half diamonds, splitting up some of your pairs for the purpose.  Assemble the quilt top.  Quilt as desired! 


*&*&*&*&*&*&*

And just so you can see some of the beautiful variations that this quilt can take...


And here's a peek at the beautiful backing I found for this year's version of Supernova...


If you make a Supernova quilt, please tag me on Instagram (@fabricaddictquilts) and use the hashtag #supernova. I love seeing them pop up - the variations are fabulous!!

*&*&*&*&*&*&*

And that's the last of the tutorials for Something Old, Something New.  I hope you've enjoyed these, and found one or more to add to your repertoire of quick, easy quilts!  Stay tuned in the coming weeks for the beginning of this year's Hands2Help Comfort Quilt Challenge!

Hugs!

Sarah

Sunday, February 19, 2017

Stunning Stars #4 - "Supernova"!

Hi, all!

It's time for another quilt in the Stunning Stars Quilt Along - and this week's quilt is my husband's favorite!  He laid claim to it before it was even finished, and there's no higher compliment in my book.  So here it is - - - Supernova!


This is a super-simple quilt - made up of half square triangles!  
The layout and color variation is what creates all the movement in this quilt.


I quilted it with radiating lines from the focal star through the diamonds to increase the "starriness" of this quilt.


Once again, I dug through my stash for this quilt.  The top was made using leftovers from the oranges I used for Emmalyn's 2016 annual quilt, and the back utilizes a great Brandon Mably print and some gray and white polkadots.  Both those pieces had been sitting in my stash for quite a while!  So this is another one for the Sew My Stash 2017 challenge!


It was awfully windy the day I took these pictures, but at least there was sunshine to show off those beautiful bright oranges!!

I can see this quilt done scrappy, or in rainbow shades radiating out from the focal star, or shading from light to dark in a single color.  So many possibilities!!  

So - - - are you ready to make one of your own?  Here's how!

*&*&*&*&*&*&*

“Supernova”
A Stunning Stars Quilt-Along Quilt


This is a very simple one-block quilt; its secret lies in the layout.

Finished size:  approximately 60” x 60”

FABRIC REQUIREMENTS:  

2 yards of background fabric

2 yards (or equivalent) of print fabric; this could be yardage, fat quarters, or scraps.  There are 50 diamond shapes in the quilt, so you could use up to 50 different fabrics.

CUTTING DIRECTIONS:

From the background fabric, cut fifty 7” squares.

Take your print fabrics and choose one that will become the focal star.  From that fabric, cut four 7” squares.  From the remainder of your print fabrics, cut forty-six 7” squares for a total of 50 squares.

MAKING THE BLOCKS:

Take your background squares and draw a line from one corner diagonally across the square on the back of the fabric. Pair one background square with one print square,  right sides together.


Using the traditional method, make your half-square triangles (HSTs).   You will have 50 sets of two matching HSTs.  Trim your HSTs to 6.5” square.  Don’t skip this step - it will make your quilt go together faster and look better!

Locate your eight focal star HSTs to start your layout.

LAYOUT:

To get a similar look to the finished quilt shown above, use the diagram below to lay out your blocks.  (NOTE: The quilt above has more blocks than this quilt tutorial calls for.  Don’t use the finished quilt as your layout guide!)  


Start with the focal point star in the lower left quadrant, and work out from the star.  Step back often and check to see that your diamonds are going the right direction!  Fill in the gaps at the upper right and lower left edges with half diamonds, splitting up some of your pairs for the purpose.  Assemble the quilt top.  Quilt as desired! 

*&*&*&*&*&*&*

If you make your own version of "Supernova", I'd love to see it!  If you share on Instagram, tag me (@fabricaddictquilts) and use the hashtag #stunningstars!

And if you've missed the three earlier Stunning Stars quilt, here are links to those...


Inspired yet?

Hugs!

Sarah

Friday, February 22, 2019

Can I Get a Whoop Whoop? Supersmall Supernova...

Hi, all!

Friday has rolled around again and it's a special one - it's time for QuiltCon!  I'm spending my weekend there, meeting friends and taking classes and looking at beautiful quilts, but I still want to do some whooping with you all - so let's get started!


*&*&*&*&*&*&*

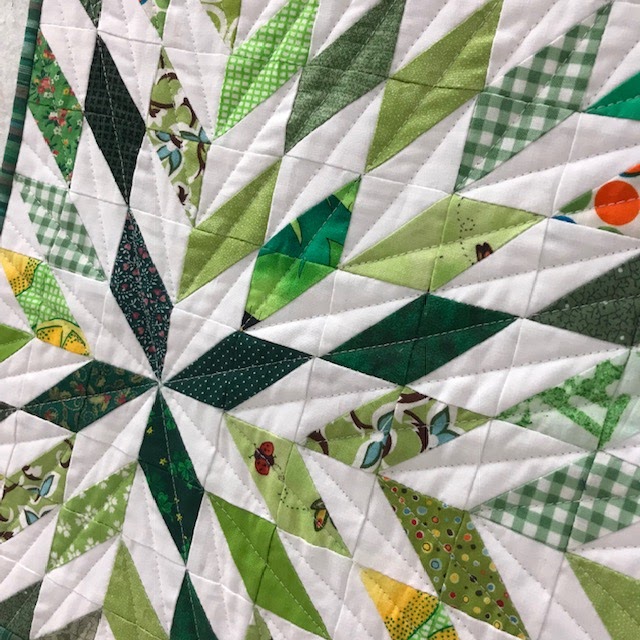
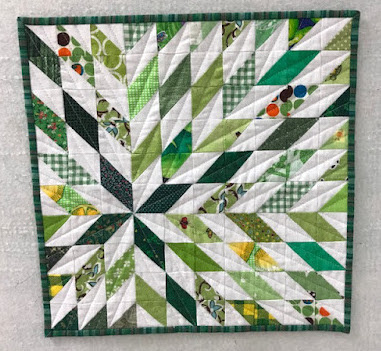
A couple of weeks ago I completed a full size Supernova quilt for my youngest grandkids' interpreter.  In one of the comments, Joy of The Joyful Quilter said that she wanted to make one in miniature.  Now that sounded like a great idea!  And I had a whole mess of tiny bonus HSTs left over from Nathanael's green annual quilt that I made for Christmas...


Of course, it might have helped if I had remembered I needed 100 HSTs and not 100 pairs!  But I have a whole other set of HSTs all trimmed and ready to make another one if I ever want to!


I don't generally make mini quilts, and this is why - it took almost as long to put this small version together as it did to make the full size one!


I did the same straight line quilting radiating out from the center that I do on the large quilt.  I think I like it even better in miniature!


I used a narrower binding than usual on this quilt, and actually stitched it down on the back by hand!  I really do like Clover clips for holding the binding inlace when I do it by hand.  Much easier!


And here's the finished version!  It measures about 13.5" square, and the HSTs finished out at about 1 1/4" each.


Isn't it pretty?  I can't imagine making one from scratch in this size, but it's a great way to use up bonus HSTs from other projects.


One last picture just for fun!

So - - - can I get a whoop whoop?

*&*&*&*&*&*&*

And now it's your turn!

What's got you whooping it up this week?


What's making you do a little happy dance?

Share!  We want to dance right along with you,

And it's always more fun to dance with friends!

The party will stay open until midnight Sunday.

Hope to see you there!

Hugs!

Sarah

Friday, February 8, 2019

Can I Get A Whoop Whoop? A Jewel-Toned Supernova!

Hi, all!

It's finally Friday again!  After a week of unseasonably (and gorgeously) warm temps, we are back down in the 30's again - but that just means more time for sewing and quilting, doesn't it?  And that's good cause to whoop it up a little - so it's a good thing it's Friday!  Let's get started!

*&*&*&*&*&*&*


A couple of weeks ago, my daughter called me and asked if I could make a quilt for her.  (This doesn't happen very often!) (surprisingly)   Her two youngest kids, Emmy and Nathanael, are both deaf and because of that, have an interpreter assigned to them at school - an adult who acts as a go-between as they attend classes, interpreting things they don't understand into sign language and also helping others understand them if there's a communication problem.  This particular interpreter has been with them for two years now and this will probably be her last year with them, and Nancy wanted to see if I would make a quilt for her.  Of course!

After much sifting through Pinterest, Nancy pointed out a quilt she liked that was very similar to my Supernova pattern.  When I called her attention to it, she agreed that it was perfect.  Lots of texting then occurred, with both of us sending fabric pics back and forth from our respective parts of town, and we decided on jewel tone batiks in blues and purples against a black background.


Lots of cutting, sewing, and squaring up then occurred - because squaring up is essential, you know?  Thank heavens for my Bloc-Loc ruler - best purchase I EVER made!  It made this part of the task go pretty quickly, and soon I had a flimsy ready for its moment in the sun...


There really isn't anything prettier than sunlight glowing through a quilt flimsy, and jewel tones make it especially lovely.  I had quite a time taking this pic, though, because the wind was blowing fiercely!


Quilting consisted of straight lines through the long axis of each diamond, radiating out from the center of the focal star.  This is an easy way to quilt, although a lot of quilt wrangling is needed when working with a walking foot. It does make for a soft quilt!  I used a variegated purple thread for the quilting. 


And of course, the label!  The kiddos (actually I think their mom!) traced their hands making the ASL sign for "I love you" and wrote their names on them.  As you can see, Emmy wrote hers in cursive, and then printed it in case her interpreter couldn't understand her writing!  When I started doodling calligraphy on the back of placemats when we went out to eat, Emmy (our little artist) just decided it was another form of art and started writing in cursive too.  We've had a hard time explaining to her that she can't write like that on her school papers - her teachers can't always figure out what she's saying!  But it is cute that she does it, and really very well.

So - - - can I get a whoop whoop?

*&*&*&*&*&*&*

And now it's your turn!

What's got you whooping it up this week?


What's making you do a little happy dance?

Share!  We want to dance right along with you,

And it's always more fun to dance with friends!

The party will stay open until Sunday midnight.

Hope to see you there!

Hugs!

Sarah

Monday, January 28, 2019

Make-A-List Monday - Snow Day? Maybe!

Hi, all!

Welcome to Monday!  I'm guessing that you may be prepping for some serious winter weather this week, as it seems to be hitting most of the country.  Here in the Nashville area, we never know what we'll get, but we don't let that stop us from closing or delaying schools the night before just in case!  I made sure that I had plenty of projects to sew on in the unlikely chance that we get snowed or iced in - because I'd hate to run out of things to do!

Let's check and see how last week's list went...

1.  Find backings for the last two Rockin' Rectangles quilts.
2.  Quilt at least two of the Rockin' Rectangles quilts.
Done!  Two cute backs, and two quilts finished!  The one with the flamingo back was featured in this past Sunday's tutorial.


3.  Quilt a ministry quilt for an adoption.
Done!  And it's been given to the adoptive parents, who will be heading to China sometime in February to pick up their new son!


4. Quilt two additional ministry quilts.
Done!  Slowly but surely, we're rebuilding our stash of finished quilts...


5.  Write at least one Rockin' Rectangles tutorial.
One down, five to go!

6.  Cut pieces for the memory quilt.
This project jumped to the back burner temporarily; I'll explain why below.

7.  Keep up with any quilt ministry needs that come up.
We gave away several quilts this week; the adoption quilt shown above is one of them.

This beautiful (and very large) quilt went to an elderly couple who are both experiencing serious health issues.


This quilt went to a woman who was just diagnosed with colon cancer.


Now, as to what I was working on instead of the memory quilt.  I got a request for a special ministry quilt that was needed in a hurry. Some collaboration on colors and fabrics by phone, and this fabric pull was the result...


Some quick cutting and sewing, then trimming up one hundred half square triangles....


...and today I finished this top, a version of the Supernova pattern!


I also spent a little time on organization this week, finding a final place for my new scrap storage cart...


It now fits at the end of my sewing table, and the shelf that was in that spot (on the right in the picture below) is now in front of the table.  That spot used to be filled with a tub of t-shirt scraps and a big pile of "stuff" - batting, tops that needed work, etc. - and was a ridiculous looking mess.  Now the shelf has ministry quilts that need to be quilted, along with a few that need some TLC, and a couple of storage boxes (feedback fabrics and binding scraps).  It looks so much nicer now!


And can you see my quilt ladder in the background?  I decided it would be a good place to hang quilt tops in need of quilting!  This way they can be decorative and still remind me they are "quilts-in-waiting"!

OK - enough about last week!  Here's what's on my radar for this week...

1.  Finish the Supernova ministry quilt.

2.  Write at least one Rockin' Rectangles tutorial.

3.  Quilt two ministry quilts.

4.  Quilt one more Rockin' Rectangles quilt.

5.  Cut out the memory quilt pieces.

6.  Work on cleaning up my office.

7.  Meet with a client about a t-shirt quilt.

8.  Keep up with any quilt ministry needs that come up.

So definitely enough to keep me busy, and if it's too cold to go outside, then I'll be happy as can be to stay inside and sew!  

And now the question is - - - what are YOU working on this week?

Hugs!

Sarah