
Hi, all!
Welcome to the first of six guest blogger posts for this year's Hands2Help Challenge! I'm so happy to welcome Jamie of L'Fair Quilts as she shares yet another wonderful quilt tutorial. Jamie has been a great supporter of the Challenge, with two previous tutorials in 2014 and 2018. She's also a fabulous pattern designer - I love her quilts and have made two of them already! I've learned so much from her, and know you will too. So without further ado, let's see what she has for us this year!
*&*&*&*&*&*&*
The pattern I have for the 2019 Hands2Help challenge is all about keeping it simple. “I Love You More” was simply born on the design wall as a way to use scraps. The story behind the name, “I Love You More”, is the simple tug-at-the-heart words my little great niece, Jolie Nicole, shares with me every Thursday when I drop her off at dancing lessons.
Let us simply begin with my 2019 H2H Comfort Quilts…
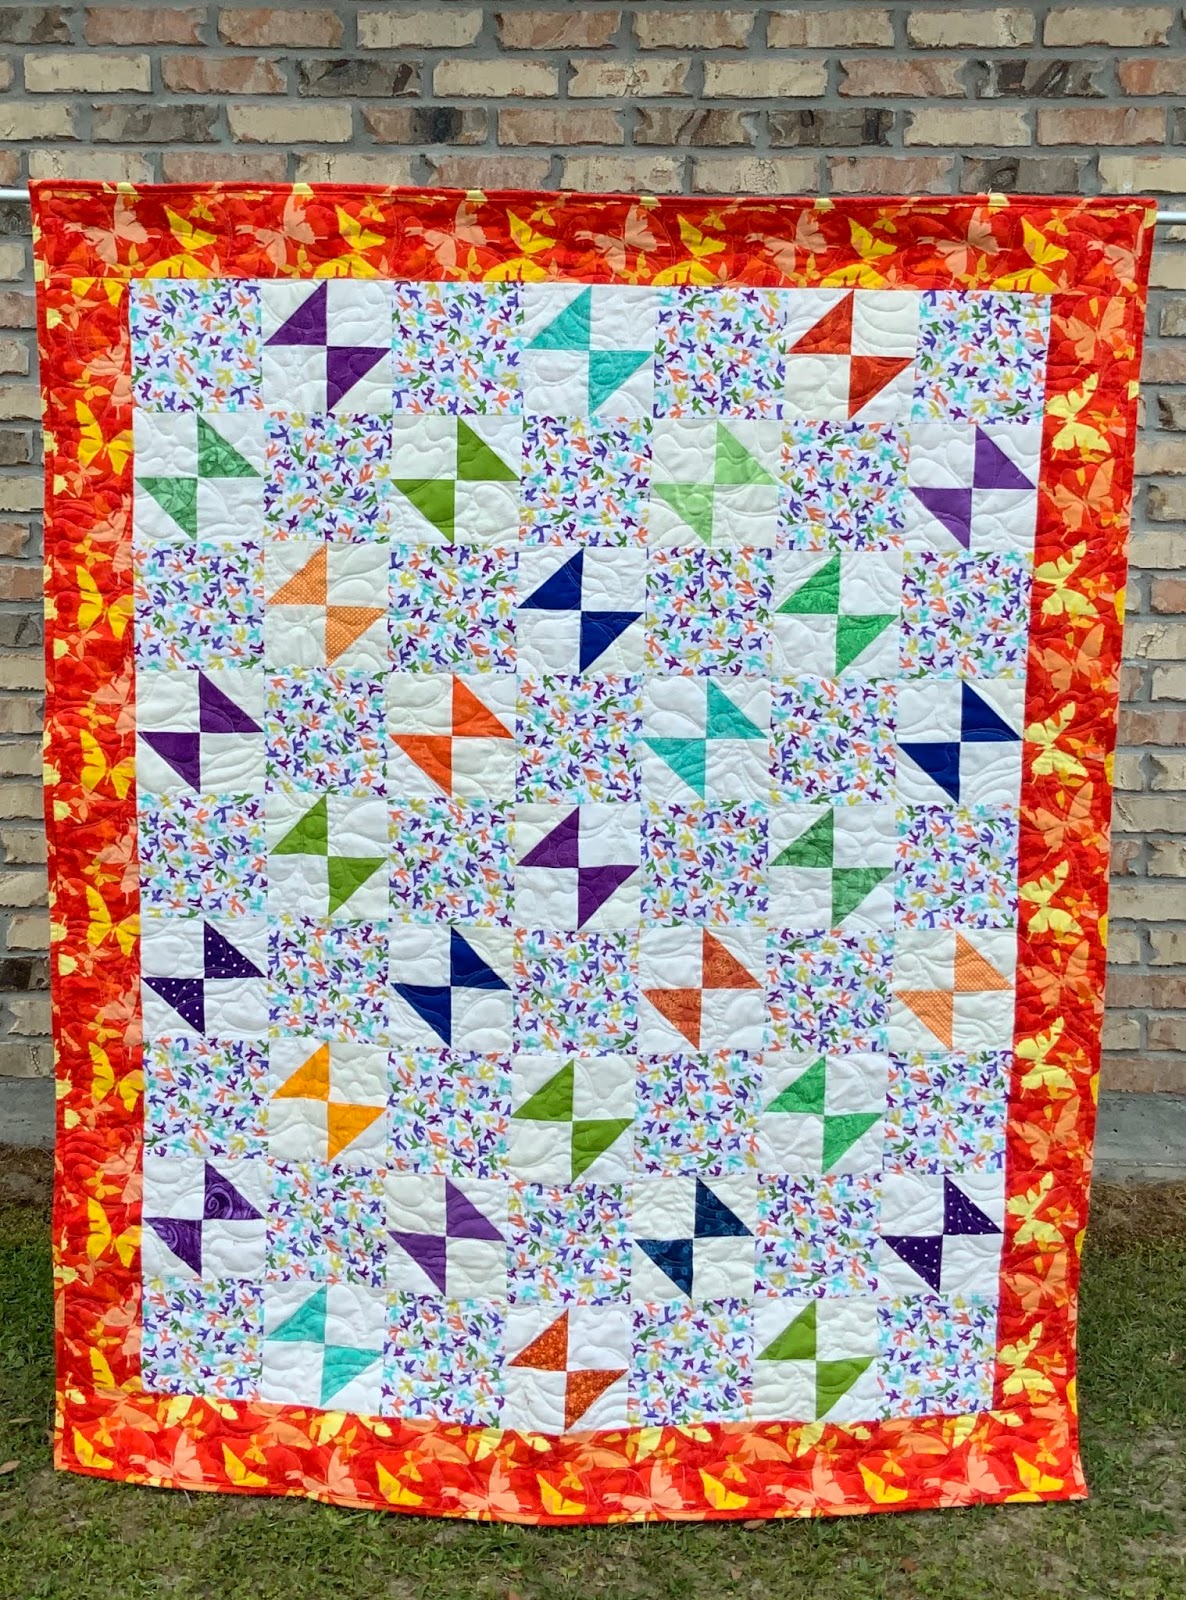

Quilt #1, Finished size: 50”
X 62”
Block Size: 6 ½”
Fabric Requirements:
·
Focus Fabric:
1 ¼ Yards for 6 ½” Squares
·
Background Fabric for 4-Patch: 1 Yard (pay special attention to cutting
instructions)
·
(31) 4” squares from scraps coordinating with focus
fabric
·
Border Fabric:
1 Yard
·
Binding: ½
Yard
·
Backing:
3 ½ Yards (horizontal seams)


Quilt #2, Finished size: 50”
X 62”
Block Size: 6 ½”
Fabric Requirements:
·
(32) 6 ½” Mile-A-Minute (“MAM”) Blocks (also
known as Crumb Blocks)
·
Background Fabric for 4-Patch: 1 Yard (pay special attention to cutting
instructions)
·
(31) 4” MAM Blocks
·
Border Fabric:
1 Yard
·
Binding: ½
Yard
·
Backing:
3 ½ Yards (horizontal seams)
CUTTING
DIRECTIONS:
Quilt #1:
Focus Fabric
·
Cut (6) 6 ½” X width of fabric (WOF) strips,
then (32) 6 ½” squares
Background
·
Cut (4) 4” X WOF strips, then (31) 4” squares (See Note *)
·
Cut (5) 3 ½” X WOF strips, then (62) 3 ½”
squares (* Note: You should be able to cut (55) 3 ½” squares
from these strips, use the left over 4” strips to cut the remaining 7.)
Scraps
·
Cut (31) 4” Squares (for HSTs)
Border Fabric:
·
Cut (6) 4 ½” X WOF strips
Binding Fabric:
·
Cut (6) 2 ½” X WOF strips
Quilt #2:
Background
·
Cut (4) 4” X WOF strips, then (31) 4” squares (See Note *)
·
Cut (5) 3 ½” X WOF strips, then (62) 3 ½”
squares (* Note: You should be able to cut (55) 3 ½” squares
from these strips, use the left over 4” strips to cut the remaining 7.)
Scraps (Various scraps for MAM blocks)
Border Fabric:
·
Cut (6) 4 ½” X WOF strips
Binding Fabric:
·
Cut (6) 2 ½” X WOF strips
MILE A MINUTE
(MAM) BLOCKS:
Quilters who “make” their own fabric for MAM Blocks, use
various methods. My method is to start
with a single scrap, adding various strips clock-wise (like a log cabin
block). Trim the blocks when they are
large enough to make 6 ½” and 4”. For
Quilt #2, make (32) 6 ½” MAM Blocks and (31) 4” MAM Blocks.
ASSEMBLE FOUR-PATCH:
Half-Square Triangles (HSTs): Draw a line diagonally across the back of the
4” background square. Place on top of 4”
or MAM square, right sides together. Sew scant ¼” away from the drawn line on each
side. Cut apart between sewing lines and
press open to the dark color. Trim to 3 ½”
square. Repeat to make (62) HSTs.

Sew together (2) 3 ½” HSTs and (2) 3 ½” background square
to form the 4-Patch as pictured below.
Press toward the background square. Repeat to make (31) Four-Patches.

ASSEMBLE THE QUILT
Be careful with the rotation of the blocks and use the
layout below. The whimsical look comes
from alternating the direction of the 4-patches on each row. It doesn't matter which direction you start with, just make sure the next row is rotated. Before sewing, take a picture and verify the
correct rotation. Sew the rows together across, then down.

ASSEMBLE AND
ATTACH BORDERS:
Ø
Join (6) 4 ½” WOF border strips into one
continuous strip using diagonal seams.
Ø
After the center top is together, measure from top to bottom, down the middle. Cut (2) strips from the continuous strip equal
to this measurement. Attach to the sides
of the quilt top.
Ø Measure
from left to right in the middle, then cut strips to this measurement and add
to top and the bottom. (Hint:
When attaching the borders, pin from the center and work out to the
ends.)
Thank you for letting me share the “I Love
You More” pattern. Please visit my blog post today for additional quilts made
with this pattern, including different sizes. If you make your own version of "I Love You More", please email us a picture and/or link or tag #Iloveyoumorequilt on Facebook and/or Instagram.
*&*&*&*&*&*&*
Wow! Another great pattern to add to the repertoire! I love the idea of the MAM blocks - and I have lots of little scraps that would be perfect for those. Are you itching to get to your sewing machine now? I know I am!
If you do make one of these quilts, be sure to send a pic to Jamie and use her hashtags (shown above). You can also use the Hands2Help hashtags - #hands2help2019, #h2h2019, and the appropriate charity (@jacksbasket, #mercyfulquilts, #carolinahurricanequiltproject, #quiltyhugs, and #victoriaquiltscanada).
We'll have another great guest blogger next week - be sure to stop by and check it out!
Hugs!
Sarah
Thanks to Jamie for those tutorials! I also enjoyed looking back at her 2014 and 2018 posts. The patterns look fun and easy to follow.
ReplyDeleteThank you Jamie for a great tutorial. Pinning for now but I sure want to find time to make one up.
ReplyDeleteThanks, now I know how to use my crumb blocks!!
ReplyDeleteGreat pattern and tutorial! My scraps are multiplying again :)!
ReplyDeleteGreat tutorial, thanks for sharing! I have soo many scraps to use up! xx
ReplyDeleteWhat a great pattern. Thanks for sharing.
ReplyDeleteGreat tutorial and pattern, Jamie. Thanks for sharing!
ReplyDeleteThank you , Jamie, for sharing another wonderful scrap pattern with us for H2H.
ReplyDeleteWonderful tutorials, Jamie. Your quilts are great as usual.
ReplyDeleteCookie in Mandeville LA
Ingenious! What a great use of scraps yet orderly layout!
ReplyDeleteI will be trying one soon!
Great tutorial to use up all the scraps that keep on accumulating! Thanks for sharing.
ReplyDeleteSuper tutorial, Jamie! Thank you for sharing your talent :)
ReplyDeleteGreat looking quilts! Thanks for the tutorial on it.
ReplyDeleteSuper cute quilt, Jamie. Love, love, LOVE the scrappy version!!!
ReplyDeleteWhat fun patterns!!!! Thank you for sharing.
ReplyDelete