Hi, all!
Wow, what a week it has been. Starting Sunday we had ice, freezing rain, sleet, and more ice. Then snow. Then more snow - lots more snow! And no sunshine. Even with all the extra sewing time, it was enough to make one feel blue. And then Friday, the clouds cleared, the sun came out, and everything started to melt. Driving around, it was a pleasure to see the ice-covered trees sparkling like diamonds in the sun. It was a truly joyful sight!
There are so many things that bring us joy, and sometimes the answer to a blue mood is to find one of those things. It's a good habit to develop, finding joy even in the midst of an unjoyful time.
The next quilt I'll be sharing brings me joy in many ways. First, and most obvious, the colors are joyful, at least to me. It reminds me of sunrise and bright shiny days. It brings me joy that it used up a lot of scraps. And it brings me joy that it is made as a variation on a tutorial I wrote back in 2017 that has become one of the most requested tutorials on my blog, with almost 80,000 views since I wrote it! So let's get started....
*&*&*&*&*&*
I was definitely finding joy in the snow for this photo of the quilt - it shows up so pretty against the white! We'll call this quilt "Joy", and it all started when I found this great tutorial by my friend Kat of Kat&Cat Quilts. In it, she discusses how to cut down your skinny strings into uniform 1.5" widths and sewing them together to create new fabric - and I was hooked.
I had already sorted all my strings into color bins, so it was easy to pull what I wanted - in this case, warm colors - red, yellow, orange, pink and purple. Anything that was wide enough went in the pile, and I trimmed away.
Then came sewing. Lots of sewing. Lots and lots of sewing!
But in the end it was worth it, and I had a VERY long piece of scrappy fabric, only 1.5" wide. But that's not very useful, is it?
So after pressing the seams all in one direction, I put the two ends together and sewed the long edge! When I got to the end, wonder of wonders, it wasn't twisted - that NEVER happens - but if yours is, just cut it before you get to the end and the twist magically goes away! (It took me a long time to figure that one out - I used to get it all straightened out before sewing it - what a timesaver!)
Next step? Take that long 2.5" wide strip to the ironing board (please excuse the state of mine!) and press the seam open all the way down. Trust me, you will be so much happier if you do this as you go rather than all at the end.
Repeat the process twice more until you have a long panel 8 strips wide, which should make it 8.5" wide(ish). Measure yours to be sure what size it is, then cut it into squares in that measurement. So if your strip is 8.5" wide, you will cut it into 8.5" squares. If it's 8.75" wide, you'll cut 8.75" squares. It's all good!
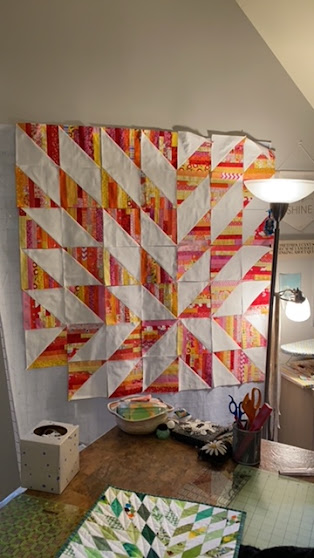
Now you can play with your blocks. Originally, I thought I wanted to use them in a railroad or basketweave pattern, and while this is pretty, I found it to be rather frantic and not calm-inducing at all. So I experimented a little more, and looked at some pictures in Kat's blogpost. I saw that she had turned hers into half-square triangles, and that's when it occurred to me that it might make a pretty Supernova quilt! (You can find the tutorial here.) (My strip of "made fabric" yielded 41 8.5" squares, which meant I could make 82 half square triangles - enough for a 9x9 layout with one left over. My HSTs ended up being trimmed down to a little less than 7.5", and my quilt is about 63" square. If you didn't make enough squares, you can either make more made fabric, or make your quilt smaller.)
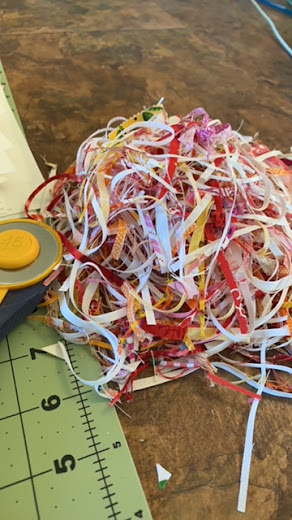
So after making the obligatory pile of pretty trimmings (yes, you should ALWAYS square up your half-square triangle blocks), I started laying it out on the design wall...

Oh, yeah, I like where this is going! You can see my mini version of the Supernova quilt in the foreground - I was using it as my pattern for the layout.
I have to admit, I did leave it up on the design wall once it was pieced for a while because it was so bright and cheerful!
And then it was finished, and time for a photo shoot!
My photography assistant thought he'd be cute as I explained to him the proper way to hold a quilt for pictures...
I apparently still haven't taught him the finer points of holding the corners!
Look at how it shines in the beautiful sunshine!
And here's the only shot I managed to get of the back - a really cute moon print from Far Far Away II by Heather Ross. It was PERFECT for the back of this quilt! And of course, my photographer's assistant (aka Best Husband Ever) trying to hide...
*&*&*&*&*&*
So remember this week to find joy - it may be hiding in your string stash!!!
Hugs!
Sarah


Thanks for this! It looks great.
ReplyDeleteThis quilt is beautiful, thank you so much for the tutorial. But I won't be making this quilt for charity, it will be staying right here at home with me. Happy stitching!
ReplyDeleteSuper and bright! Thanks for the tutorial.
ReplyDeleteSuper Nova is really shining this morning. Great job as always, Sarah. Thanks for the tutorial. I wouldn't have thought of sewing all the strings together like a jelly race to make this quilt. Lots of prep at first but so much faster in the end. Have a great day! ;^)
ReplyDeleteSuch a bright and cheerful quilt! Thanks for the tutorial and links!
ReplyDeleteWonderful quilt. Making the blocks into HST's is what sold me. I will add it to my bucket list.
ReplyDeleteI saw this on IG and thought "Supernova!" Glad to see I was right. What a great use of strings, and so many things one could do with those HSTs. Maybe your quilt holder can check out Mr. Wombat Quilts style, although the pinky move might be copyrighted. Ha, ha! Another great quilt to inspire the maker and the recipient.
ReplyDeleteIt's beautiful! I love your posts about strings and scraps.
ReplyDeleteI don't know where you are, but here in N. Louisiana, it's been rough for many. Thankfully, we never lost power which is a miracle! Water got low, but we never got without.
That brutal cold messed up a lot of houses that had pipes to burst.
We had a beautiful snow in January which was enough. LOL This time we had sleet, snow, and then freezing rain for about 10 hours. That was the worst. They're just now able to free some of the big trucks stuck on the I-20 through Shreveport. It was just too cold for me to sew. We had to try and conserve power so ours would stay on.
Now on to Hurricane season in 100 days! LOL
Sarah - if you enjoyed Kat's tutorial for 1.5" strips, do check out the page on my blog for my Dumpster Diving series of quilts. The first one was inspired by Tonya Ricuccis' tutorial which is linked from my page. SO many ways to play with these strips!! https://quiltdivajulie.blogspot.com/p/my-dumpster-diving-quilts.html
ReplyDeleteOh, fun, Sarah! Now I can make a jumbo sized Supernova quilt to counterbalance the micro mini one that I made back in 2019. Fun!!
ReplyDeleteThat is very fun. I might have to give that a try.
ReplyDeleteOoo, I love that, the making of fabric from skinny little pieces!! And the finished project is a stunner! I might need to try this some day but found a string project that I started some time ago and need to get that one done first!
ReplyDeleteSuperb--I love the way you off-set your supernova!!!!
ReplyDeleteJoy is perfect for this quilt and your hubby hiding, well, a lot of us can relate to that! My husband is afraid his man card will be revoked. Haha! I’m glad you had a pretty, snowy backdrop and can look forward to warm weather.
ReplyDeleteYou always share so much joy in your posts and this one is no exception. I love the Joy quilt, and I'm thinking about a UFO sitting in my quilt room and how I might be able to use this for that. Hmm. Thanks for sharing!
ReplyDeleteYou make me want to run to my scrap bin and start sewing but I have to go to work!!!!!
ReplyDeleteGreat!!! Love it, Sarah!!! The joy quilt is beautiful! Thanks for sharing!
ReplyDeleteThis quilt is a big ol' BURST of joy! I had forgotten about that tutorial from Kat; nice to be reminded :)
ReplyDeleteI like this idea of sewing these thing strips together! Thank you!
ReplyDeleteKathleen -- kakingsbury at verizon dot net
Beautiful quilt! Very joyful way to break down the winter blues.
ReplyDeletePretty pretty! I love what you did with the strings!
ReplyDeleteThank you for these String Therapy and Supernova articles. All these beautiful fabric strings I have collected over the years-now I know what I can do with them. Your blog has lifted a weight off of my shoulders. Onward and Forward!
ReplyDelete