

Hi, all!
Welcome back to the 12 Days of Christmas in July Blog Hop and Quilt-Along! I hope you enjoyed the first two stops on the hop yesterday - I know I now have more things on my "things I want to make before Christmas" list! Today we have two more awesome quilters sharing their Christmas "gifts" for us, and I know you'll just love them. Amy from Sea of Estrogen and Meloney from Mel's Quilting Blog are newer blog acquaintances, but no less treasured - they are repeat contributors to this hop and I'm excited to see what they have to share!
Here's this year's hop schedule once again for your convenience:


Sunday, July 14th
Monday, July 15th
Tuesday, July 16th
Wednesday, July 17th
Thursday, July 18th
Friday, July 19th
Saturday, July 20th
Sunday, July 21st
Monday, July 22nd
Tuesday, July 23rd
Wednesday, July 24th
Thursday, July 25th
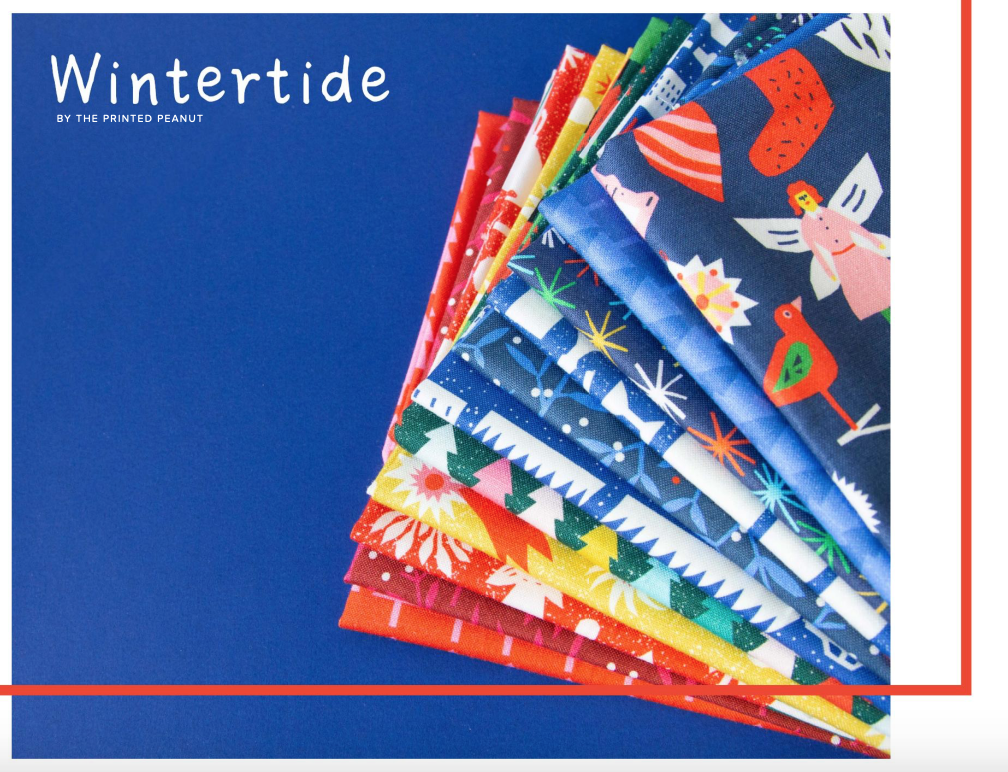
And remember, too, there's a giveaway! FIGO Fabrics has donated a fat quarter bundle of their new Christmas line, Wintertide...
...and one lucky reader will get to take it home! All you have to do is fill in the form below with your full name and email address (don't worry, I won't use it for anything beyond notifying you if you win!). Entries will close on Tuesday, July 30th, and I'll announce the winner here on Wednesday, July 31st - New Year's Eve in July!
Be sure to click "Submit"!!
You get an entry for visiting the stops on the hop, too, so drop by each new day's blog posts, enjoy the post and leave a comment (comments make us happy!), then fill out the entry form on their blog too. If their blog hop post doesn't have an entry form feel free to come back here and leave an entry after checking out their "gift" for you!
So get hopping, folks - then come back here to see today's step for the quilt-along...

*∆*∆*∆*∆*∆*∆*
Welcome back to the quilt-along! Hopefully you have all your pieces cut out and ready to go, and a pressing area arranged near at hand to your sewing machine. (If not, there's still time to catch up!)
This is really a very simple quilt to make, once you learn how to make the basic block. The only complicated part is keeping your colors in the right places! For just that purpose, I created a very high tech tool...

That, my friends, is a business card with a cutout square the same size as a single block on the printout of the quilt design.

And see how nicely it isolates the block you want to work on? At least for me, this made it much easier to be sure I had laid my block out correctly. After all, none of us like to rip things out, am I right?
Now, you can start with whichever block you choose to. Over the next nine days, we'll be making all the blocks for this quilt, one per day. Personally, I usually start with the center block (because it's the least complicated of all nine), then build the quilt around it on my design wall. You may prefer to start in one corner and do a nice orderly row-by-row. It's all good! The technique for making the blocks is the same, however you do it. I've set that technique out in detail in this post, and I won't go into that much detail here, but I will kind of walk you through how I made the center block for my own version of the quilt.
First step is to lay out the center of the block. Referring to my diagram, I started in the very center with the red and white 4.5" triangles, then added the outer ring's green and red triangles (those are the 3.5" triangles), and filled in the rest of the octagon with the 4.5" green triangles.

Then I pulled out one triangle unit (four smaller triangles) to assemble.

Starting with the lower right side of the triangle unit, I sewed the right green triangle to the center red triangle. As you can see, the green triangle is larger than the red triangle, so you should loosely center the red triangle on the green one before sewing. Don't worry - this isn't a make-or-break centering, as you will be trimming the triangle unit down to size after it is assembled.

Sew that seam (please refer to the earlier post for info about correct seam allowances and how important they are!) and then press the seam open. I know for many of you that isn't the way you do it, but trust me, it will make your life a lot easier with this particular quilt!

Next, you will lay the two pieces you just assembled on top of the left green triangle, loosely centering the red triangle along the length of the side. Sew that seam, and press it open.

And voila! You have the bottom of your triangle unit complete. Now I will confess that it was a totally unplanned event for the bottom of my green triangles to be so nice and straight - usually one is shorter than the other, and yours may be too. It does. not. matter for this triangle unit, because you will be trimming the bottom off anyway!

Now it's time to sew the top of the triangle unit on. Despite the picture you see above, this is much easier if you lay the bottom three triangles on top of the top triangle - this means the open seams are on the top where you can see them, and you can be sure they remain open when you stitch across them! But it is easy to see the dog-ears in this picture, which can be trimmed off now (this makes less bulk in your finished quilt top).

A straight edge and a rotary cutter swipe, and poof! they're gone.
Now it's time to trim that triangle unit to the perfect size! After you've pressed all the seams open and nice and flat (the earlier post also has information about pressing vs. ironing and how important the difference is), lay it out on your cutting mat.

Lay your triangle template on top of the unit, and line up the side seam allowance lines with the top corners of the center triangle. Look to be sure that the horizontal lines on the template are parallel to your seam. Now, if your seam allowances are correct, the lower point of the center triangle should be sitting on the seam allowance line at the bottom of the template! (If it's not, refer to that earlier post and work out the correct seam allowances!) Trim CAREFULLY on all three sides of the block - this is one instance where the old adage "Measure twice, cut once!" is definitely true! Check the position on your template frequently, as it is very easy to shift it while cutting on the angle.
Now that you know your seam allowances are correct, you can sew the remaining seven triangle units together, then trim them all at the end.
NOTE: For you chain-piecers out there - I really don't recommend chain piecing for this quilt, as the triangle units are so varied in color layout. It would be easy to get mixed up and put the blocks together wrong, and then the design would not work. But if you can figure out a way to do it, good for you!
Lay your finished triangle units out in the correct order once again, then start assembling them. You will match the points of the center triangles on the sides - a pin through the very point of the two will line them up, and you then aim for the spot the point enters as you sew. That should be just about exactly a 1/4" seam because of the way you trimmed the triangle units.

I usually sew two quarter-units together, then sew those together to make a half-octagon. When sewing the quarter-units together, you'll have two seams to match - the seams at the points of the center triangles, and the seams at the top of the unit (which will become the center of the block.
It's so much fun to see those points match up nicely! But don't sweat if your points aren't spot-on perfect - step back from it and see if it's as noticeable as you think it is before you go ripping it out. Quilting covers a lot of errors!

Once the two halves are finished, sew them together, matching the center of the block and the two spots where the unit center-triangles come together. Then all you have to do is add the corner units (see the earlier post for instructions, as I don't have pictures of that step with this fabric!) and trim the excess fabric from those corner units to bring your block to square.
This first block may take a little longer as you learn the process, but I think you'll find that you can eventually make one of these in about an hour. For each of the next nine days, we'll be making one of the blocks in the quilt, so if you have lots of time to sew one day, but know you'll be strapped for time on another, feel free to make as many as you like! I also hope to share some ways to make your quilt "grow" to a larger size along the way, since this year's design is smaller than usual.
And I'd love to see your creations as they grow - if you're on Instagram, tag me (@fabricaddictquilts) and use #12DCIJquiltalong to share your work!
See you tomorrow with more great Christmas "gifts" and more quilt-along!
Hugs!
Sarah
This is a beautiful quilt! The link to Sea of Estrogen doesn't work. Happy Stitching!
ReplyDeleteThis comment has been removed by the author.
ReplyDeleteThe quilt is looking wonderful. Enjoying the Hop so much. (My other comment had a lot of misspellings so I removed it, sorry about that).
ReplyDeleteGotcha! On schedule!
ReplyDeleteHi Sarah, Great job on your tutorial! Love the quilt.
ReplyDeleteHi Sarah! I love the tutorials you share. You give such great detailed instructions with fabulous photos. That is very much appreciated. ~smile~ Roseanne
ReplyDeleteWelcome to illuminati brotherhood where you can become rich famous and popular and your life story we be change totally. my name is Carlos I am here to share my testimony on how I join the great brotherhood Illuminati and my life story was change immediately.I was very poor no jobless and I has no money to even feed and take care of my family I was confuse in life I don’t know what to do I try all my possible best to get money but no one work out for me each day I share tears, I was just looking out my family no money to take care of them until one day I decided to join the great Illuminati , I come across them in the internet I never believe I said let me try I email them.all what they said we happen in my life just started it was like a dream to me they really change my story totally . They give me the sum of $20,000,000 million and many thing. through the Illuminati I was able to become rich, and have many industry on my own and become famous and popular in my country, today me and my family is living happily and I am the most happiest man here is the opportunity for you to join the Illuminati and become rich and famous in life and be like other people and your life we be change totally. If you are interested in joining the great brotherhood Illuminati contact this number call whats spa +14703335103 or morganilluminatirich@gmail.com
ReplyDelete